How we worked in the past and why ACES is “Scene Referred”. Why the grading in the past had to be the first step and now it should be the last if possible.
Note:
This article needs some rework. Over the last years I learned that the comparison scene- vs display-referred is oversimplified and actually more complicated. I am in the process to write some new articles about this topic. I will link them here once they are finished.
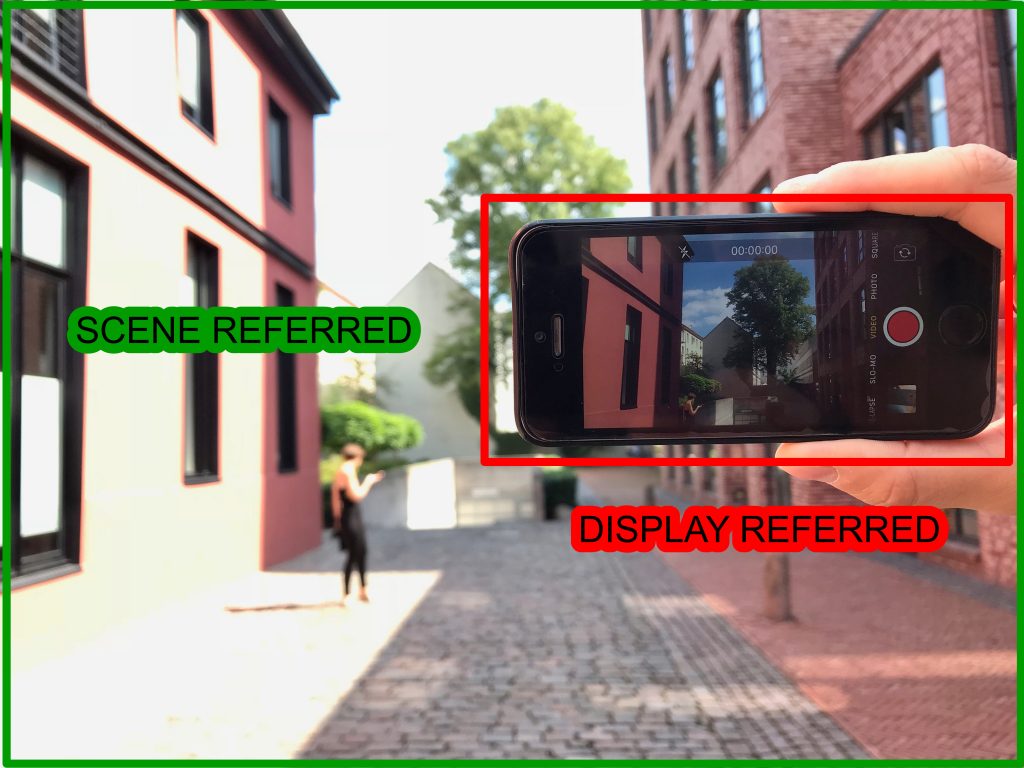
Most old workflows in the times of analog film, Telecine and analog/digital tape formats were “Display Referred“.
This means the material was seen and graded for the display that you use.
Around the year 2000 there were only a few display standards like PAL (601), NTSC (501), later HD (REC.709) and computer displays (sRGB). Display Referred also means that you see an “interpretation” of the scene that was shot in a studio or on location. And whatever the recording format was, in the Telecine step the material got initially squeezed into the dynamic range and color gamut of the resulting display – it gets “limited” in the first working steps.
(Resolution comparison example: Think of a 8K camera, and the first step is a downscale to HD “1/4th” – you can’t get back to the full 8K resolution later on again.)
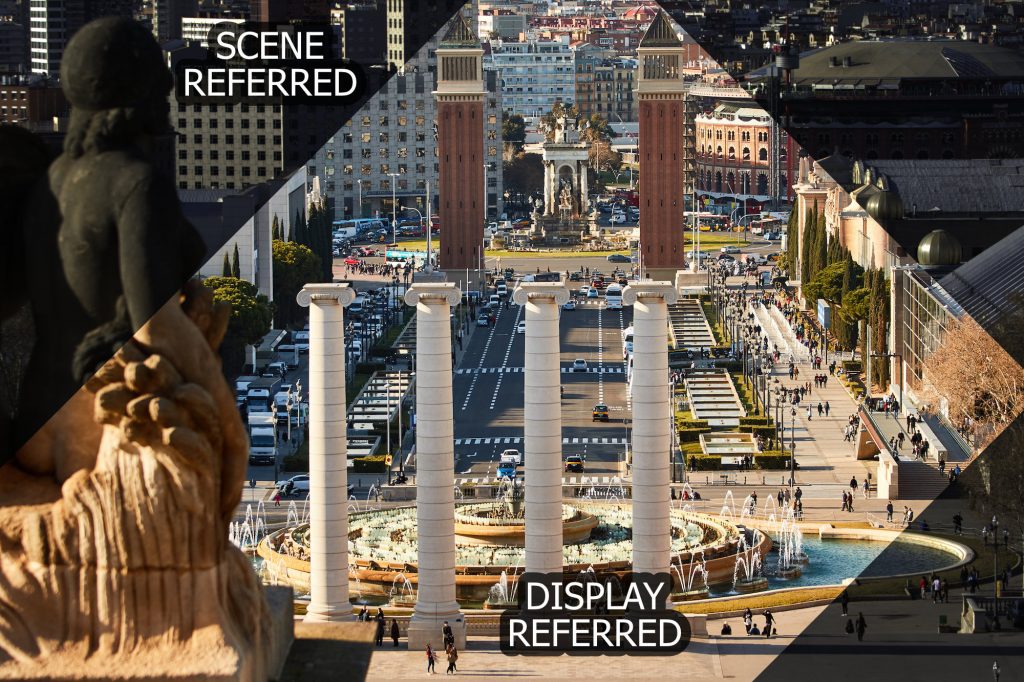
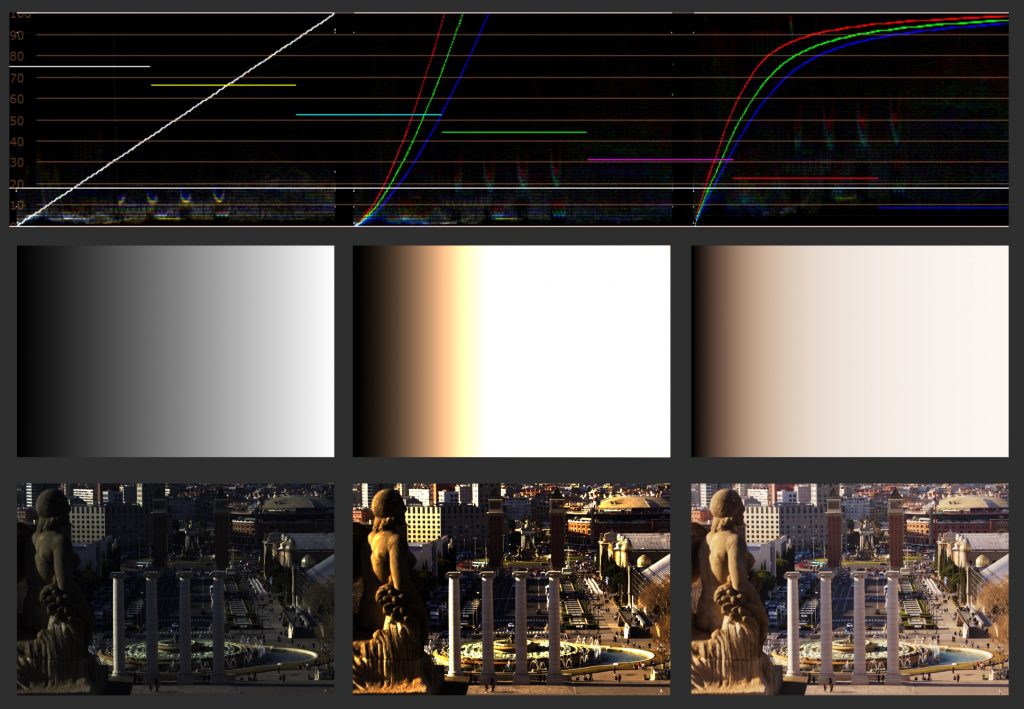
Working Scene Referred has a different approach. To see what the two methods have for an effect on an image, the change of a simple exposure operation is shown next. (Note: an exposure operation in Display Referred is non-linear whereas in Scene Referred it is linear)
Display Referred

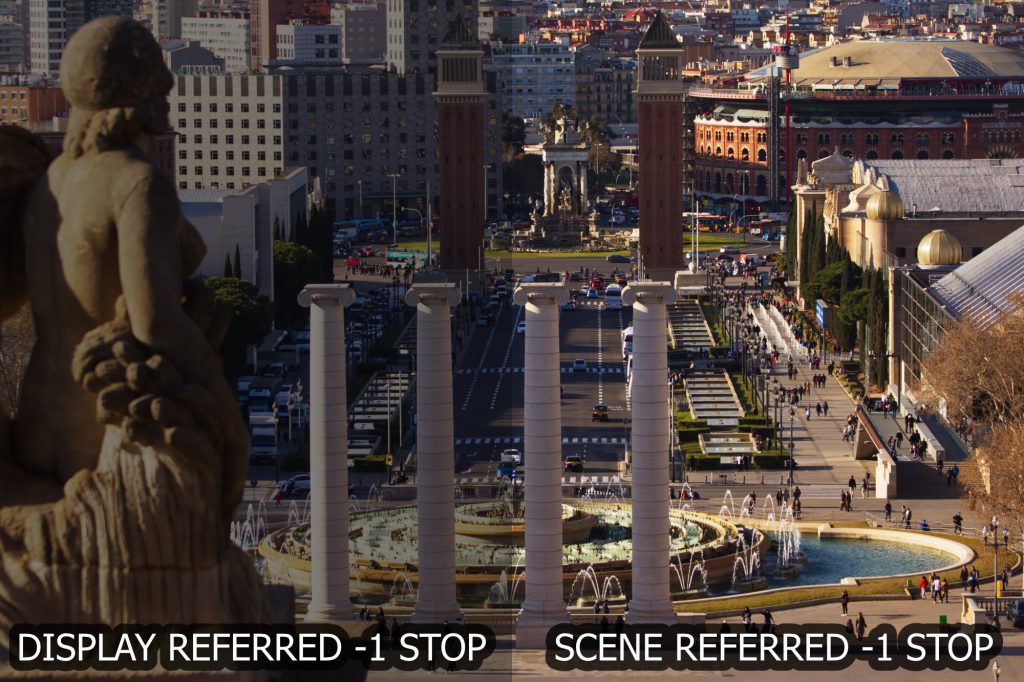
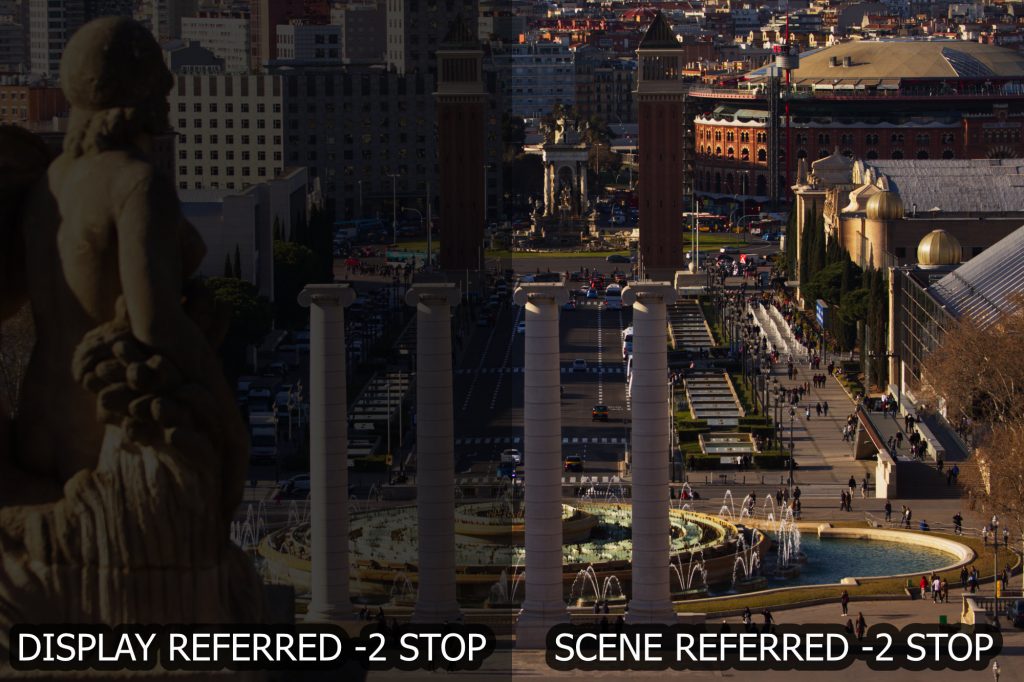
Scene Referred

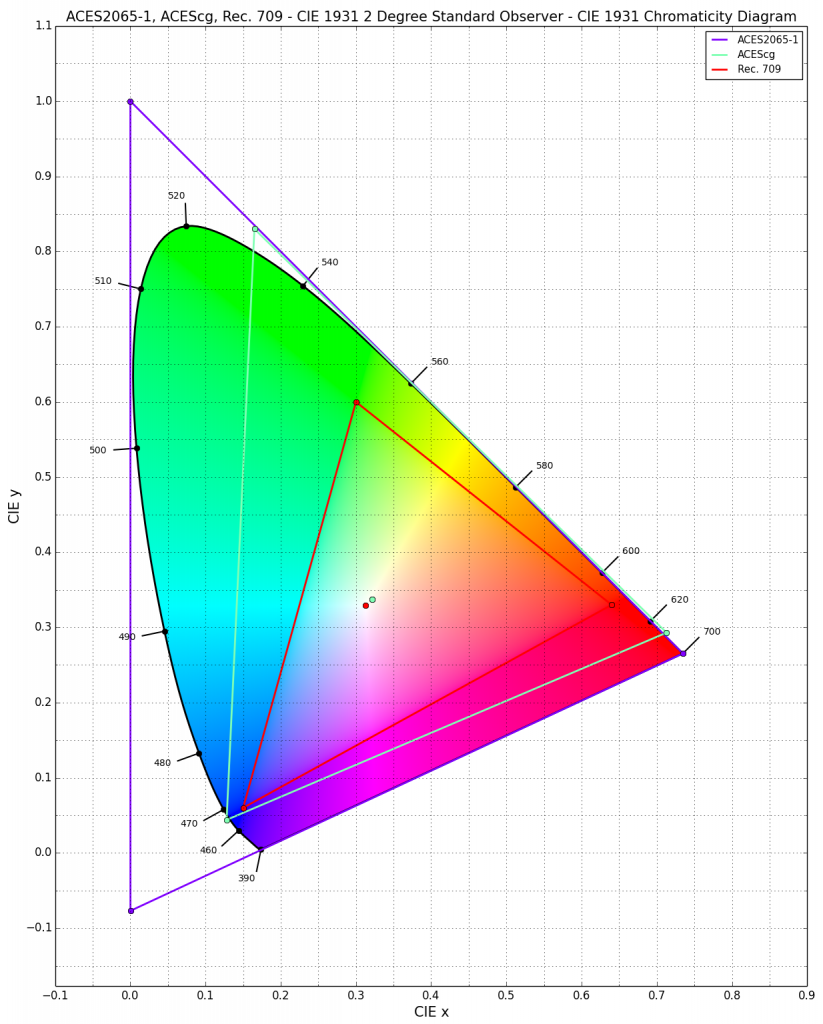
ACES on the other hand has a different approach that is called “scene referred“. All material is uniformly “placed” in a much larger container in the file format Open-EXR.
This is true for the dynamic range and also for the color gamut.
In ACES you work with a “copy” of the scene that was shot, and not an “interpretation” of the scene. The quality of the “copy” depends on the ability of the camera model.
„Scene referred“ means working with linear light values (actually, a camera sensor „counts“ photons).
One candle illuminates a scene with a certain brightness depending on the camera ISO/ASA settings, the aperture and shutter value. 10 or 100 candles illuminate the scene 10 or 100 times more. But because of how the eye and the human brain works, we don’t see the scene 10 or 100 times brighter.
Another example with modern LED light bulbs.
The left image is color balanced and exposure levelled image illuminated with only one LED bulb from a desk lamp.
The center and right are half as bright as the left left and look the same. Although they are made with two different bulbs. The right is the same as the left, but half the exposure time, whereas the center has the same exposure as the left, but a nearly half as bright bulb was used instead.
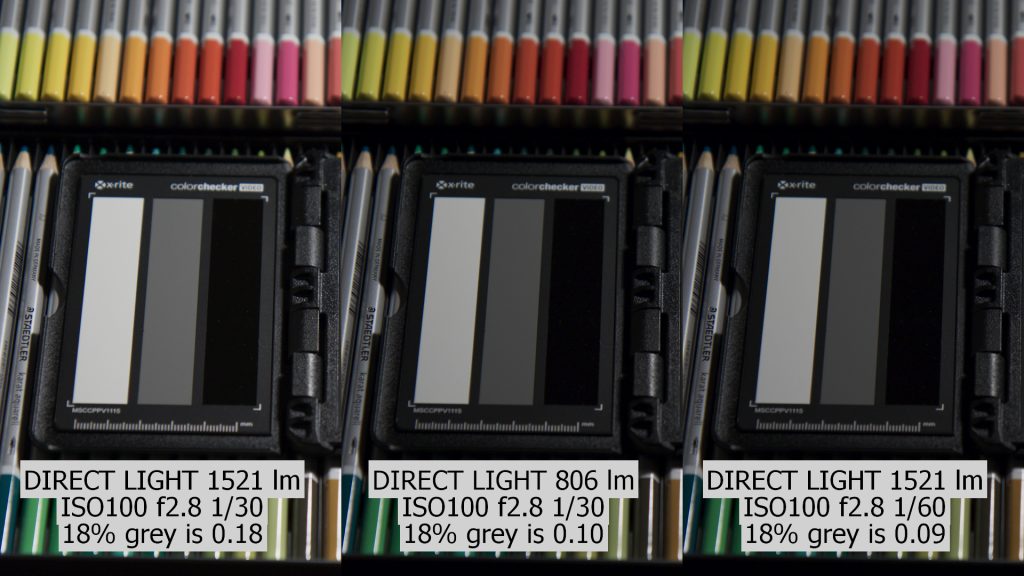


(1521 lm / 806 lm ≈1.89 or factor of ≈0.53). 0.18 becomes 0.10.
ACES is viewed through a general tone-mapping method called RRT. Together with the display depended ODT you see the image on the screen. The ODT limits the material to a display specific dynamic range and color gamut. The underlying material has the full dynamic range (about 30 stops) and color gamut (every human visible color). This is more than any camera can record and any device can display.
The development of ACES has always in mind to make itself independent from any camera format and any display type. ACES can store images from the „perfect camera“ and show these images on the „perfect display“. Both of them don’t exist.
Therefore ACES is ready to create deliveries for different output formats like HD(REC.709), UHD Wide Gamut (REC.2020), Cinema DCI-P3, both in SDR (standard dynamic range) and HDR (high dynamic range). These formats you can find today on Netflix, the iTunes store and Amazon Prime Video for example.
How to use ACES in practice? (technical terms)
3D Animation:
Working in ACES with Maya is rather simple. The working color space is called ACEScg. The Arnold render viewer uses REC.709. Textures are converted to ACEScg before rendering. 3D software is working anyway in linear light. The rendered files are stored in the format Open-EXR in the colorspace ACEScg.
Compositing:
Nuke is set to work in ACES and the working color space is also ACEScg. The Nuke viewer is set to REC.709. Read nodes have to be set to the right color-space settings and a color matrix is applied to convert the images to ACEScg. Nuke is working since its creation in linear light long before a lot of other tools. The rendered files are stored in the format Open-EXR in the ACES storage format ACES 2065-1.
Grading:
Resolve can be also set to work in ACES.The working space is set to ACEScct. The ODT is set to REC.709.The graded files are exported as Open-EXR in the ACES storage format ACES 2065-1.
3D, Compositing and Grading are using the same file formats are all tools use the same View-Transform. This assures that everyone sees the same images and work with the same full quality files.
New possibilities and new workflows
Example: What if you need to deliver for a cinema project instead of TV/Web?
ACES pipeline switch from Rec.709 to cinema DCI-P3 example:
In ACES it is rather easy to switch to a full DCI-P3 cinema pipeline from REC.709. 3D & Compositing need new monitors that support the DCI-P3 color gamut. Grading would use a DCI-P3 projector to view the images. All tools set the ODT to DCI-P3. This is basically all what you need to do to switch from HD REC.709 to DCI-P3 cinema in an ACES color managed pipeline.
It’s that simple, because the underlying image data is untouched. It incompasses all available display types and might only need a little color-trim pass to get even more out of the actual display type.
A photographer/DOP and also a colourist can work best with all the elements in a picture. A finished well composed image should be the base to do a good grade.
In VFX you add green screen elements, add in 3D rendered elements or remove unwanted elements from a picture. This creates a new image. And this should be graded and not the empty plate.
The old saying shoot in camera what you can instead of adding stuff in post production is valid as always. By working scene referred we can add elements virtually on location instead of adding them onto or into an image on a “screen”.


I hope this shows that a finished retouched and comped image with or without 3D rendered elements can differ so much from the original plate that you would judge and interpret the original plate and the compositing – to an extent that the graded result should look different.
Which steps are the same and which differ?
“Display Referred”:
- SCENE
- Filming in a studio or on location
- TELECINE
- Grading (one light, best light, selected takes) for one specific display
- 3D Animation
- 3D has to light to an „interpretation“ of a scene that might change.
- 3D is working with scene referred HDRs environments that don’t match the “display referred” plates
- COMPOSITING & ONLINE
- All retouch, compositing and effects steps are done on the graded footage that might change.
- ON AIR copies (for one TV standard)
- If the grading changes, so do all the steps afterwards in 3D, Compositing and Online.
A color managed ACES “Scene Referred” workflow:
- SCENE
- Filming in a studio or on location
- ACES/IDT
- transform the camera media in one uniform color space and linear light values (scene referred), maybe color balance shots if needed (gain only)
- 3D Animation
- 3D is lighting on scene referred plates with scene referred HDR environments and render scene referred images
- COMPOSITING
- brings together scene referred sources, the shot plates and the generated 3D for example in a scene referred compositing environment
- GRADING
- The grading is now applied on an altered “raw image”, the compositing before happened in the “scene” and not on the image
- ONLINE
- Online can work scene referred too, only before you add for logo endings and titles you need to apply the ODT to be again Display Referred.
- At this point you are working in the same way as in the old days
- ON AIR copies (depending on today’s and other viewing standards in the future)
- The underlying ACES master can be easily adapted to new standards.
Summary
In the past you did the graded first and continued working from there.
Now you can work first on a “copy” of the scene and and grade at the end of the process and a change in grading doesn’t affect the work before.