Another attempt to measure RGB values – this time from “RAW” files
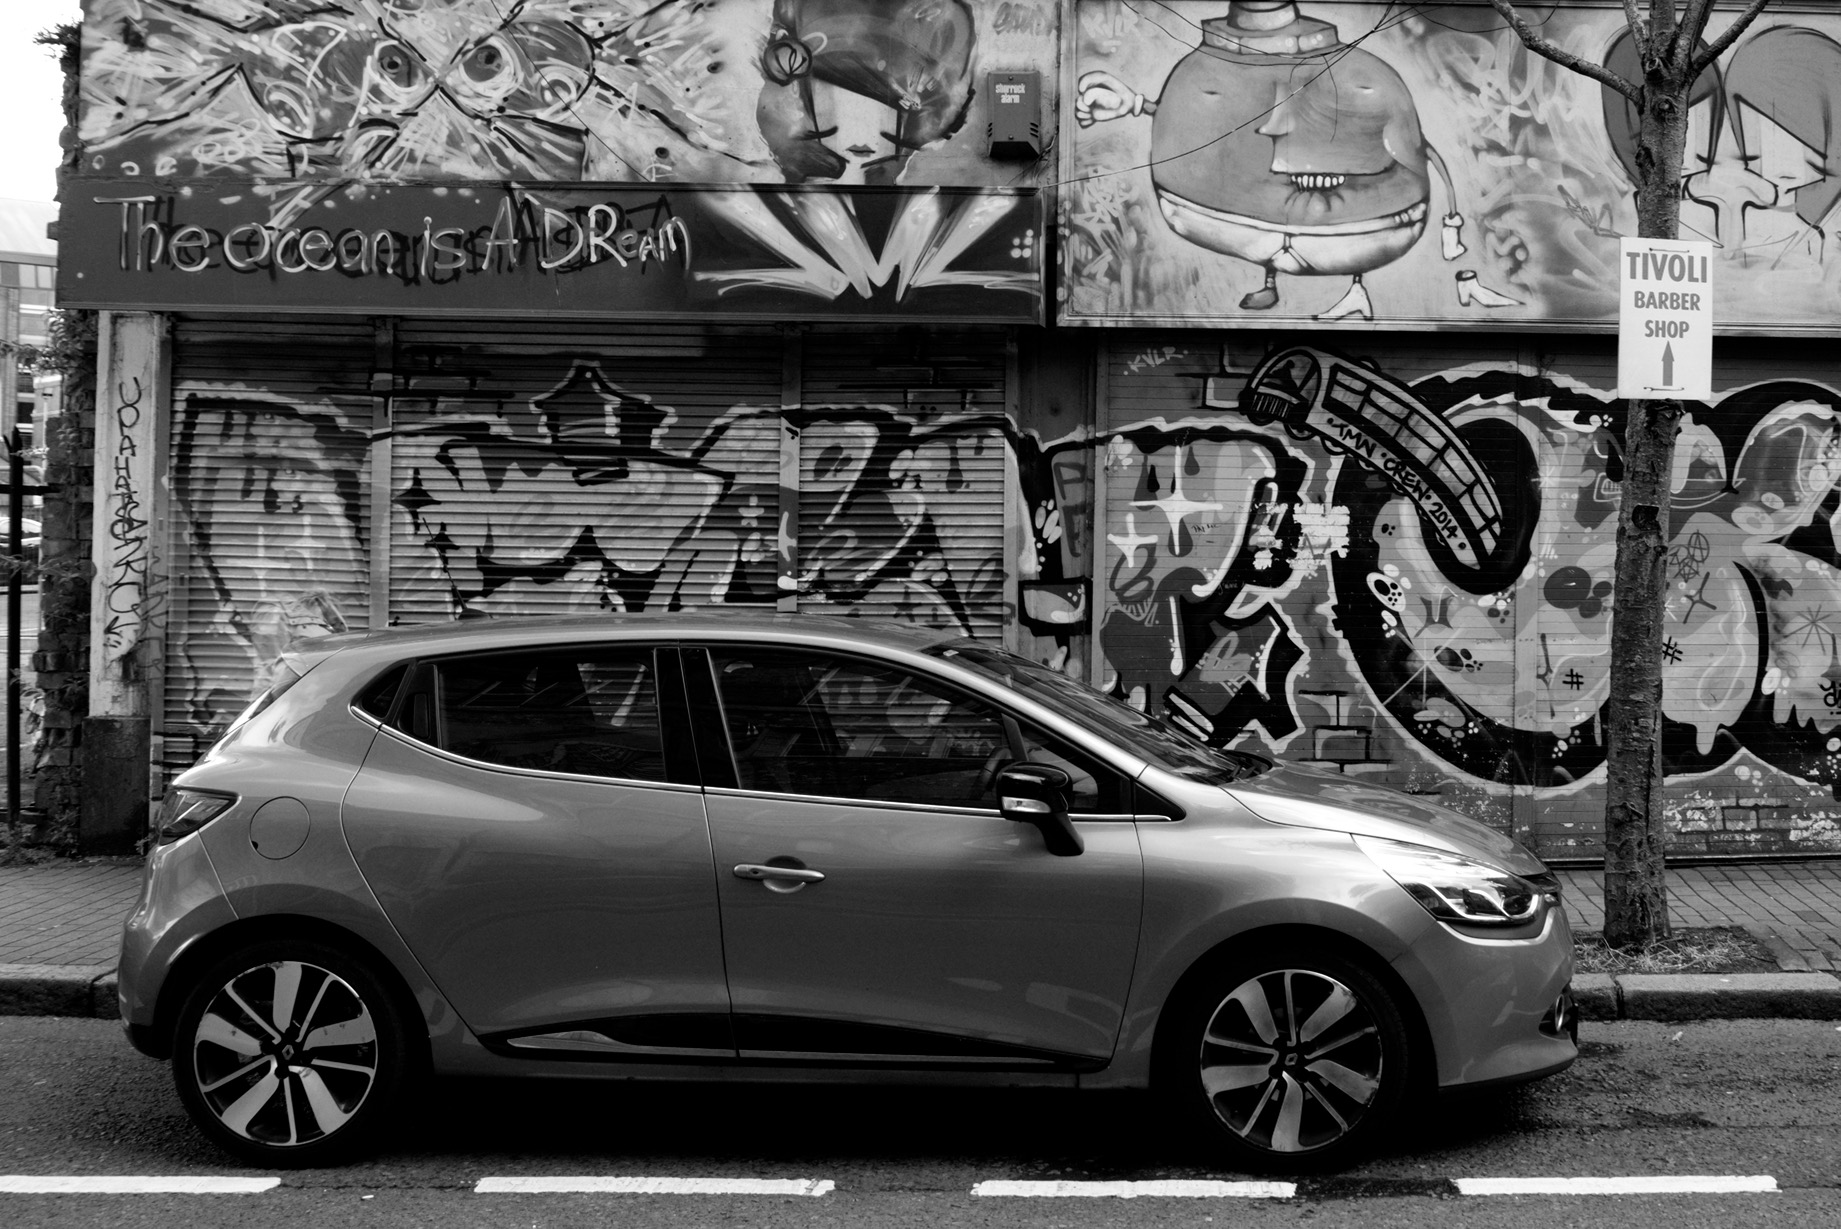
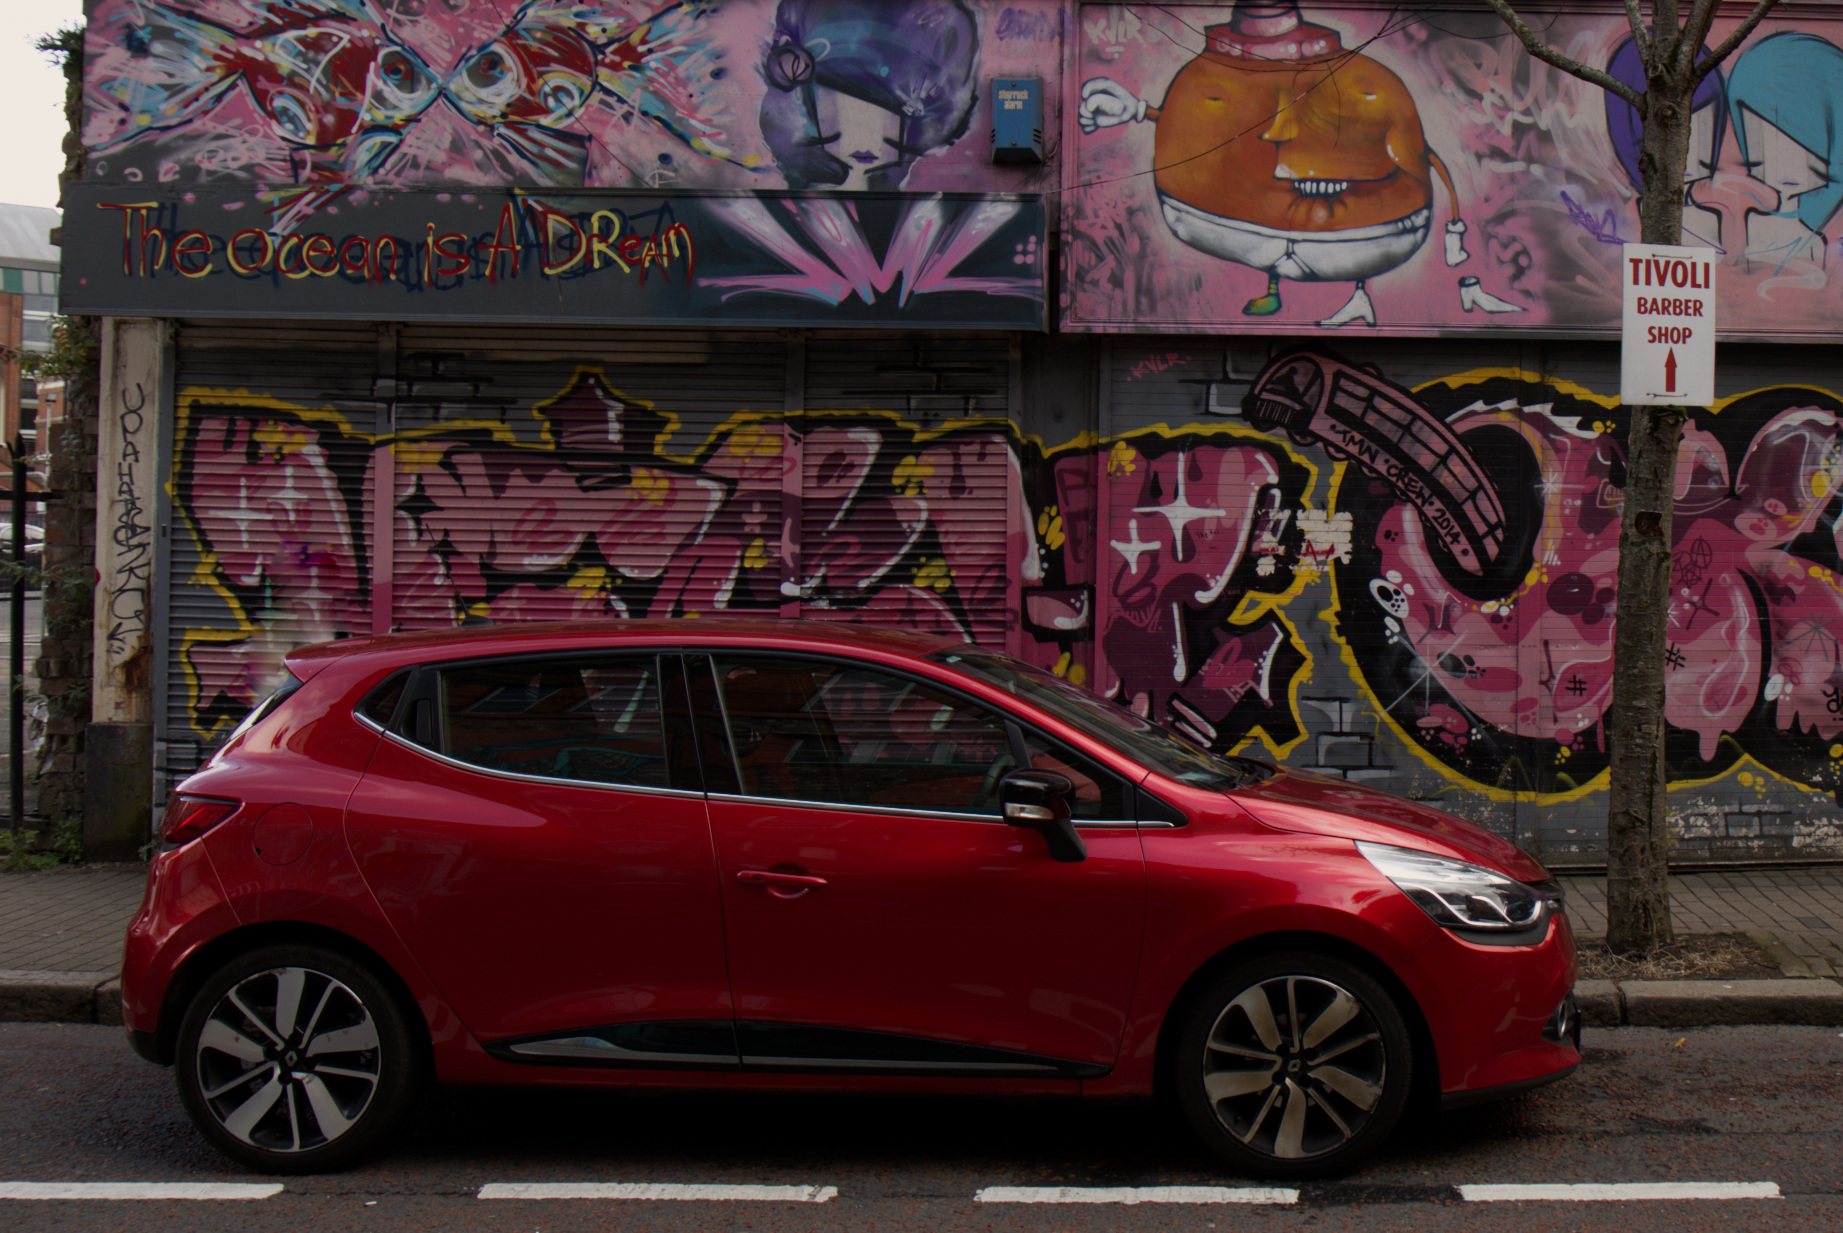
For this next article, I searched through my digital photo archive and found another image of a red car. This photo was taken with my DSLR during the holidays of 2017 in Belfast and by the look of the car it seems I took another photo of a red Renault Clio. What a coincidence! Anyway, I always shoot “RAW” (or digital camera native).CR2 files with the Canon 7DMKII.

The topic of this article is (again): Which colour could have the red car? In the first part of this blog post series, I used an iPhone (.HEIC) photo. These images are fully processed and formed when they are presented as a JPG file on the website. These images are also called “display referred” imagery because they are meant to be viewed (usually) on a sRGB display. Apple devices from around 2015 onwards are equipped with Display P3 screens and Apple’s ColorSync colour management system and image tags are helping to present the right colours on your display.
A digital camera native file like the CR2s from my Canon camera needs a lot of processing steps before it can be viewed as an image on the website. The image above was processed with Capture One 23. In Capture One there are some hints about the internal processing pipeline, but you are always presented with a fully formed image on your display. Capture One uses ICC profiles for each camera model, the CaptureOne engine and in the export dialog you can choose different output characteristics and profiles.
I pushed the contrast and saturation in Capture One and exported two JPG files with different display profiles. The first one uses the wider gamut of my iMac display. The image is exported with the output profile Display-P3. The second image was exported with the output profile sRGB. When your browser and OS support Display P3, the top image will look “more” red than the second image. In comparison, the second sRGB image even looks a bit orange-red.
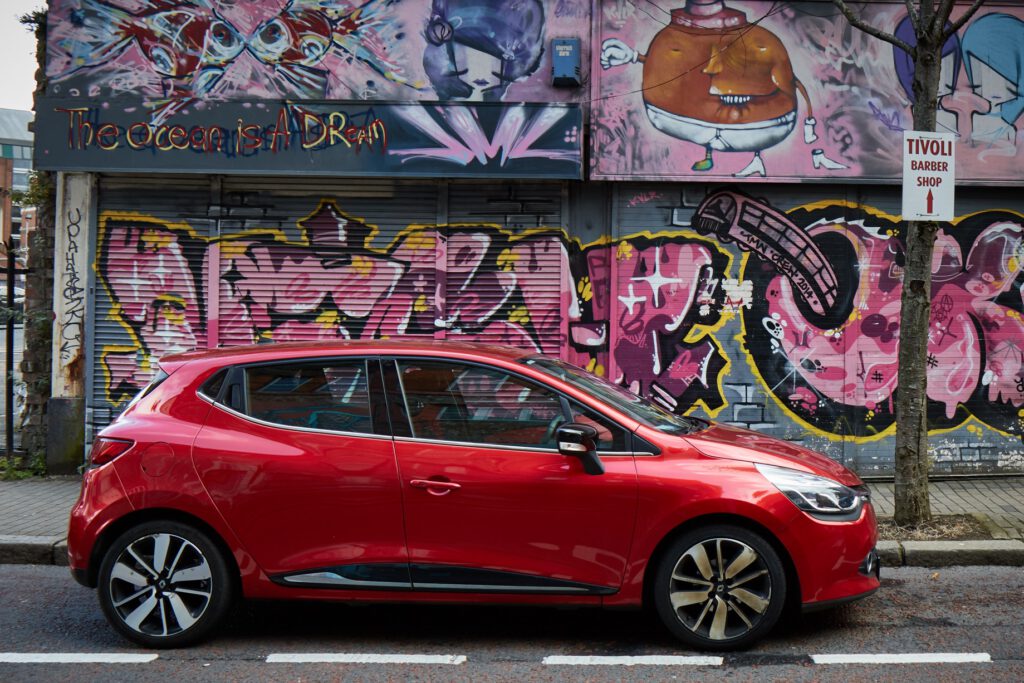

How many times have I heard the discussions while working on car commercials: “My” colour is not right yet! Already the difference between these two red shades could mean a different car paint!
The output profile and image processing path determine how much “red” the car will appear on the screen. Both images are displayed referred to and optimised for two different types of displays. The “grading” recipe is in both images identical up to the point of the output profiles.
So it seems there is not ONE “right” result of a processed “RAW” file.
Camera native (RAW) files are often used in combination with another term that is called “scene-referred”. I wrote an article about the two terms display- and scene-referred some years ago. Writing down my thoughts at the time was very helpful for me to better understand the problems and challenges that I was facing when I was learning about ACES.
A “scene-referred” workflow means in the context of image processing that you are working with linearised tri-stimulus (RGB) data and apply a view transform at the end of the image processing chain. The view transform needs to match your display type, otherwise, you might “read” the processed images on your screen with the wrong “glasses on” so to speak.
The term “scene-referred” is also being used (I did this as well) to describe the idea that the “scene” is somewhat comparable with the location where you took the RAW images. It’s like capturing “reality” with images. This would also mean that I could measure the “red” of the car in this photo.
Let’s try it.
Now I switch to the open-source raw image software “darktable“. Thanks to the YouTube channel “Studio Petrikas” I learned how to use darktable a bit better and can use it for my purposes. darktable uses the term “scene” as well in the software help and offers a very nice explanation of the term “scene-referred workflow” in their PDF manual. Look it up!
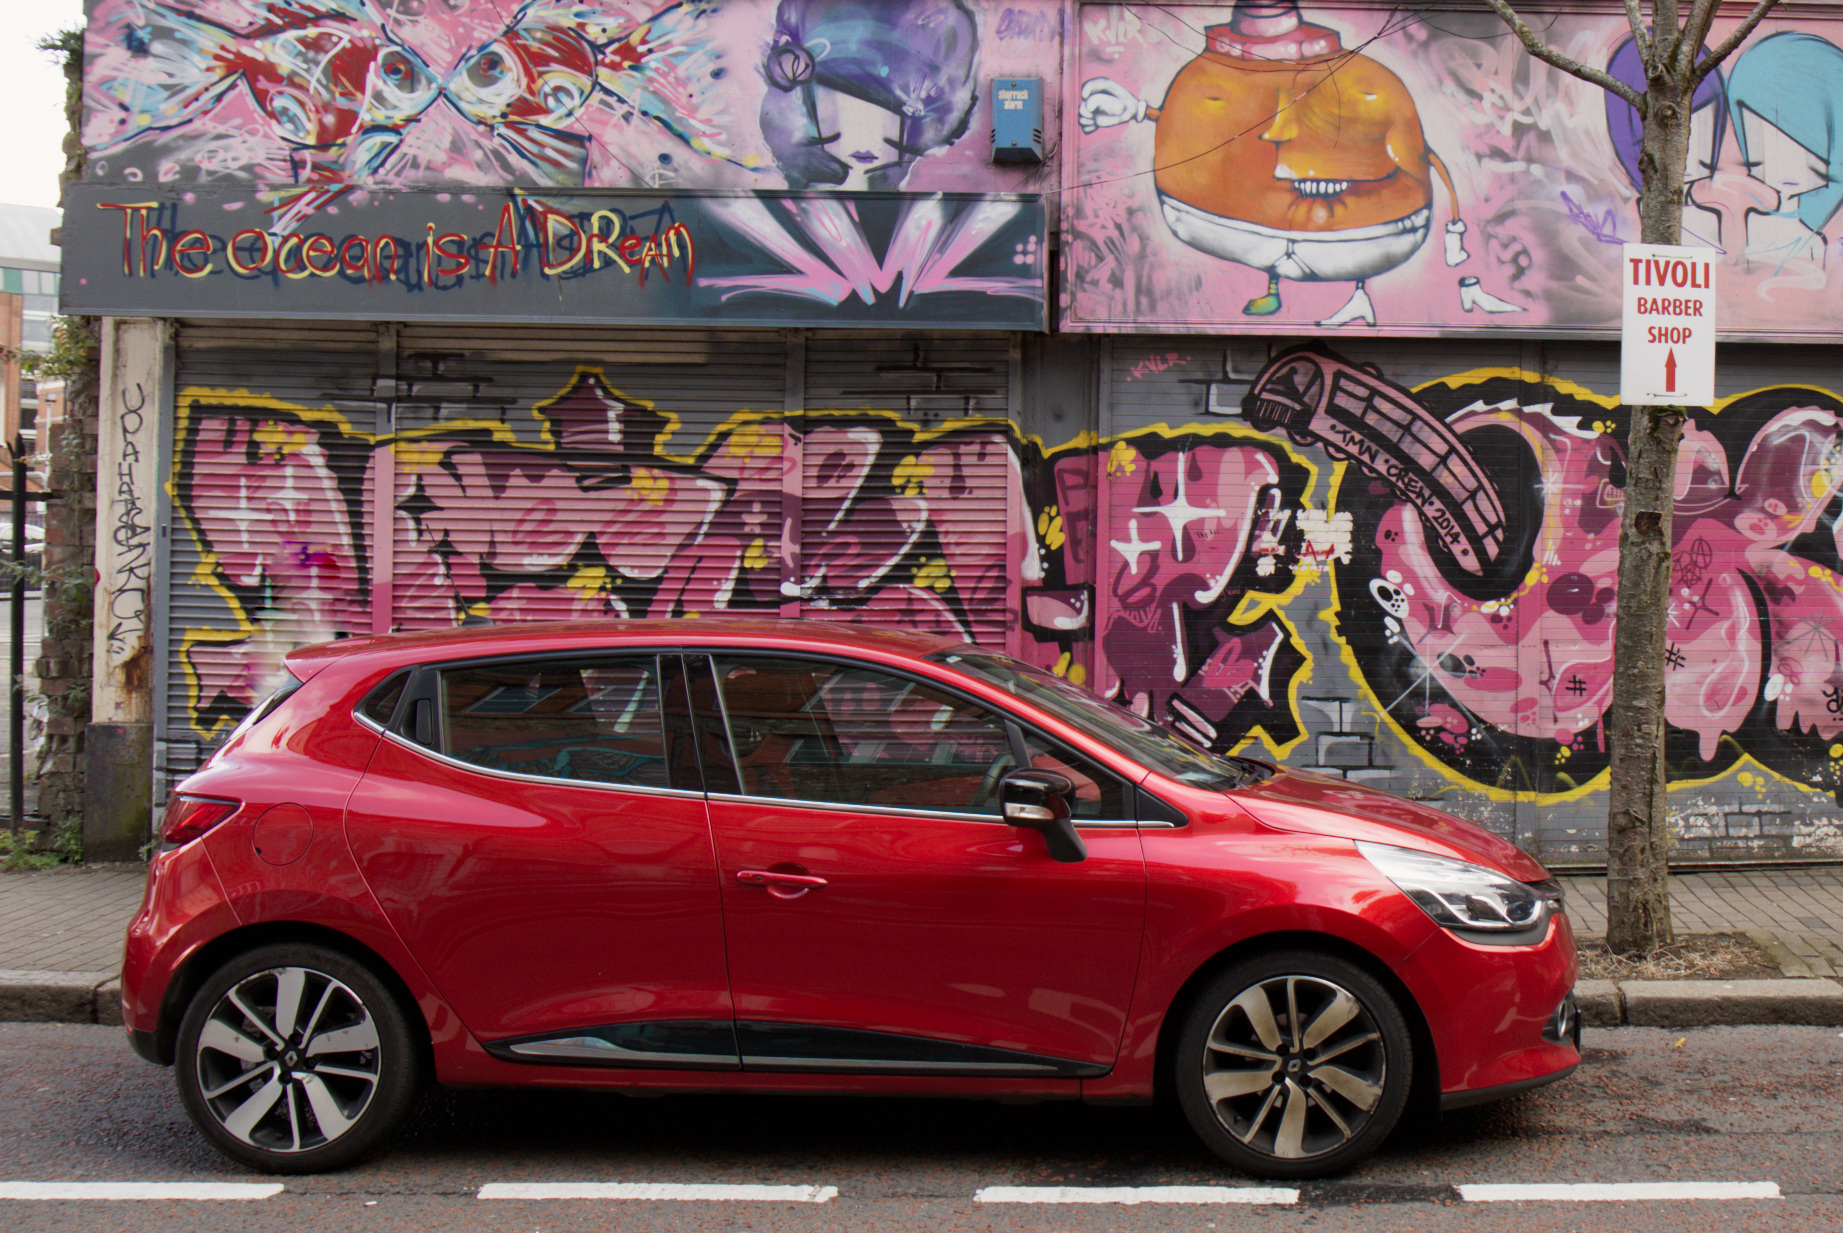
This image uses the default processing that was meant to be adjusted to make the photo look good, but for the demonstration, I left everything at the default settings. This image shows a different interpretation of the same camera native image date like in the images from Capture One at the beginning of this article.
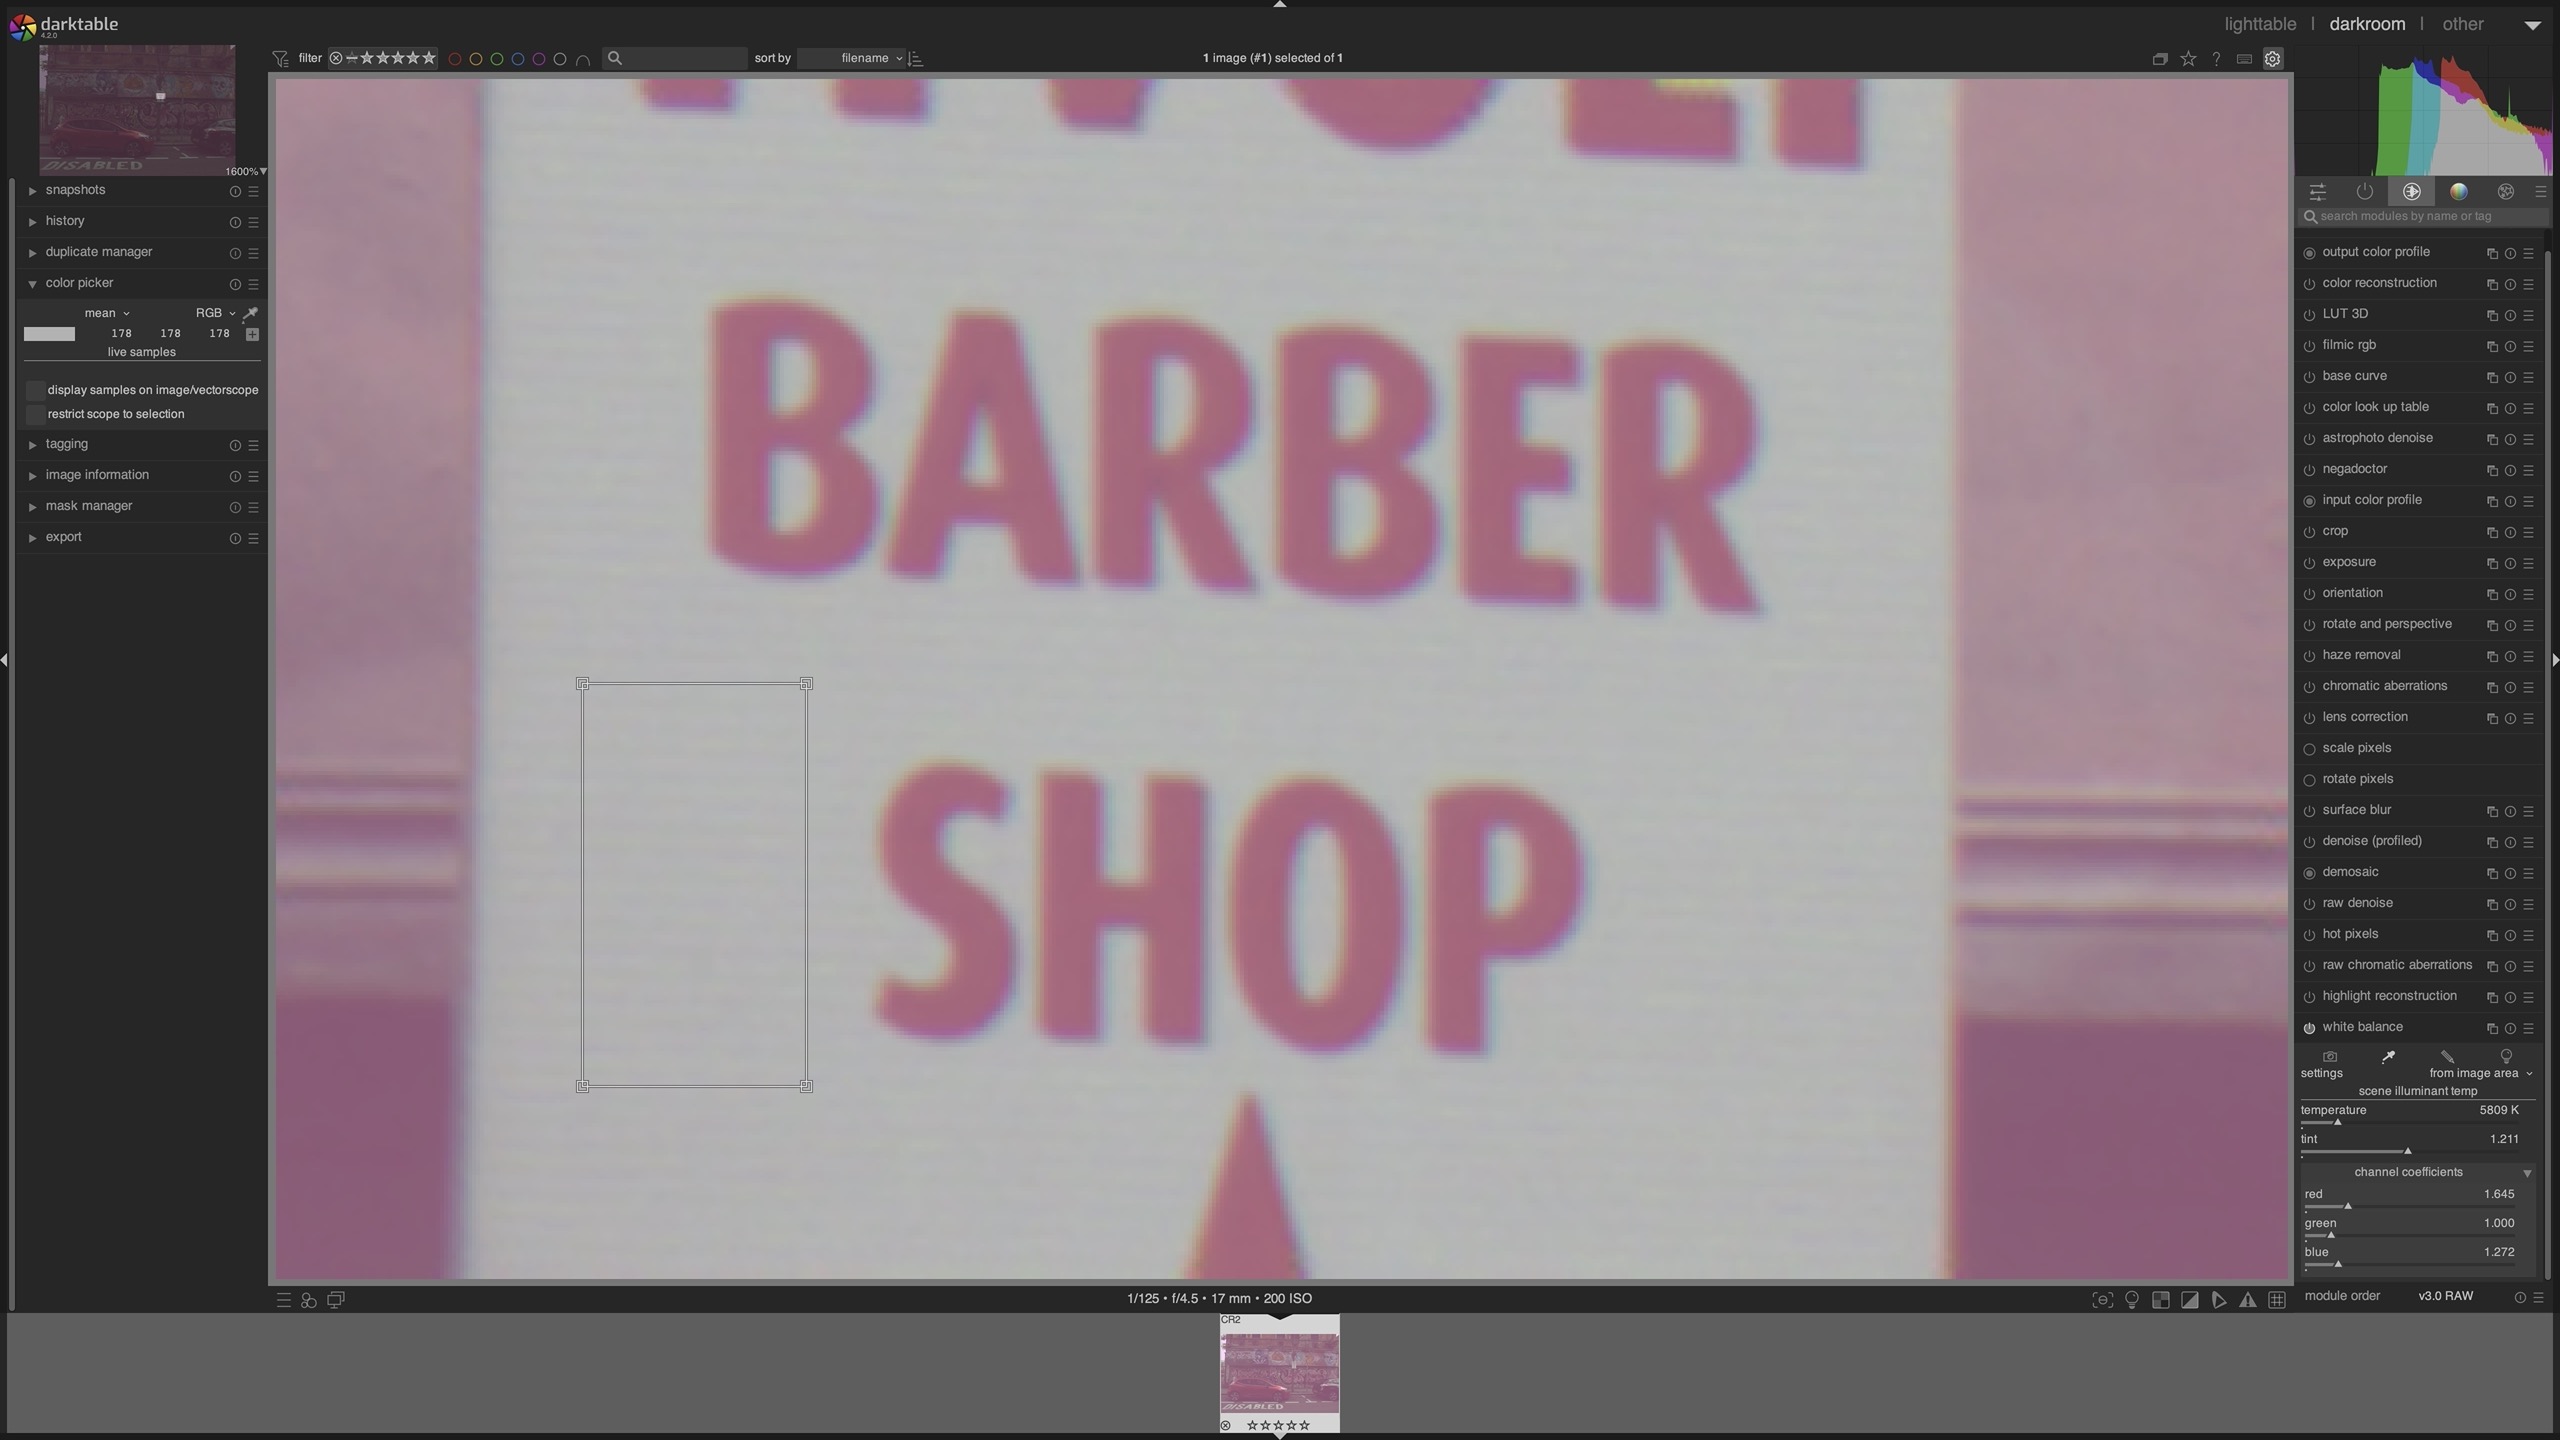
Let’s focus now on the small sign on the tree that reads “TIVOLI BARBER SHOP”. darktable allows one to disable a lot of modules in the processing chain and this allows one to get a better sense of what camera “raw” means. Some modules can’t be disabled, so it’s never really “raw” RAW what you can see.
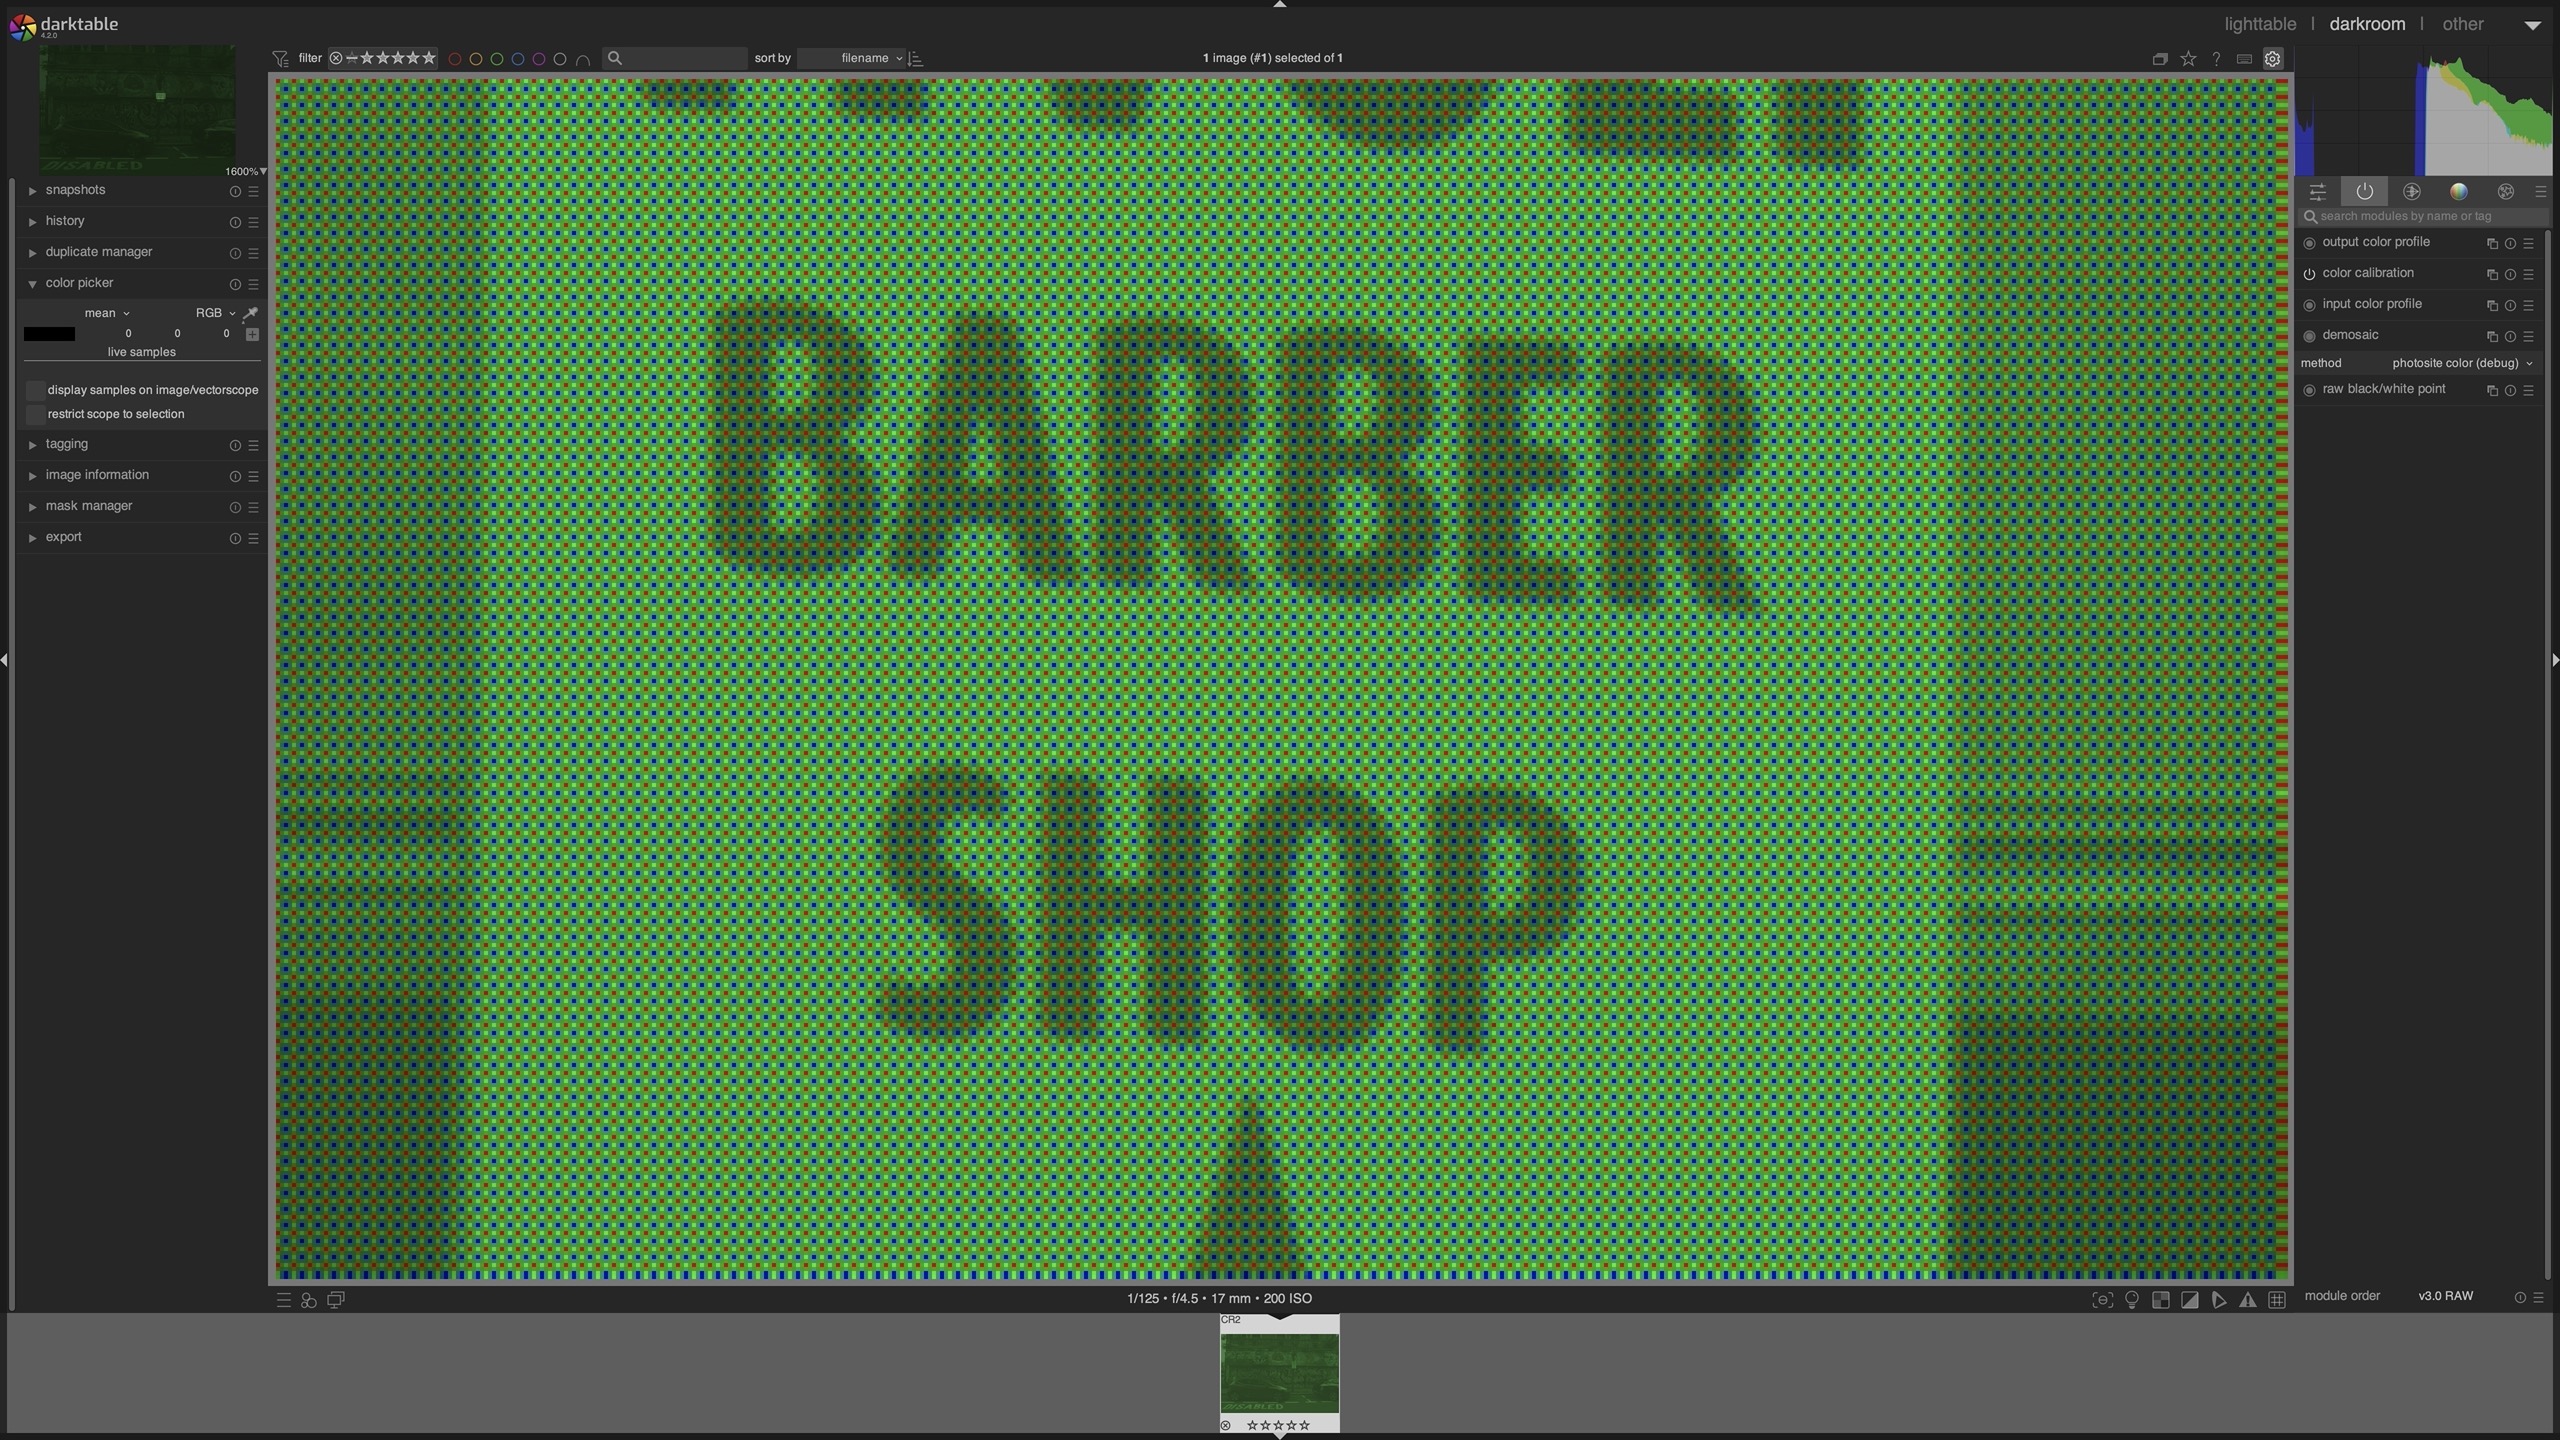
Basically, the sensor counts photons on the three different filtered photo sites that end up at this point only with luminance information.
Oh wait, this would mean if I use a monochrome sensor, I would get an image where I see a parked car, but I would not have any indication that it was a red car!
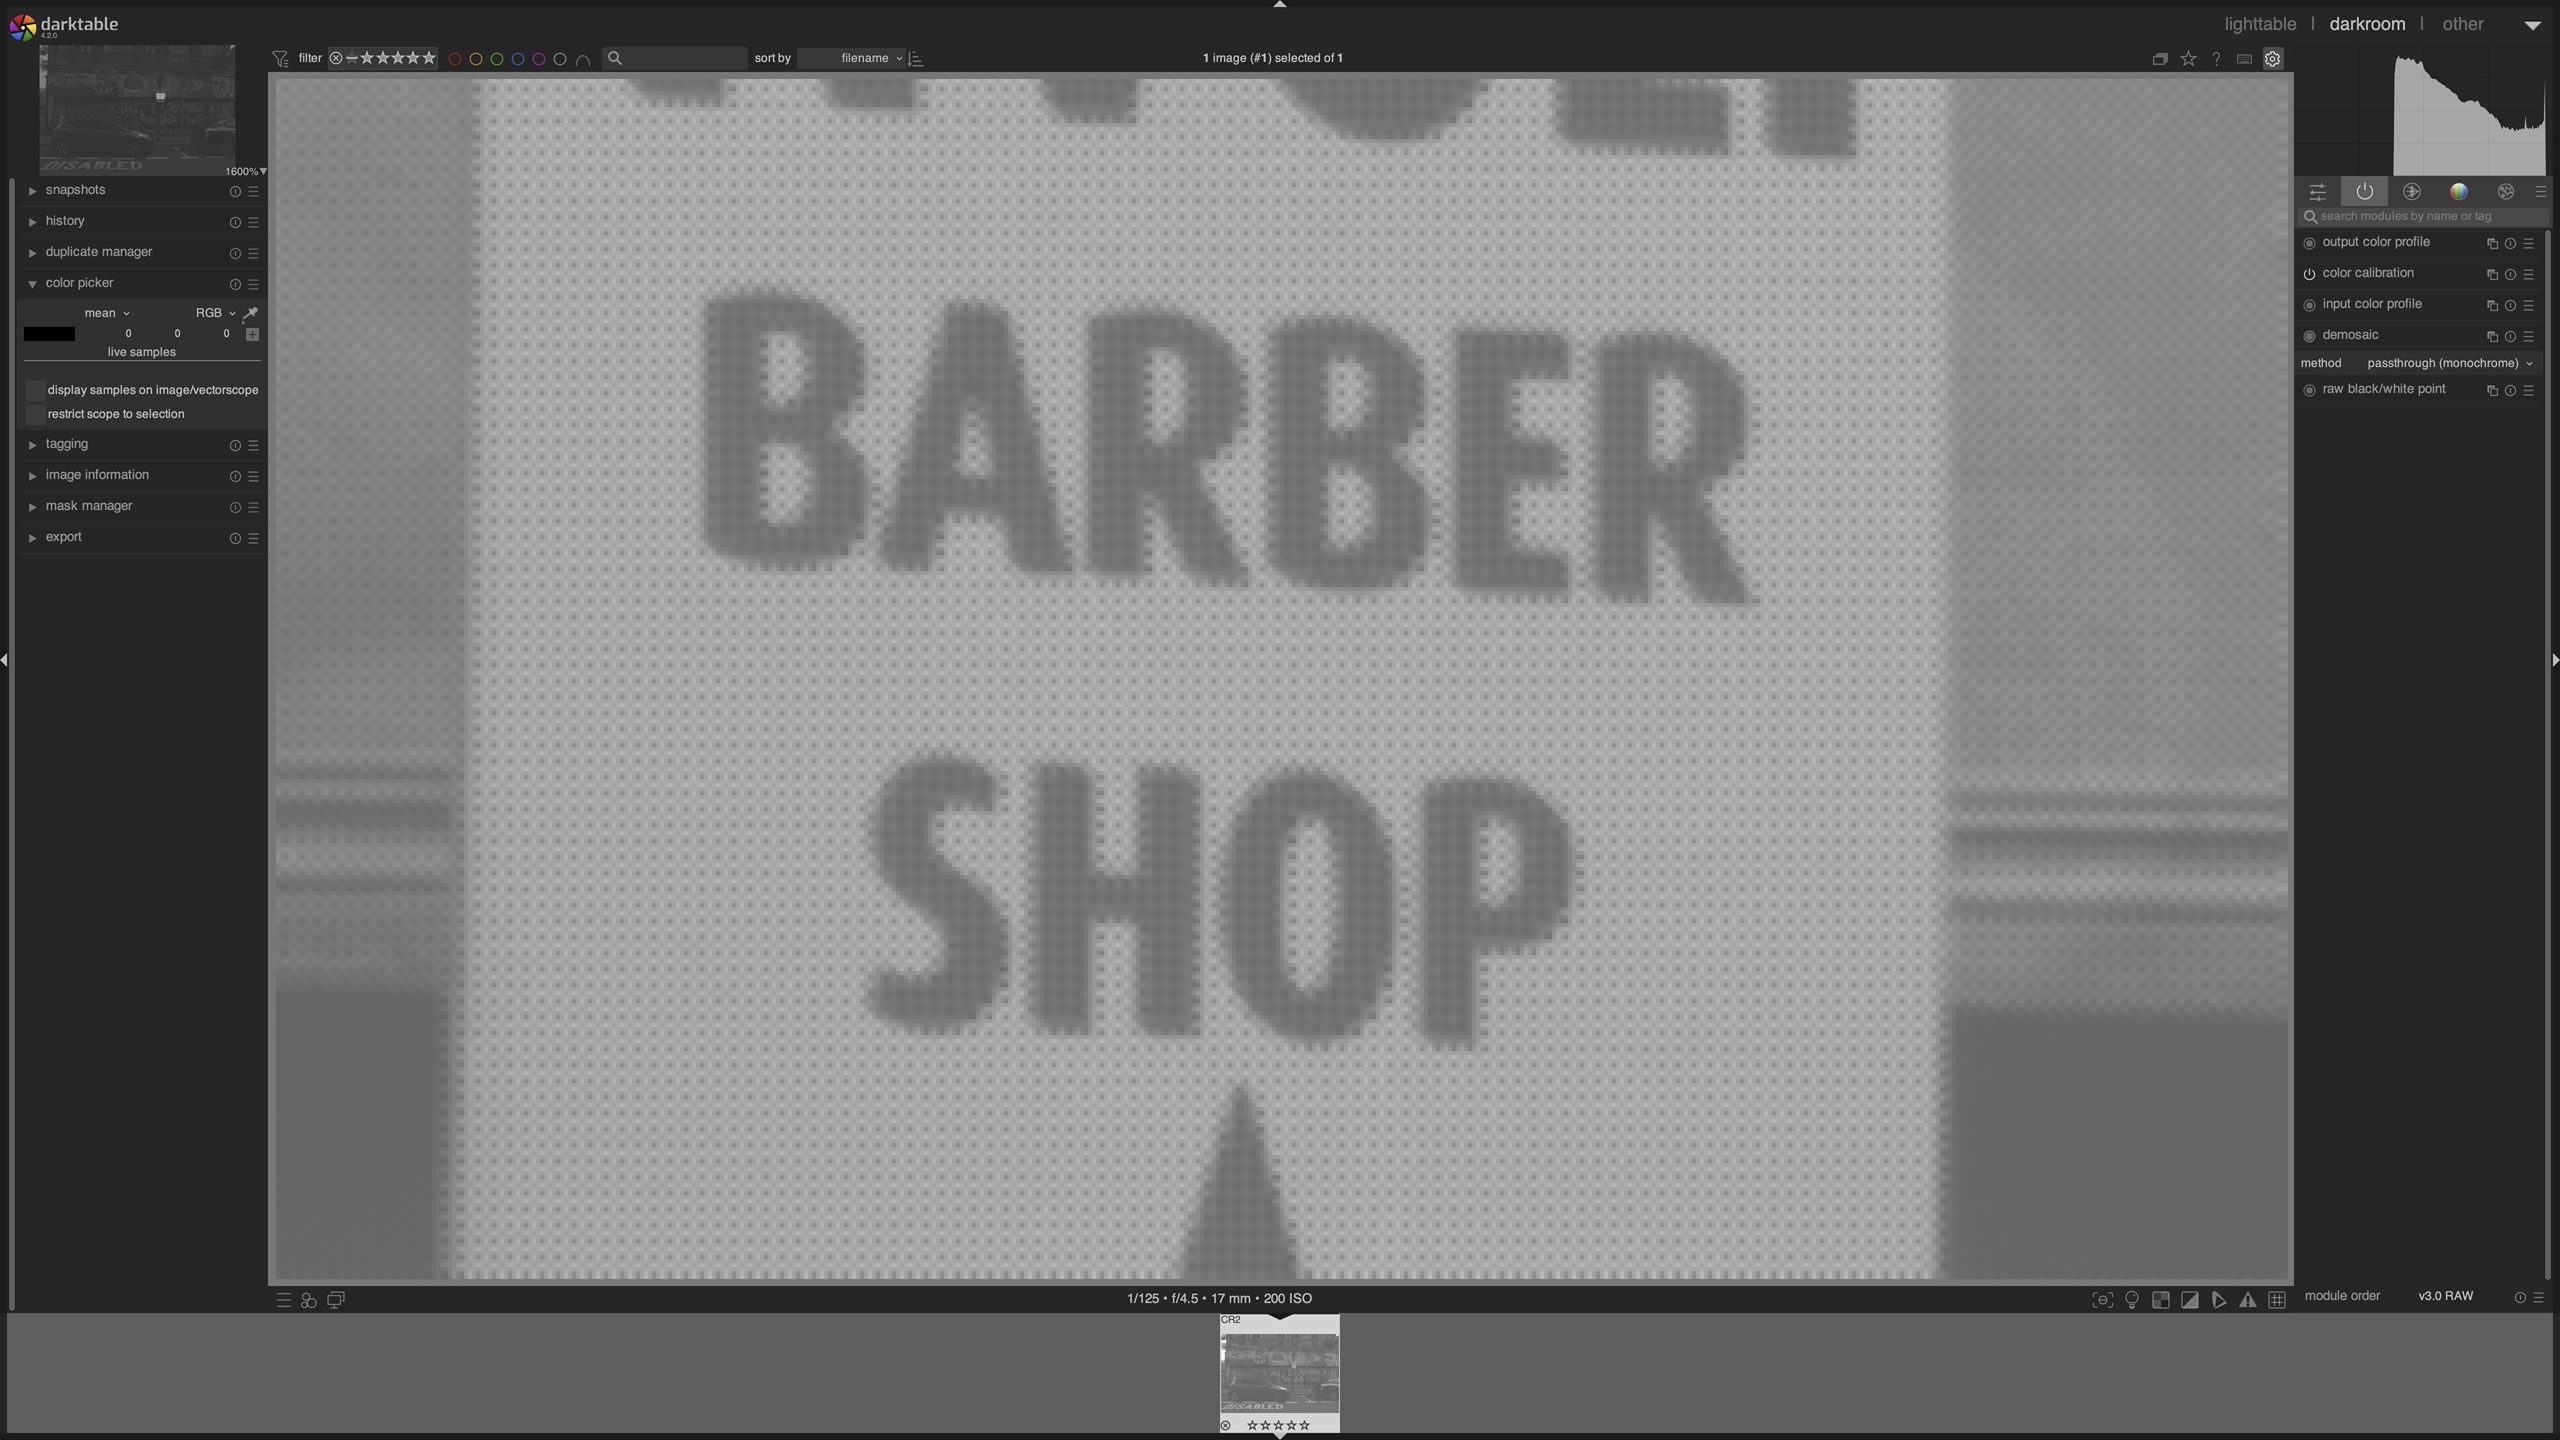
Heading back to the Barber Shop sign, the demosaicing step will interpolate the Bayer-pattern data into RGB values for each resulting pixel.

Some more modules are needed to finally present the image from the beginning of the darktable section of this article.
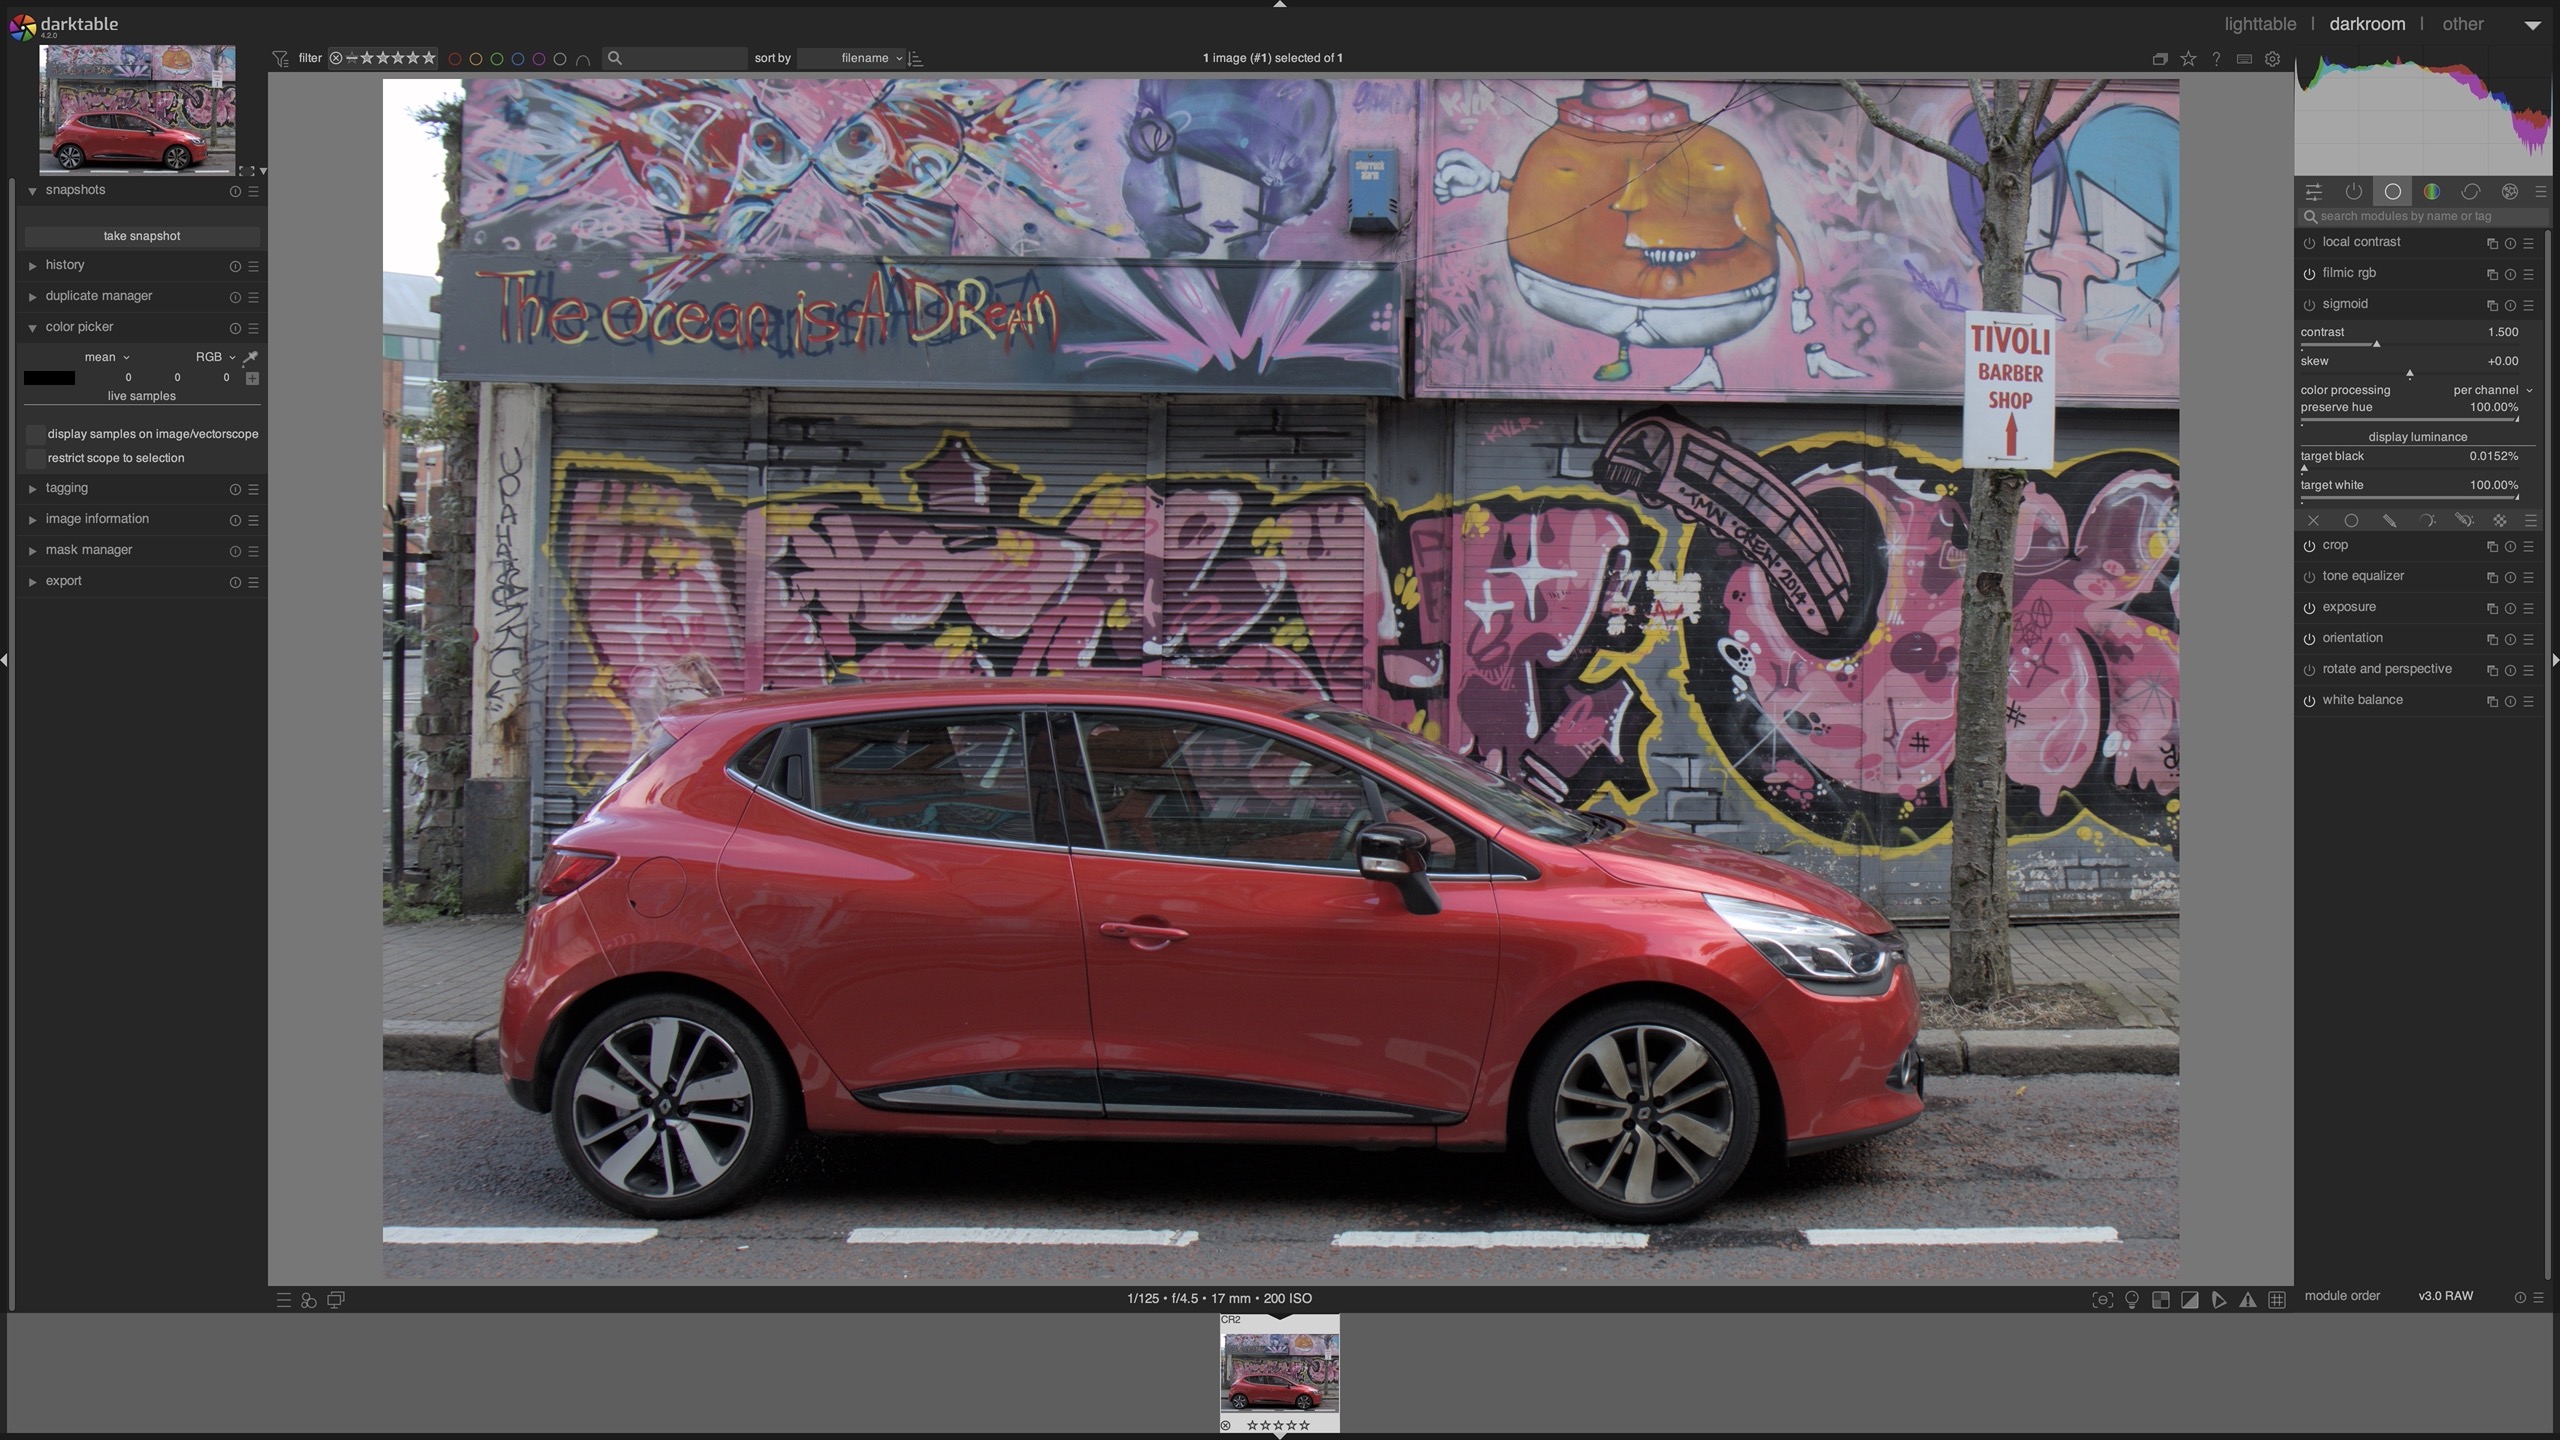
In the resulting image, I see a red car and I can use the colour-picker in darktable to measure the pixel value on the passenger door under the door handle.
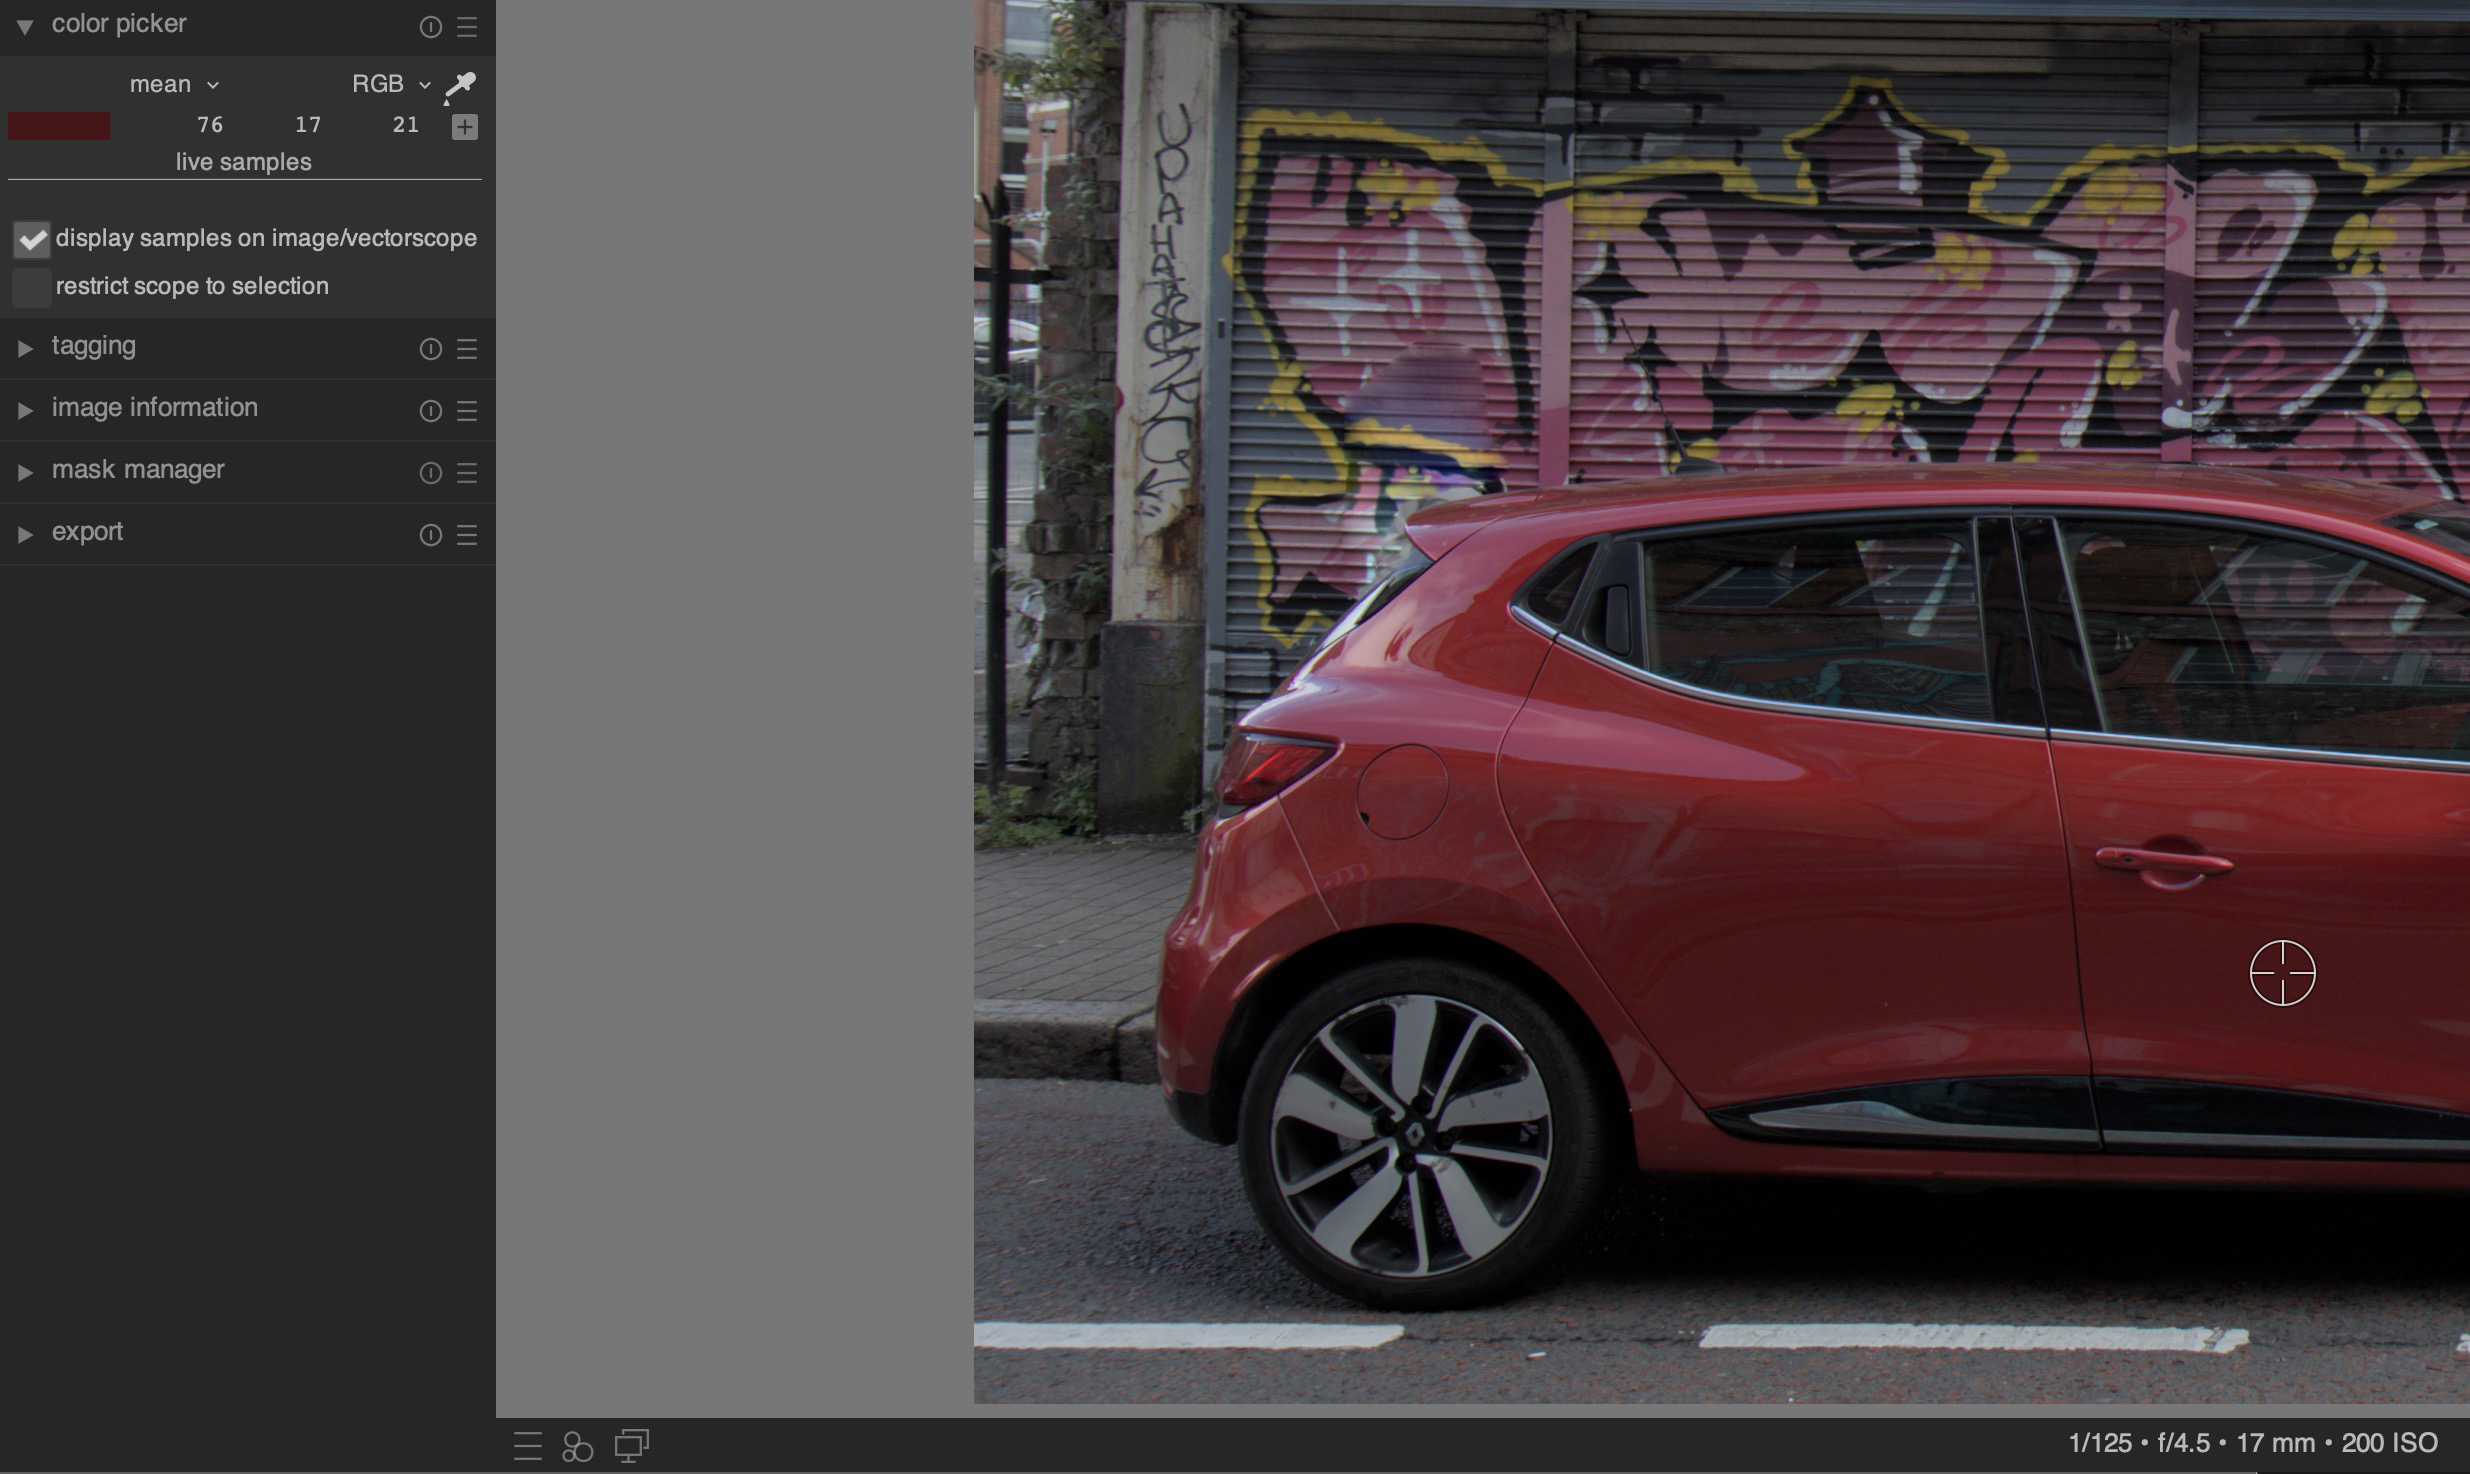
The measured average value is display-referred and describes over a transfer function how much each red, green and blue light my display needs to emit to give me a sensation of red. I am still looking at display referred values, but I wanted to pick scene-referred RGB values. I want to export the image data for Nuke.
In another video from “Studio Petrikas” there is a tutorial on how to export minimalistic processed camera native files to EXR files. The working colour space of darktable seems to be linear Rec.2020 by default, so I decided to export the EXR file with the same primaries. In Nuke I imported the file using an OCIOv2 ACES 1.3 config with the IDT lin-Rec. 2020 and the view transform is automatically set to ACES 1.0 – SDR Video (sRGB – Display).
I ignore the fact that I see inside of Nuke the wrong colours anyway on my iMac display, because of the lack of an OCIOv2 config for Display-P3 screens.
The exported JPG is quite dark.
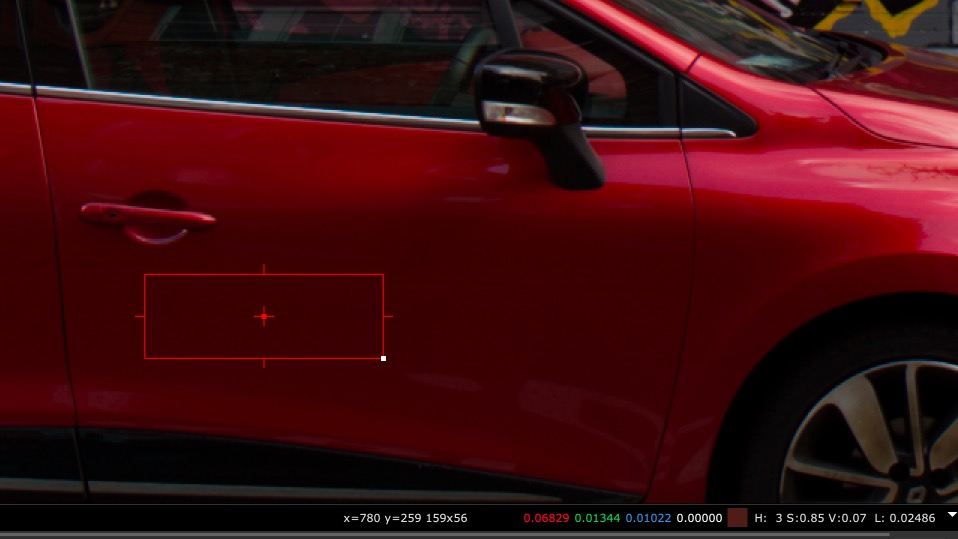
The averaged RGB values for the given area marked by the red rectangle are 0.068 / 0.013 / 0.010 in ACEScg.
To get a result that looks more like the other images in this article, I used an exposure node and added 1.333 stops to the RGB data before applying the view transform.
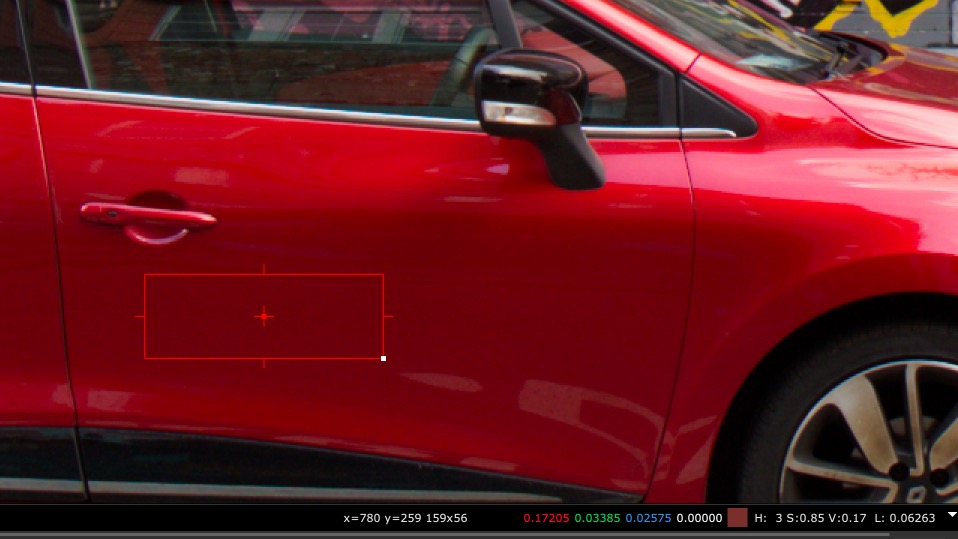
The ACEScg RGB values in the sample area now read 0.172 / 0.034 / 0.026.
The ACEScg RGB values are kind of useless too to determine how the red colour of the car was because the numbers will change by the exposure, by using a different working colourspace or a different view transform.
In other words, the display-referred average colour values of 76 / 17 / 21 tell me somehow more about the red I am seeing on my display than any of the scene-referred RGB values like the ACEScg RGB values.
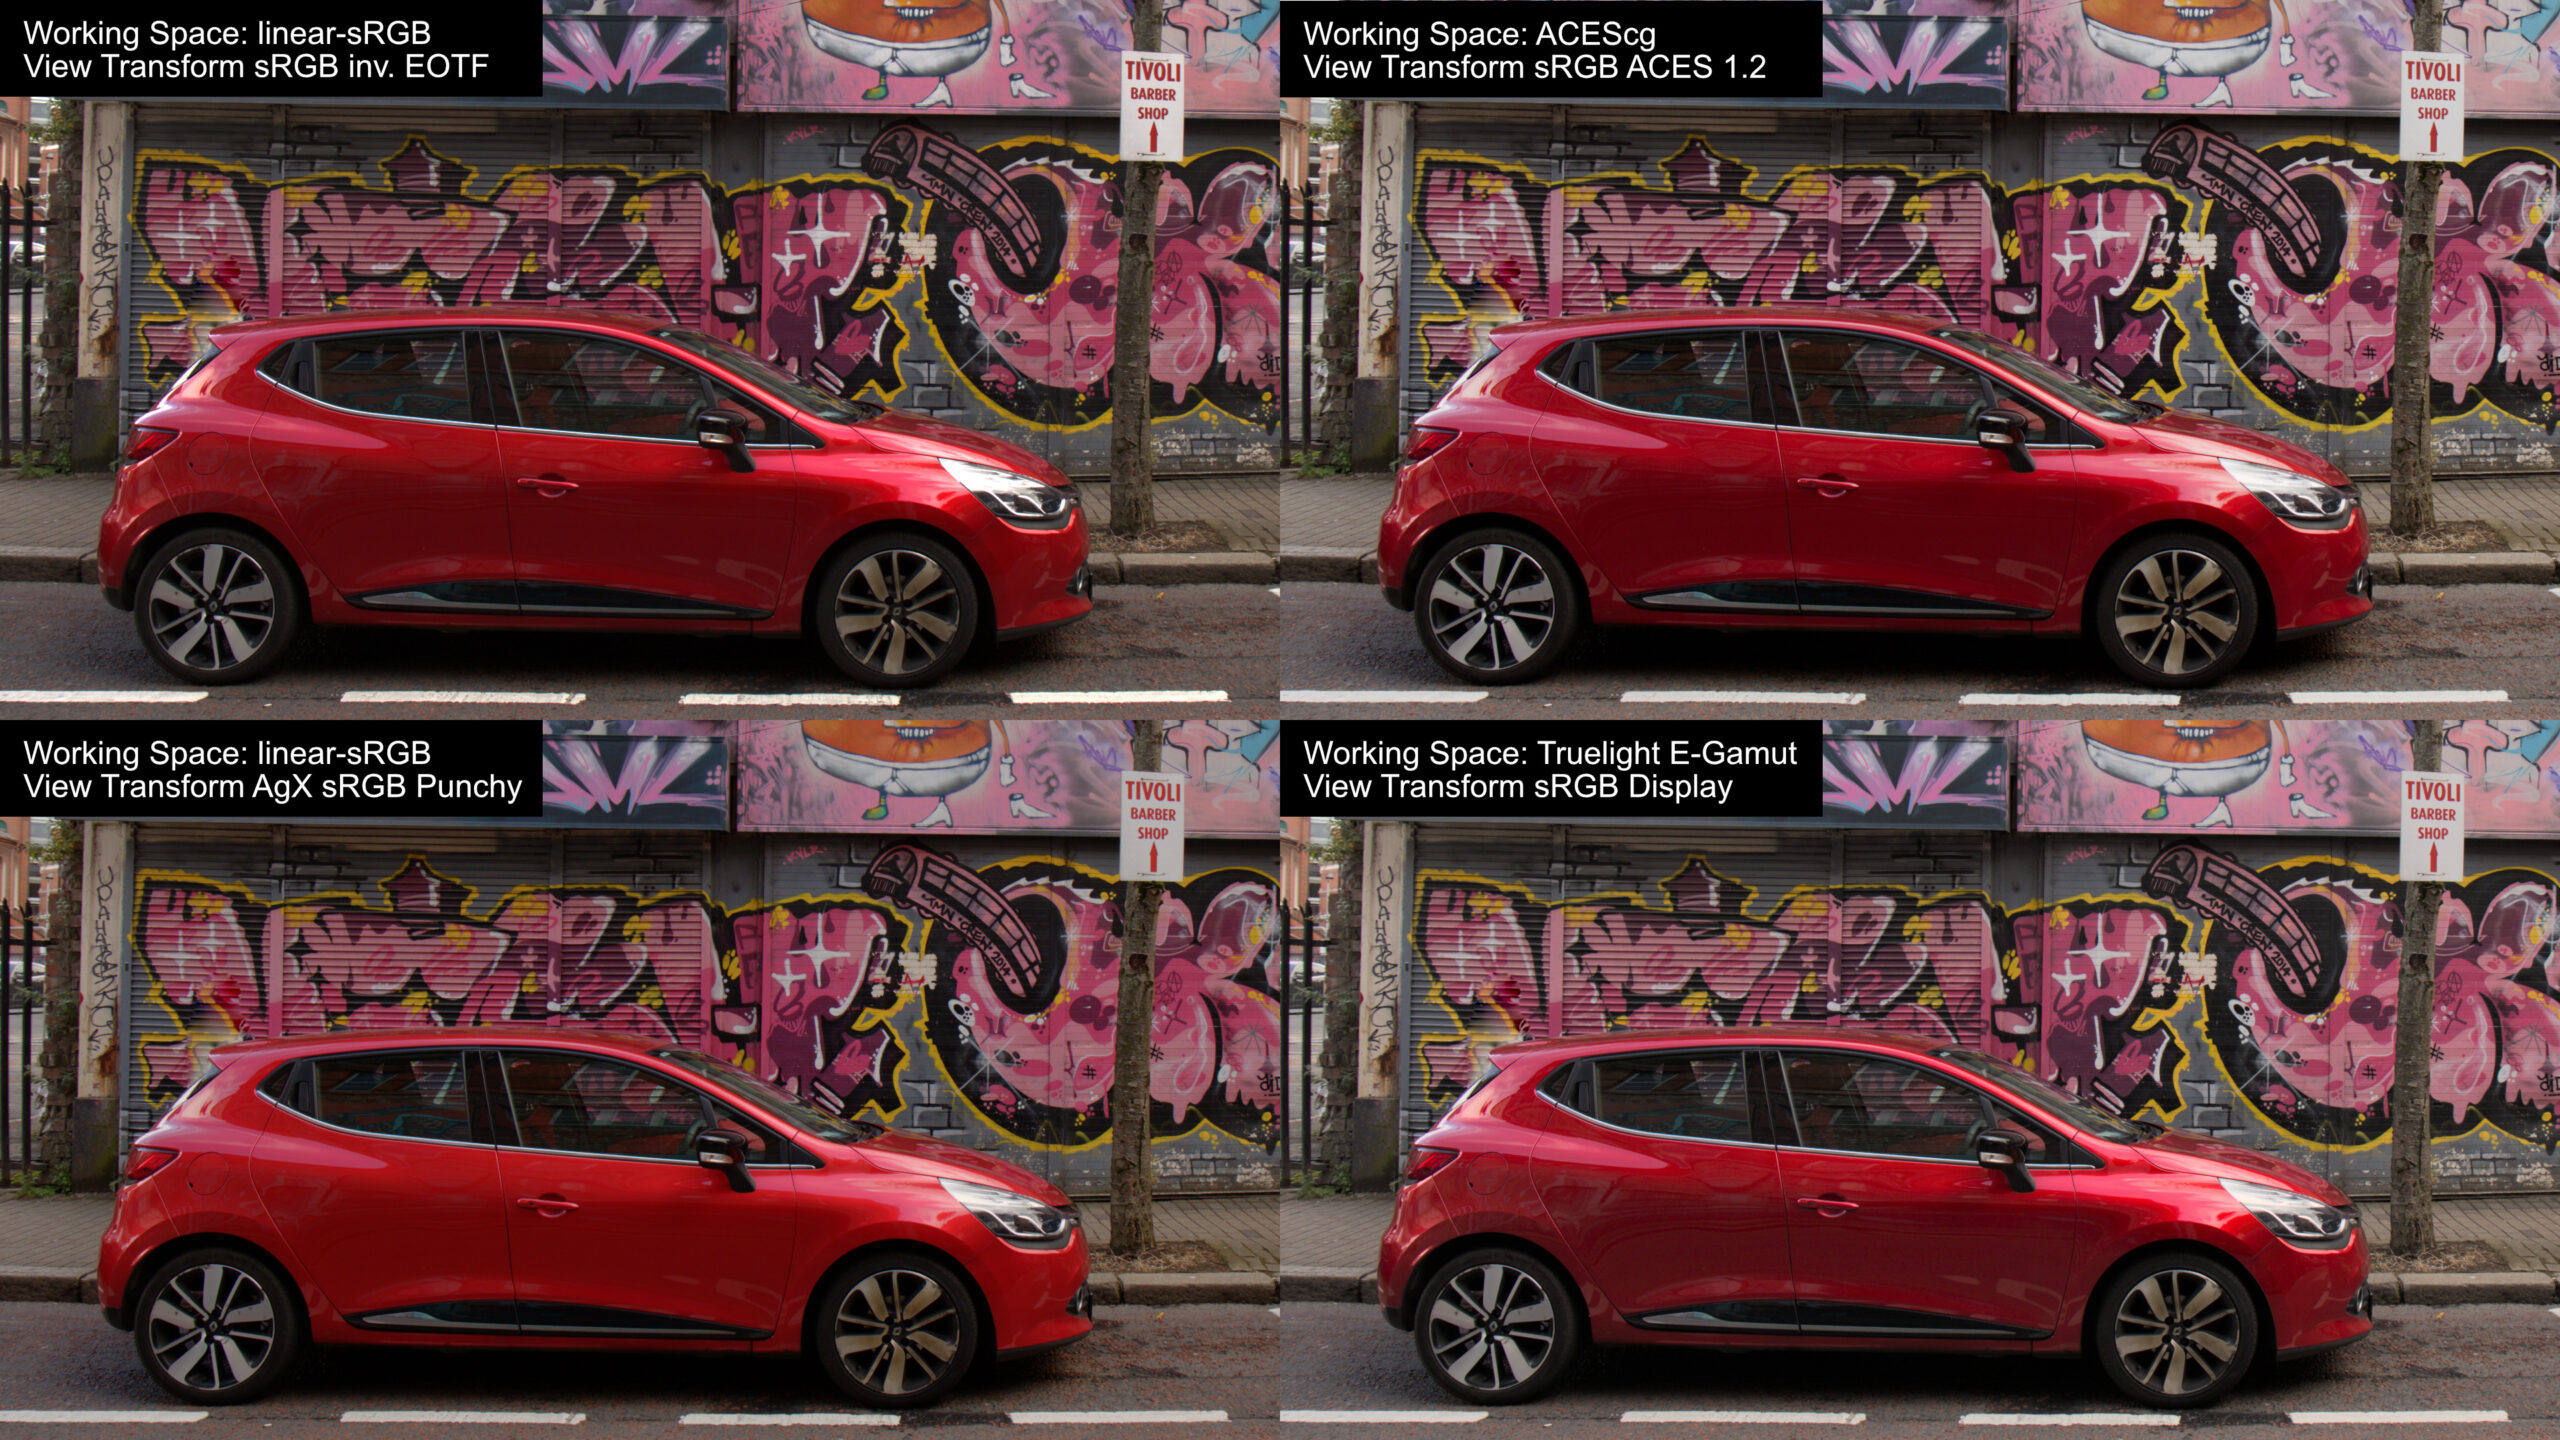
To finish up this article, here are three more view transforms next to the ACES ODT for sRGB. In the first 4-split image I used the same EXR file that was coming from darktable, changed the working colour space with different OCIO configs and exported out display referred results for sRGB displays.
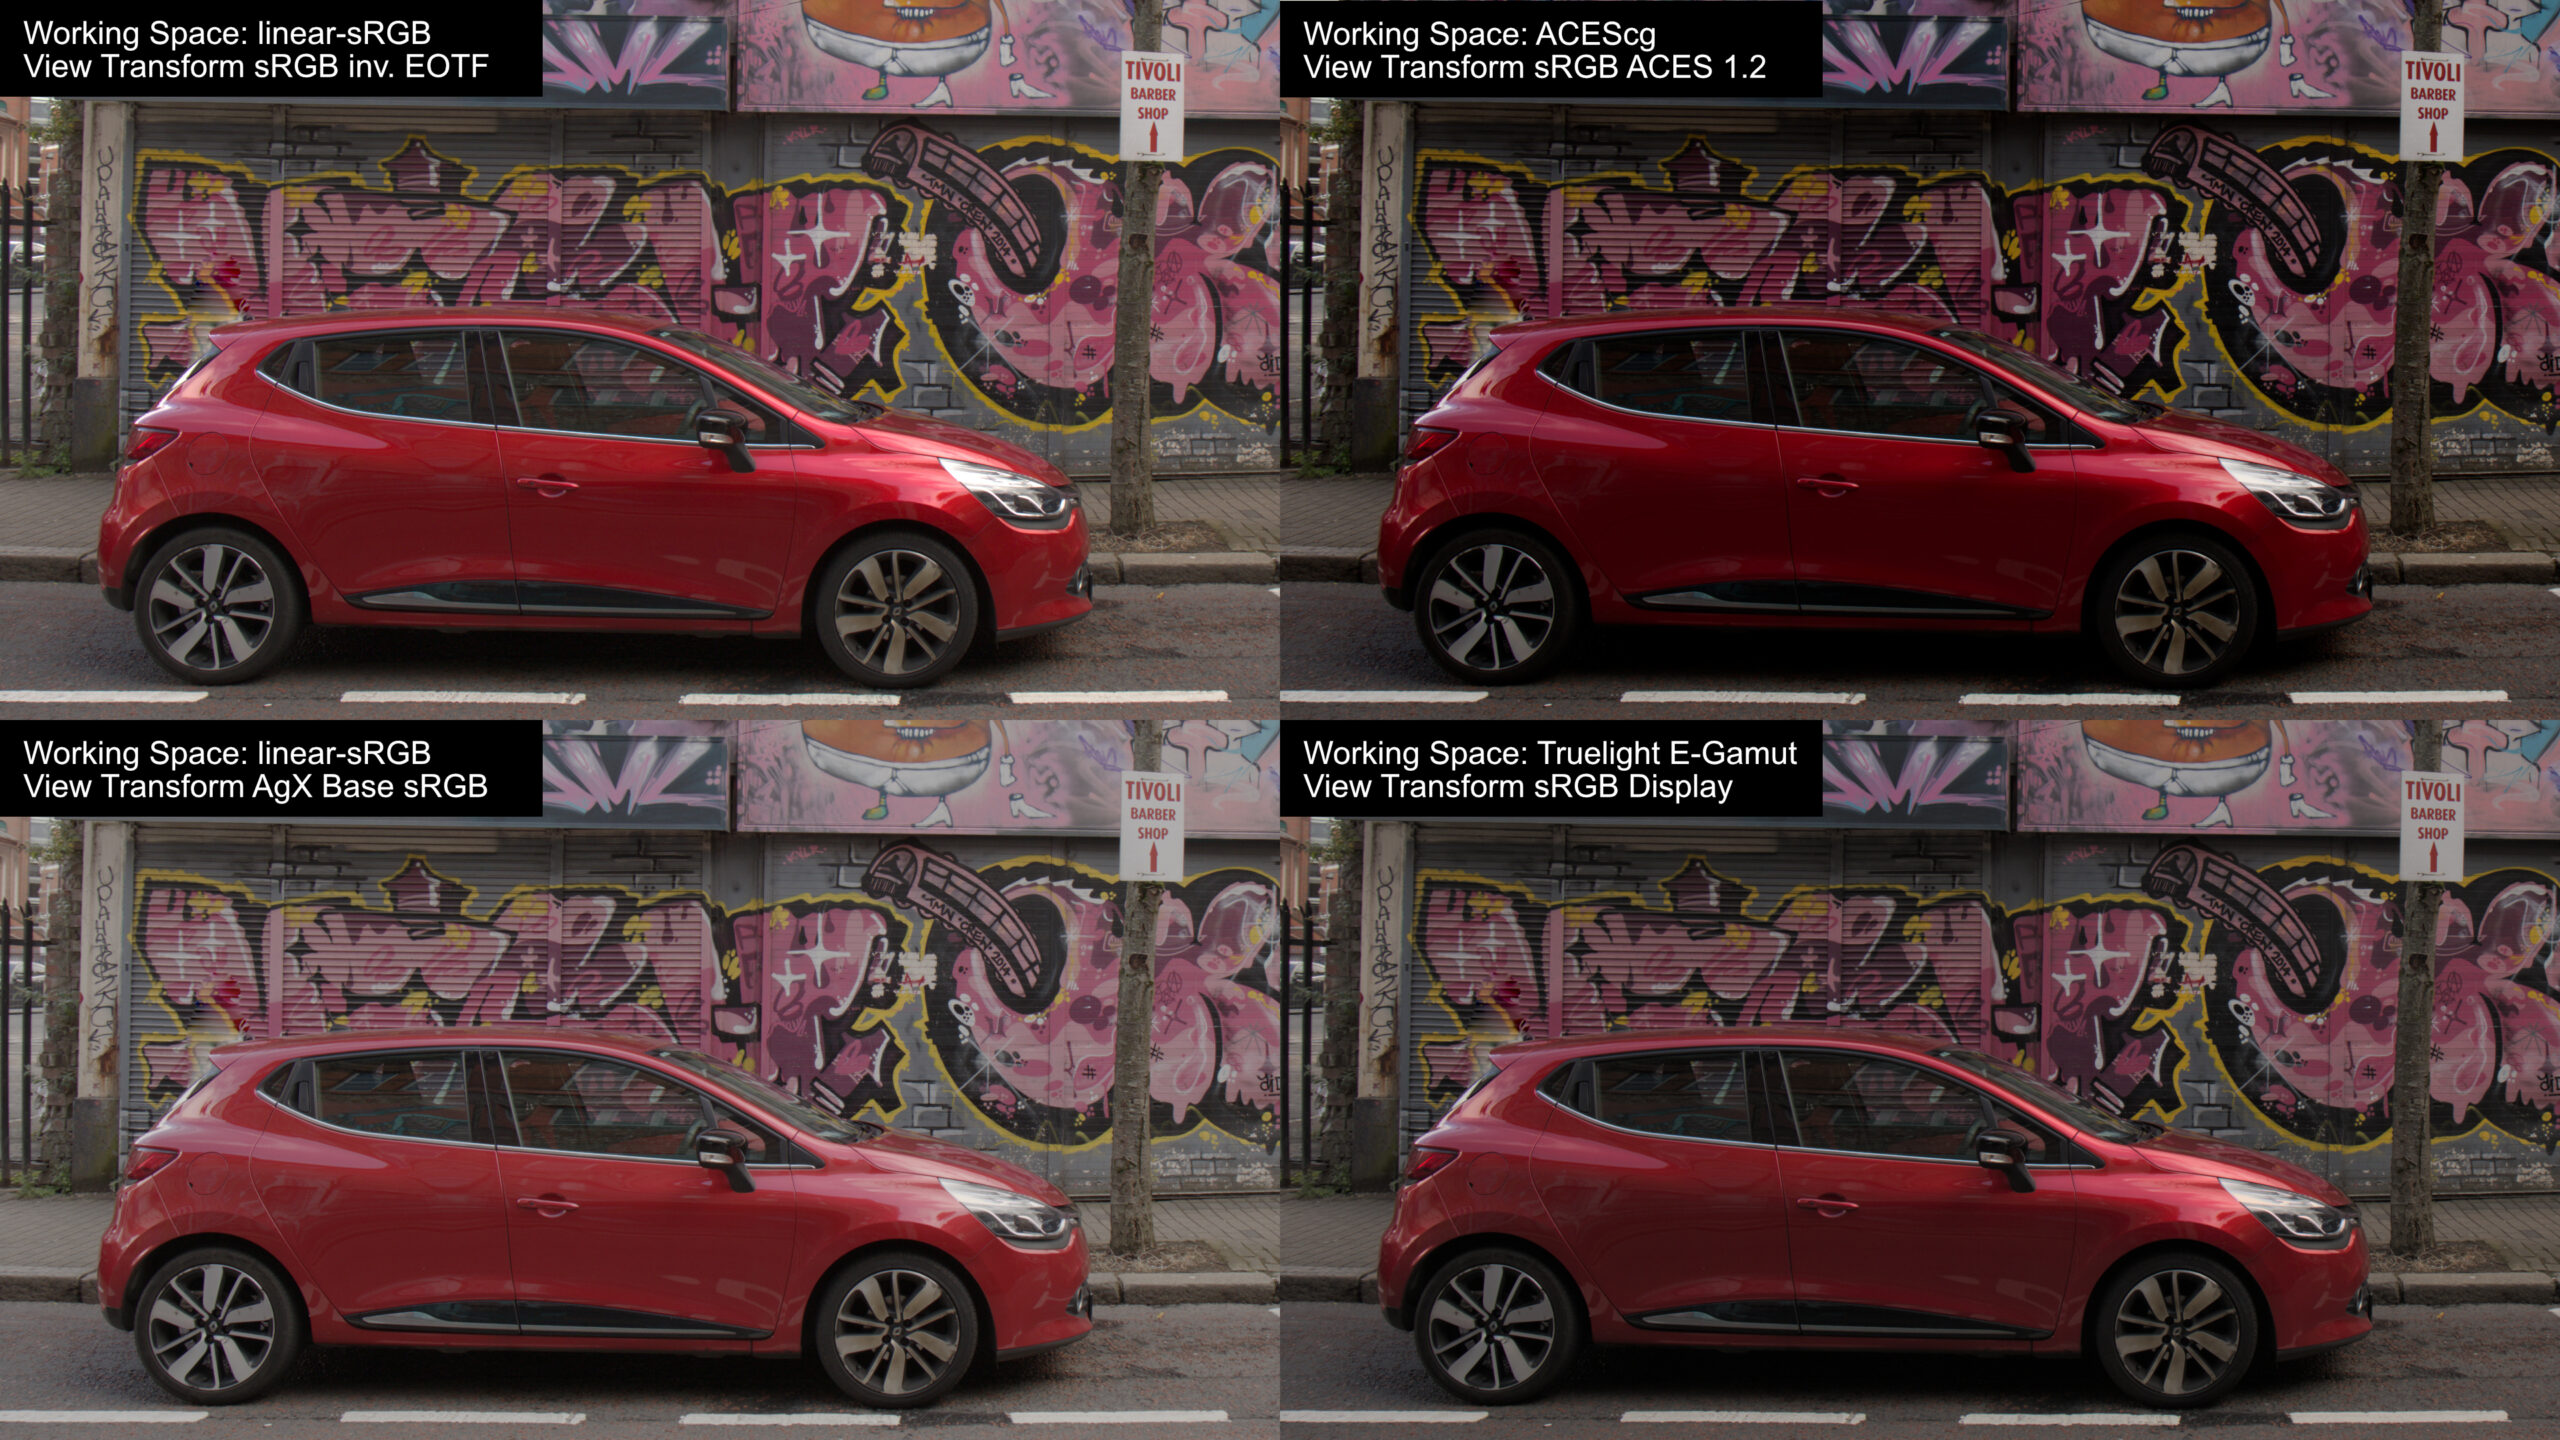
Now I see four more interpretations of the same scene-referred image data. Why are some so dark and others so flat? Because they are meant to get some kind of “look” applied in conjunction with the view transform.
In the last step, I used a nuke colour corrector node and only adjusted the contrast and gain to make the 4 images look more similar.
I have not come closer yet to measuring the red car paint with the help of a “RAW” image file. Maybe a colour checker can help me out to have some kind of reference? I will try this with a different set of “RAW” image files in the next article…stay tuned…