Three ways to handle projects and some tips on the way
In this little guide I want to describe three ways to work with ACES material in Autodesk Flame for normal day to day online work and deliverables.
There are so many ways to work with flame – as the one tool to do everything or like a link in a chain of tools in big project environments. The starting point that I describe on this page are graded ACES 2065-1 EXR files. From here I want to conform them to films, add logos, titles and sound and export ProRes 4444 media for client masters.
Flame is in this case the tool to convert from scene-referred media to a display-referred output.
A quick note about the flame 2018 color management default preferences:
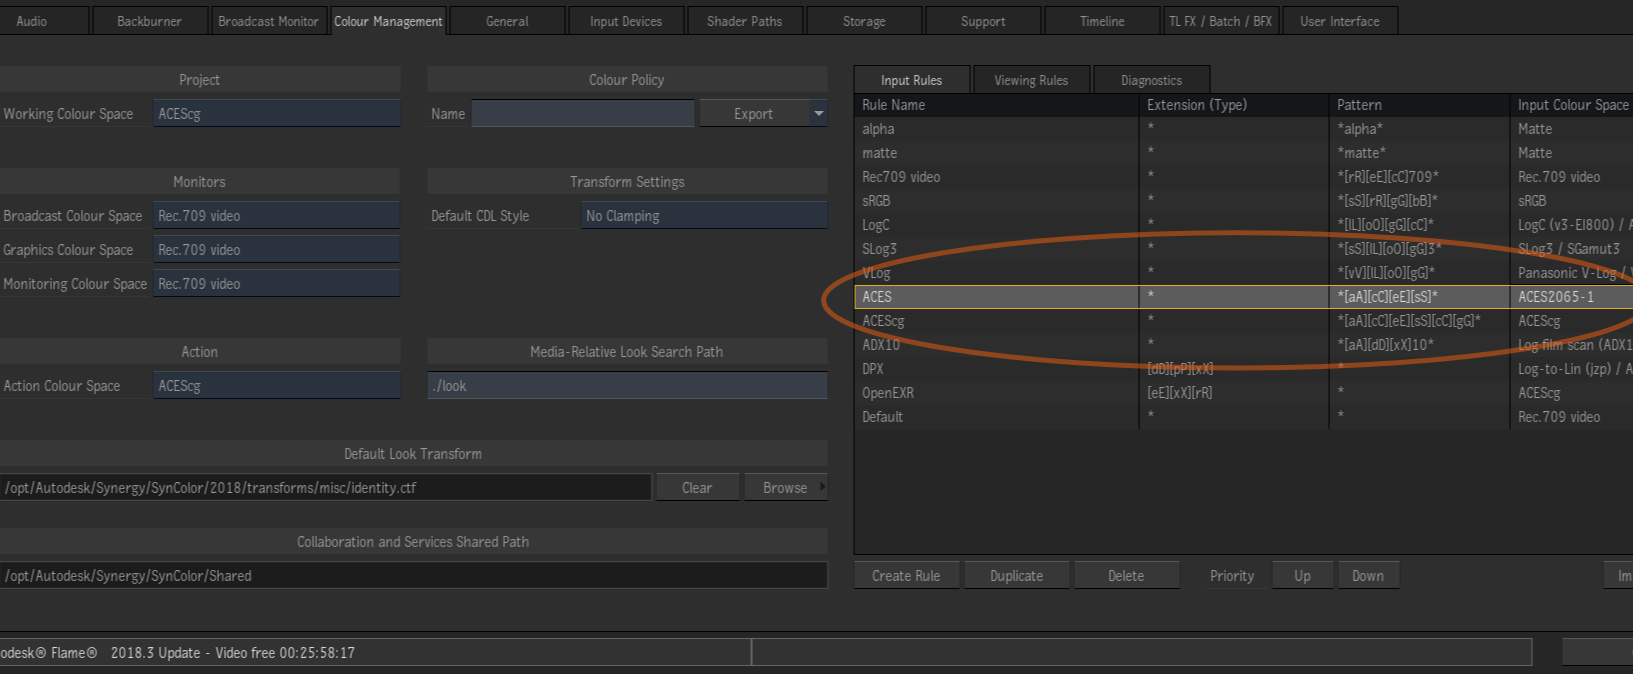
The default import rules for EXR files are set to ACEScg – at least in flame 2018. This could be due to the fact that flame & maya share the the color management system and maya’s default render settings for EXR are also set to ACEScg.
ACES default EXR colorspace is ACES 2065-1, not ACEScg. This could lead to wrong color space interpretations when importing EXR files from Resolve for example, even if you name them with the proper filename addition: Filename_aces.exr.
There should be a second rule for ACES 2065-1 set by default.
- Filename_aces.exr = ACES 2065-1
- Filename_acescg.exr = ACEScg
Nuke has actually the same problem for years, because there you can only set one rule for floating point files. Which is very odd as Nuke supports OCIO for a long time and is kind of the only tool which doesn’t have support for the color space settings based on naming conventions.
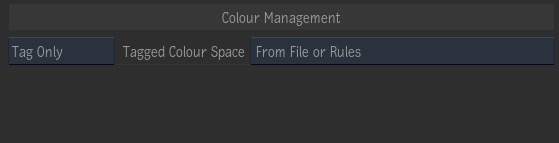
TAG ONLY – AUTO CONVERT – VIEW TRANSFORM
The moment you import footage manually or automatically in the Conform module you have three choices how to handle the footage in flame.
TAG ONLY – Assemble films and playout
This method I find useful to have access to the whole dynamic range of the EXR files (in my case I assume they are finished comped and graded already) and I want to archive them in flame as well, but not really planning on doing additional work on the footage. The EXR files are kept in ACES 2065-1 (AP0) colorspace that is the archival format in an ACES workflow.

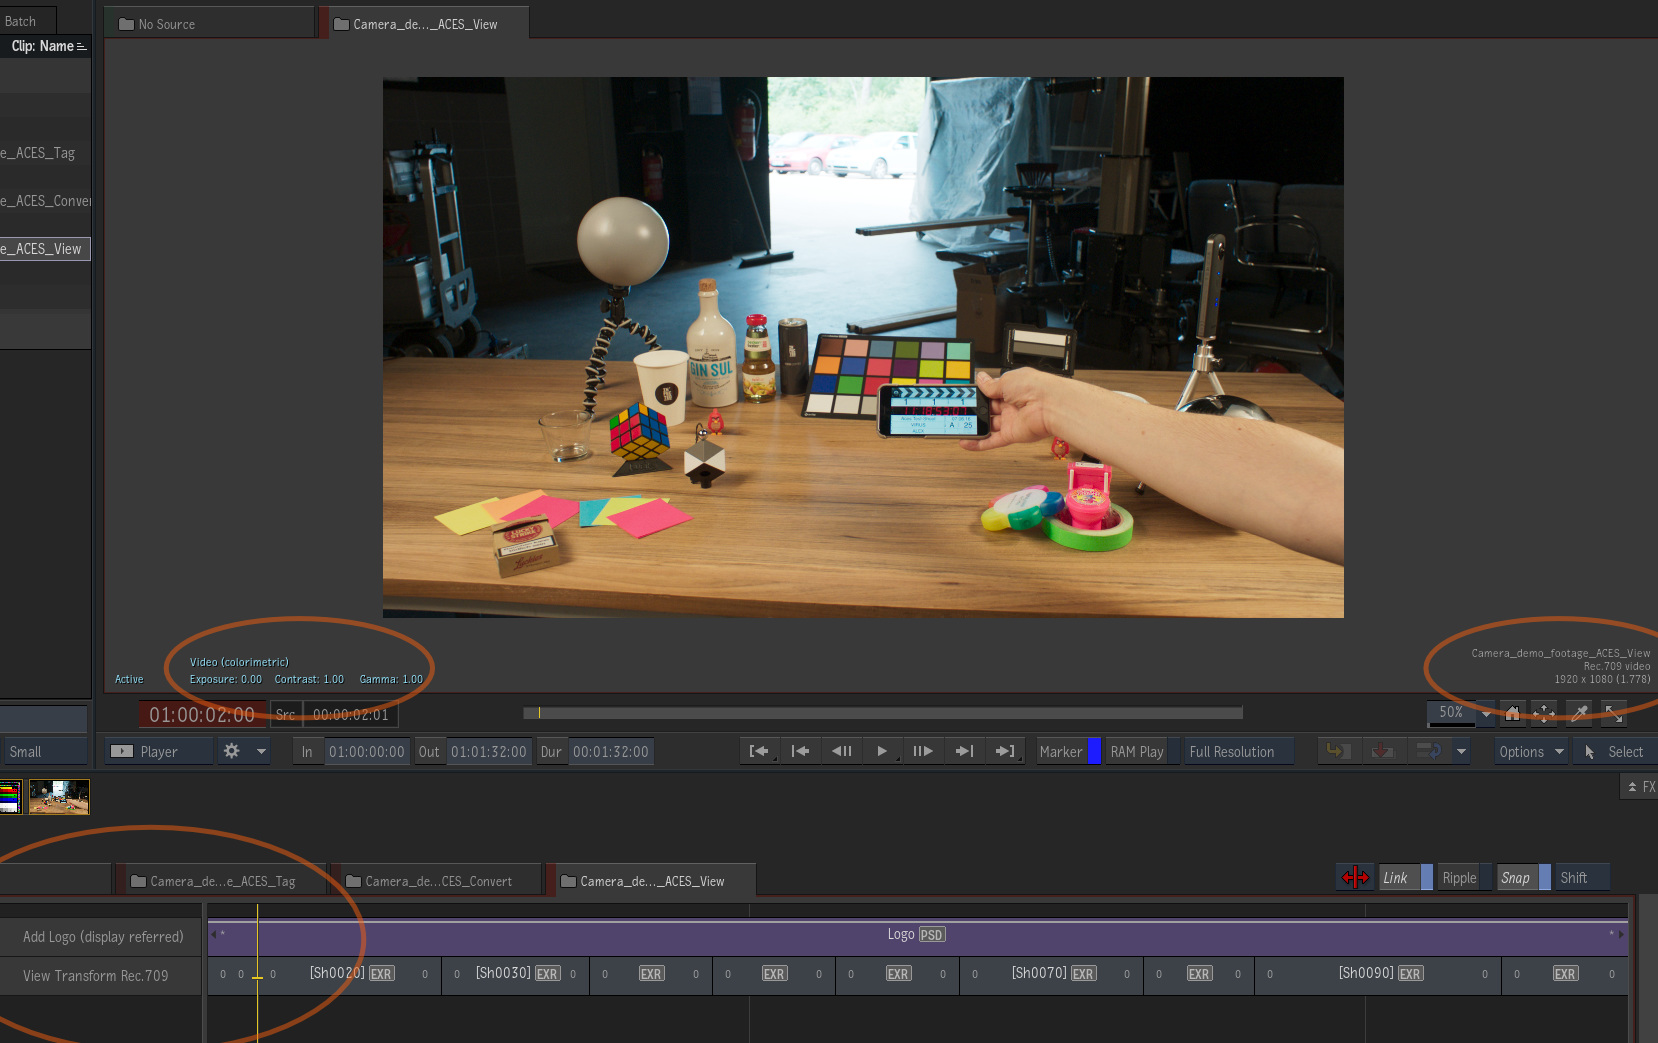
Before I can add a client logo or titles on top of the footage, I want to convert the scene-referred files to display-referred by applying the view transform (in my case this is standard Rec.709 for HD projects) to the footage with a gap effect and a Color Management Node set to “View Transform”. This requires a proper setup of the Color Management preferences for the “Input and Viewing Rules” and assuming a ACES color policy is used for the project.
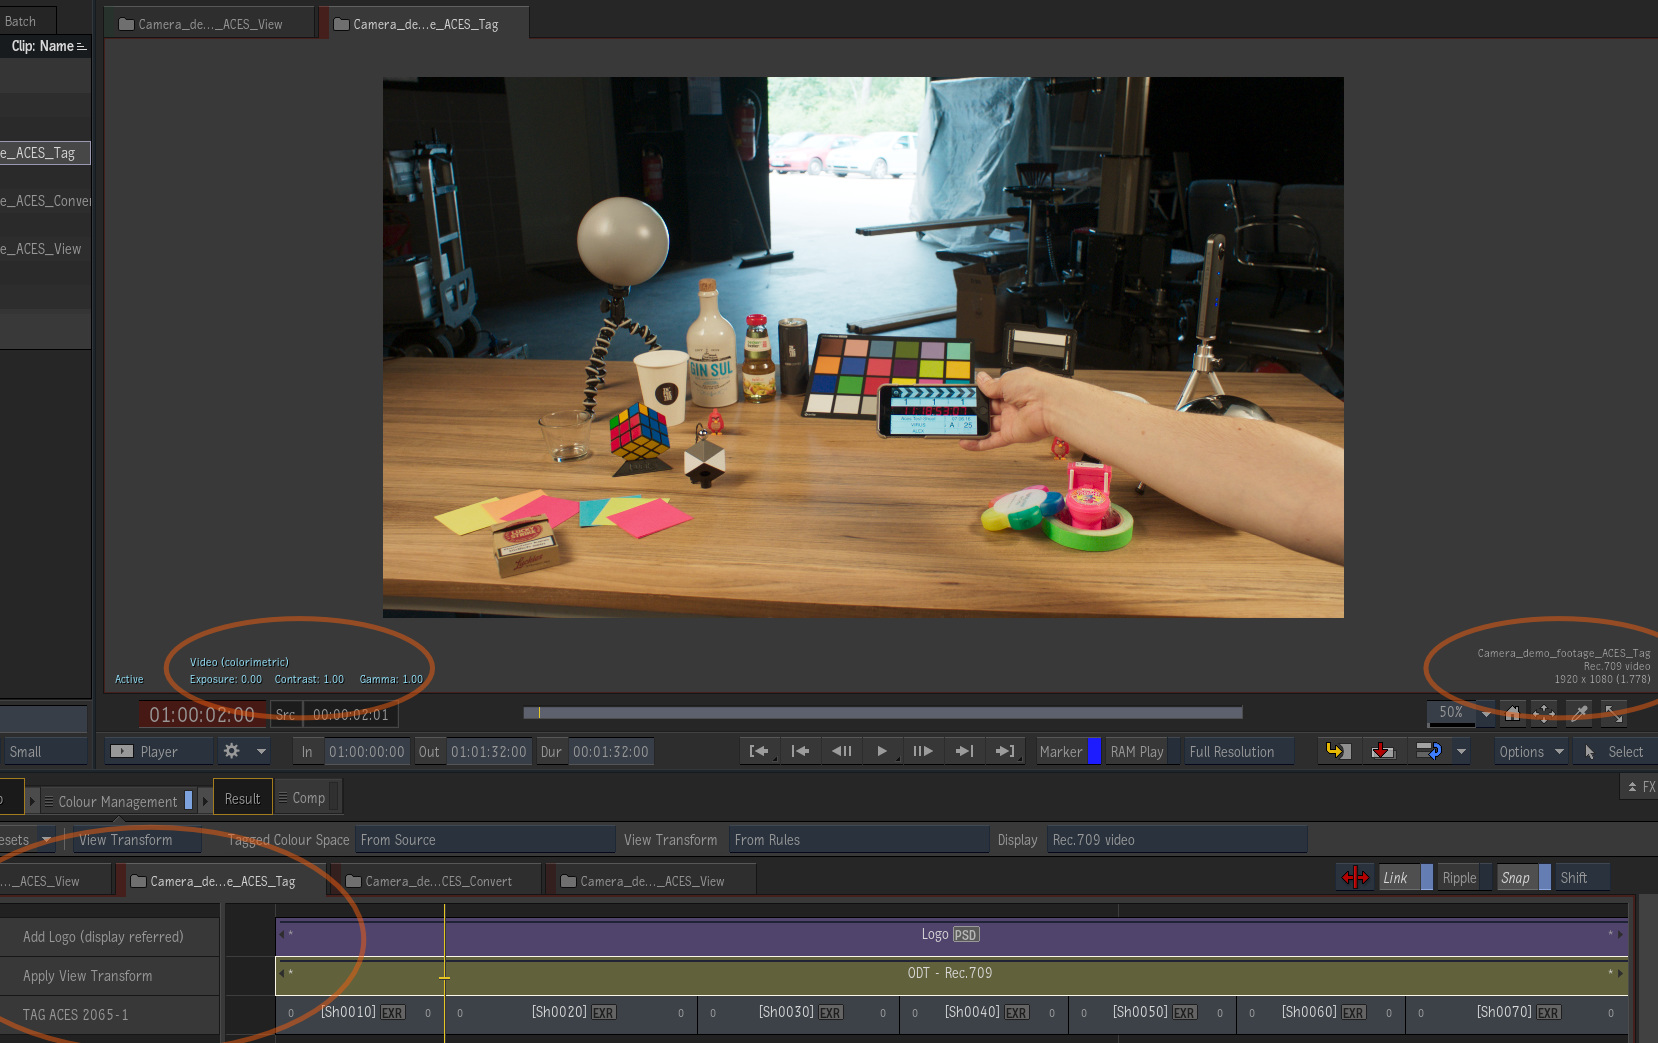
Now I can add any logos and supers on top of the image and everything works like it always has – in a display referred workflow.
Notes on the “TAG ONLY” workflow
- The flame archive contains the ACES 2065-1 files.
- I could easily change the display device and the switch to another ODT.
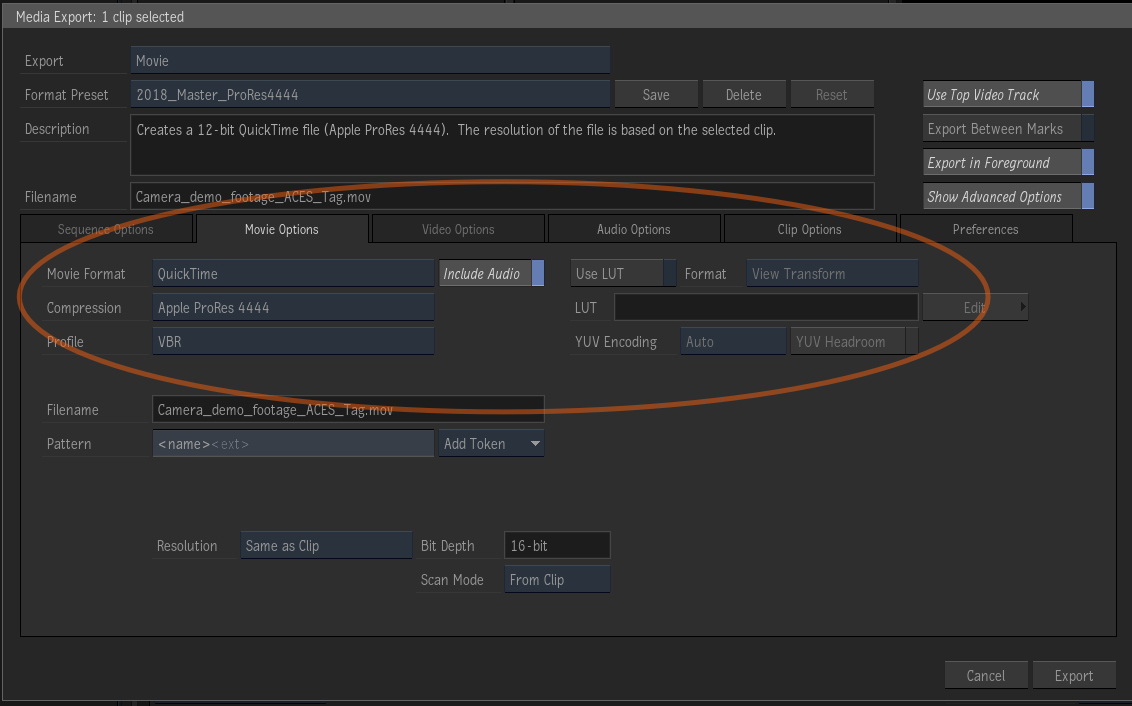
- Exports from flame don’t need any thought about which colorspace to choose, because it’s all handled in the timeline.
- Before working on any segment in the timeline below the ODT be aware to convert first to the working colorspace ACEScg (AP1) – do the compositing work and convert back to ACES 2065-1 (AP0) to avoid unwanted behavior of tools.
- Be aware of high scene linear light values and scaling algorithms that sharpens the image if your footage is bigger than the timeline sequence resolution. This might lead to artifacts around highlights.
- Project “Cache and Renders” should be uncompressed and support EXR and or RAW
- Project default bit depth should be 16-bit floating point
AUTO CONVERT – Compositing in ACES
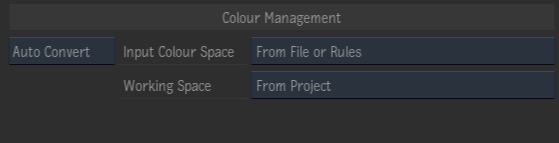
The option “Auto Convert” reads the color space information in each filetype and applies the right IDT depending on the “Import Rules” in the preferences. The working space is ACEScg.
By the way, this is the default behavior that Nuke uses.
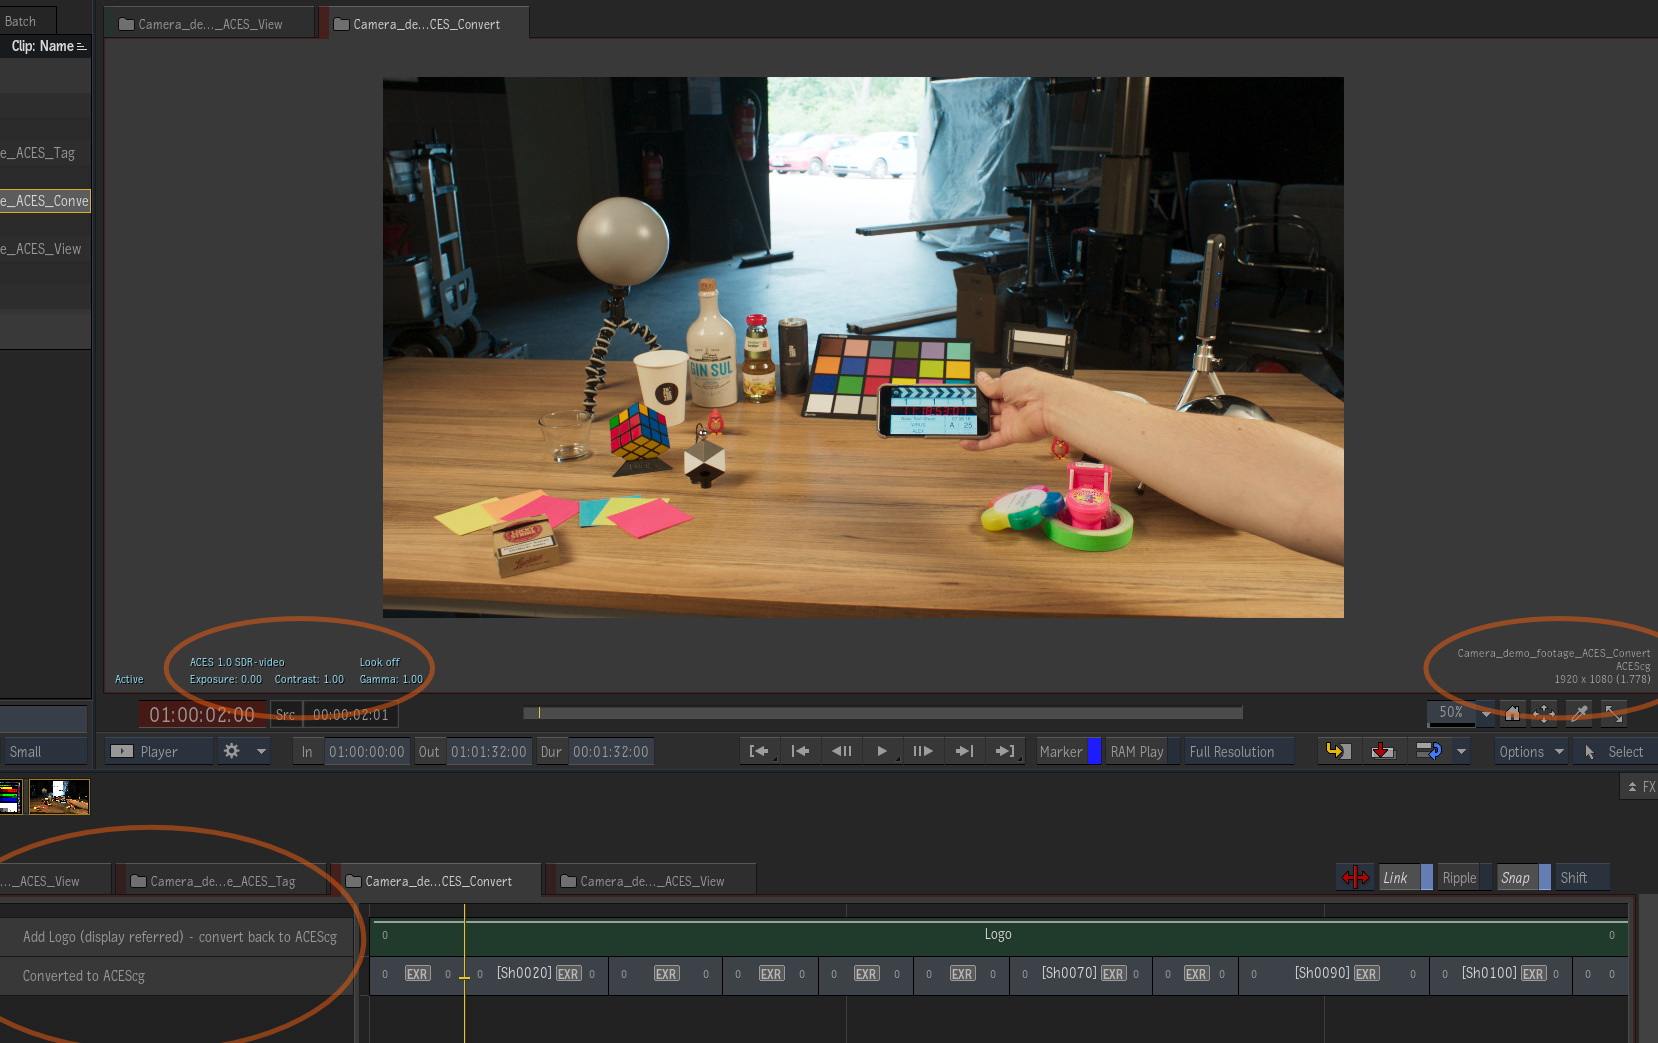
Do not mix “Auto Convert” and “Tag Only”. This leads to problems. Let’s assume the PSD logo is still only tagged, in this case with the inverse ODT of Rec.709, but not converted to the working colorspace. I can’t mix scene-referred and display referred material without compromises or a loss of image quality. The end result “looks” the same, but inside the BFX I had to go from scene referred to display referred, add the the logo and convert back to scene referred. This approach clips values and the gamut.
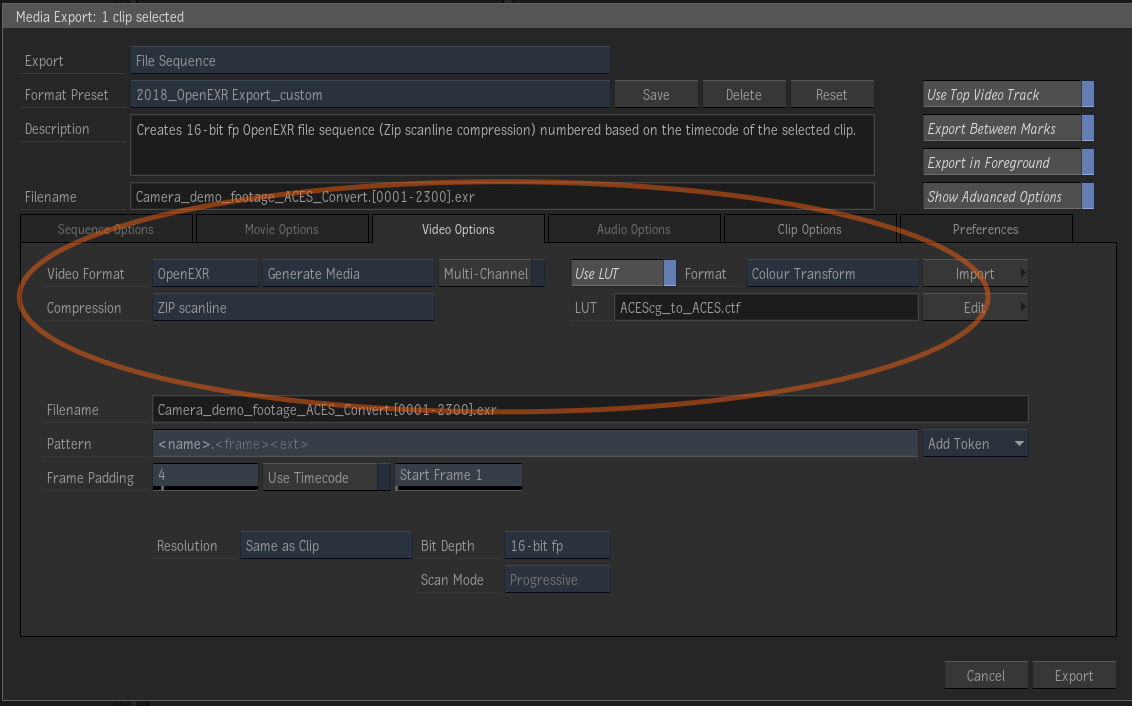
If you export this timeline as OpenEXR files in ACES, be aware that although these files are exported without an ODT, the ODT Rec.709 was baked in once during the image processing.
Instead the right way to import the PSD is to use “Auto Convert” as well. But this leads to different problems:
- The Logo is meant to be added in a display referred environment. Adding it in a scene referred will lead to a different result.
- The sRGB/Rec.709 gamut of the PSD will be placed in the working color space ACEScg which is a lot larger than sRGB/Rec.709. Thats why the colors look more dull and desaturated. Check the color gamut with Blender article here.
- The look of the logo will be different. You can try to match the look, but it won’t be exactly the same.
Adding a logo in a scene referred environment is like taking a photo of a screenshot or a print out of the logo and hope that the photo will look the same as on the screen before. The colors and the brightness of the logo is now depending on the exposure of the photo.
But in this way I work the whole time scene referred in ACEScg. The ODT is only applied once as a “View Transform” on the display or baked in for a display referred output in a ProRes for example.
This allows different outputs when needed.
Imagine the whole project is still ungraded and forget about the added logo for a moment, this would’t make sense in this step. But if needed the whole film could be exported as a DPX files or a ProRes4444 in Alexa LogC (or any other camera log format) for a grading in Resolve in a non ACES setup. Note that this steps also might clip scene referred values and the gamut depending on the input transform that is used. I made a list of my most used camera color spaces and the scene linear values that they support.

Notes for “AUTO CONVERT” workflow
- Project “Cache and Renders” should be uncompressed and support EXR and or RAW
- Project default bit depth should be 16-bit floating point
- I find it hard to use the Color Warper (as of version 2018.3) in an ACES environment. I got confirmed at one IBC in a meeting that the Color Warper is expecting a display referred input.
VIEW TRANSFORM – converting any scene referred colorspace to a display referred colorspace at the ingest stage
The third way is applying a view transform at the media input stage.This makes sense if you don’t need to work with any scene referred ACES or native camera colorspace material once its imported. This could be the case with doing a conform of ungraded camera footage first that you want to replace later with graded footage. Also for ACES material flame will work just like it always did in the past when we all worked with display referred material.
It makes it easy to handle the footage in flame and add supers and logos for example. But at the cost of “loosing” the ACES color gamut and dynamic range by baking in the ODT in the media ingest stage. Still you can change the color management for any segment, so nothing is really lost.
Notes for “VIEW TRANSFORM” workflow
- Project “Cache and Renders” works with compressed formats like ProRes
- Project default bit depth can be 10-bit
- Logos don’t need to be imported with a “View Transform” !
Conclusions
Flame is so flexible when it comes to Color Management. This strength is also it’s weakness, because you have to know what you are doing. One mistake and the whole color pipeline can break.
Whereas Nuke for example works like the “Auto Convert” option, but you never have to think about connecting color spaces. In a write node I choose ACES 2065-1 and the system takes care of the ACEScg to ACES conversion automatically. And from presentations of Baselight I like the so called “Color Journey”. This seems to be a helpful tool to understand the color pipeline better.