This page is about the “quality” of light when using an HDRI for image based lighting. This is not an ACES only topic, but as the ACES RRT can handle high dynamic range imagery better than a standard sRGB view transform, it felt right to have it as a part of Learning ACES.
On this page I will focus on:
Mistakes I made setting up a scene in Blender 🙂
Setup of a new test scene in Blender 2.8 beta to check out HDRs.
Comparison of Theta-S vs. DSLR HDR image quality when it comes to dynamic range.
“Fake” in a new sun into a low dynamic HDRI and the side effects of doing that.
A collection of HDRIs from the Theta S, render results and balanced renderings.
Preparation: finding the right exposure in Blender without an HDRI
When taking a photo all materials, “shaders” and the light are already set by nature.# A camera is used to a find the right exposure and take a picture of a scene.
In Blender I can set materials, shaders and the intensity of the light. Without measuring the light it is easy to mess up a scene’s exposure.
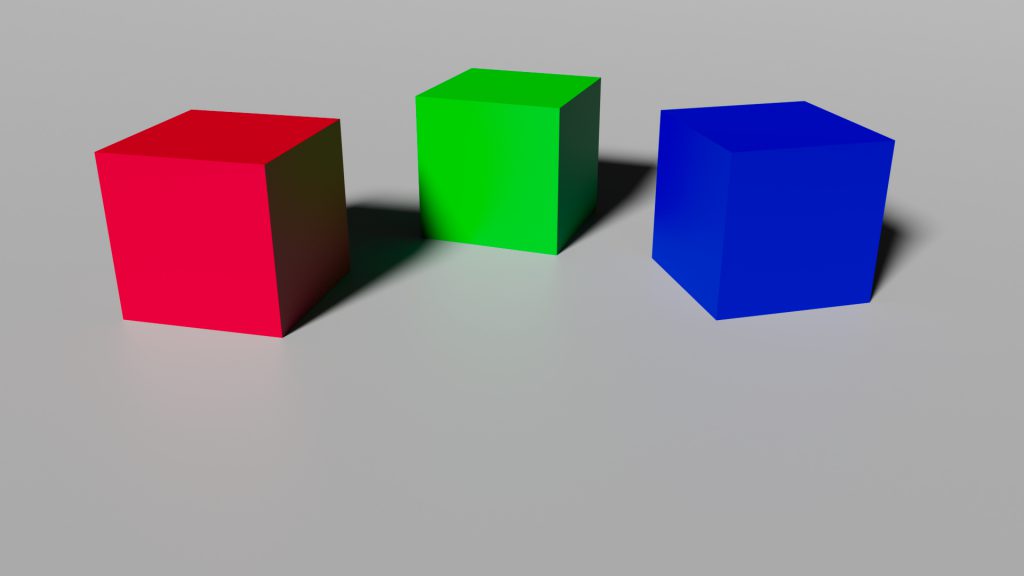
This was my first test render for the page: 5. UNDERSTANDING GAMUT WITH ACES AND BLENDER.
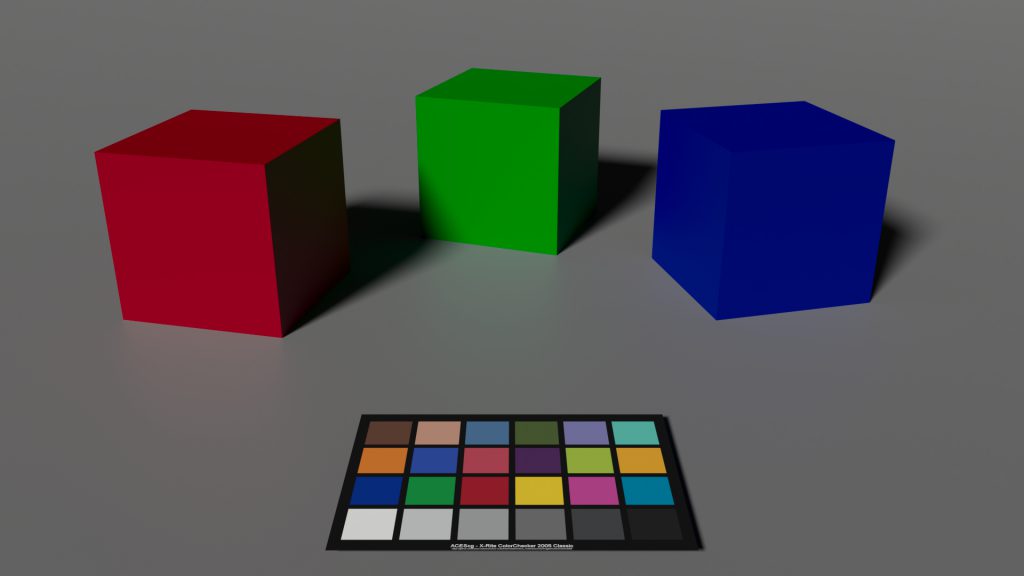
When I started thinking about the UNDERSTANDING GAMUT WITH ACES AND BLENDER page I created this very simple scene with the cubes and the ground having each 0.180 for the base color in either R, G, B or all of them. A white (RGB = 1.0/1.0/1.0) Blender sunlight with a strength of 15.0 is lighting the scene.
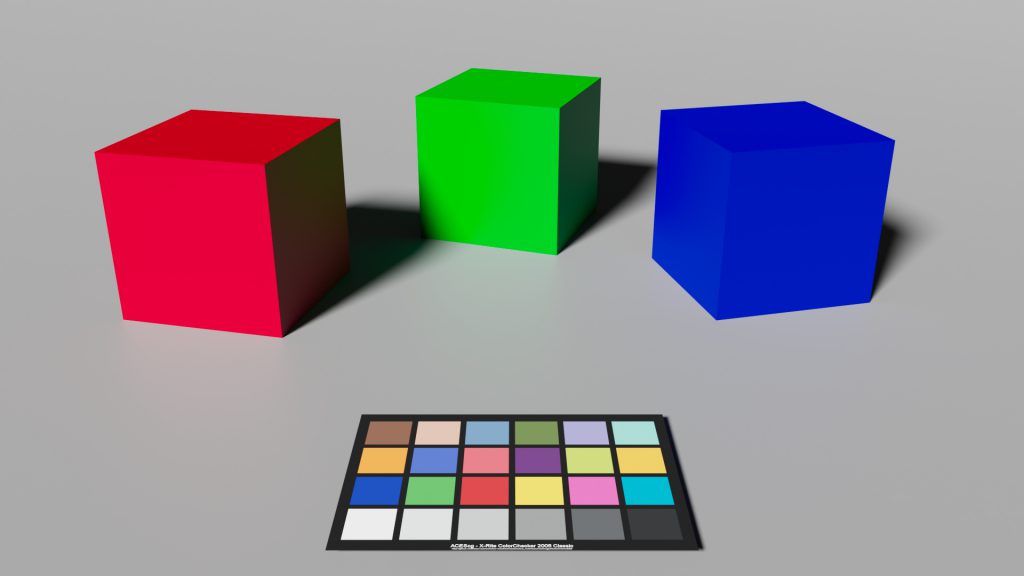
A colorchart makes the bad lighting visible. The middle grey patch on the chart is at 0.5 instead of 0.18.
The addition of the Colorchart gives a reference about the exposure of the rendering. Suddenly the image looked over exposed. After adjusting the exposure of the rendering to match the 18% grey patch – the image feels under exposed.
Now the chart is at 0.18, but the whole scene looks quite dark. The strong shadows assume a bright light.
My day to day job is compositing with Nuke & Flame. How many times I had to work with renderings which felt somehow “wrong”. Playing around in Blender helped me to better understand lighting in 3D.
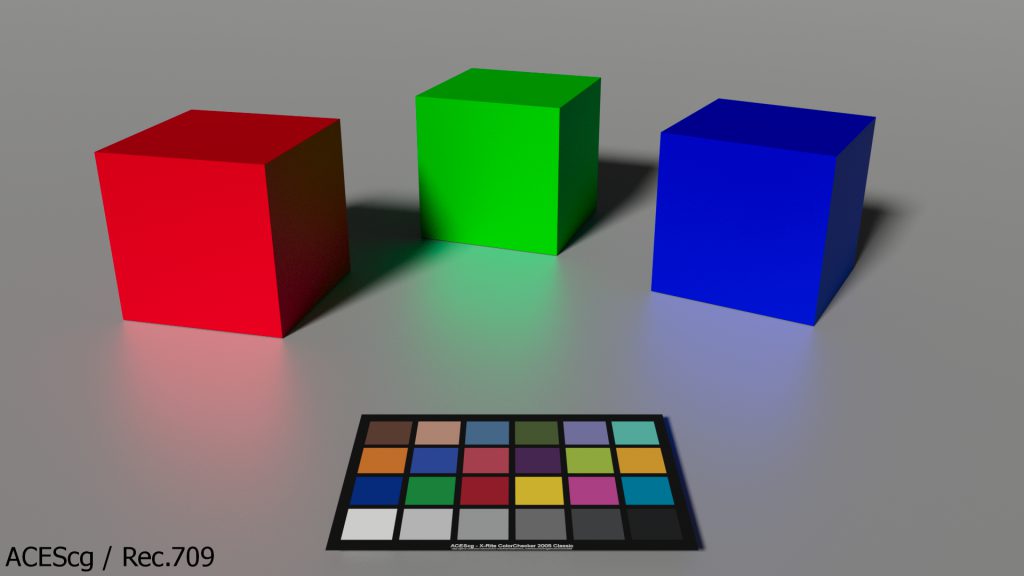
After changing the shaders and the light intensity I continued with this rendering for the UNDERSTANDING GAMUT WITH ACES AND BLENDER page.
Using HDRIs for lighting
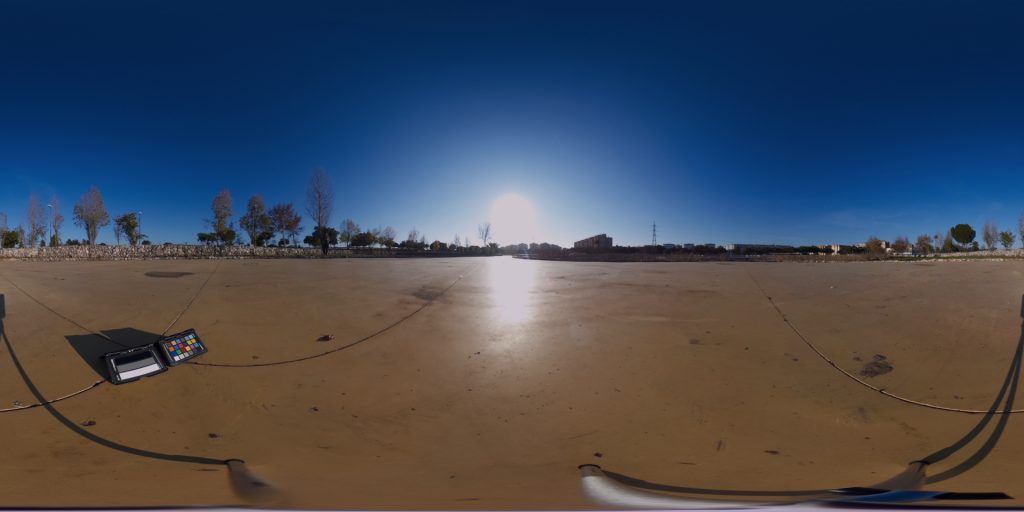
Especially easy to use and small 360° cameras like the Ricoh Theta are very tempting to use for creating an HDR instead of carrying around a big tripod, a panohead, the DSLR, the lenses, ND filters etc. And for indoor situations these small cameras can be great. But for capturing direct sunlight theses cameras are not well equipped. The comparison of the two cameras might be unfair – but it is often what you get if you don’t specify otherwise.
Theta-S HDR made from 6 brackets, but the “darkest” image looks similar to the result. The sun values are clipping around 3. The shutter of 1/6400, the fixed aperture of 2.0 and minimum ISO 100 limits this camera from getting more dynamic range in the sunlight.The Canon 5D HDR is made of 7 brackets and not really clipping in the direct sunlight. The values of the sun are around 3.000.
Prepping a scene for the HDRs.
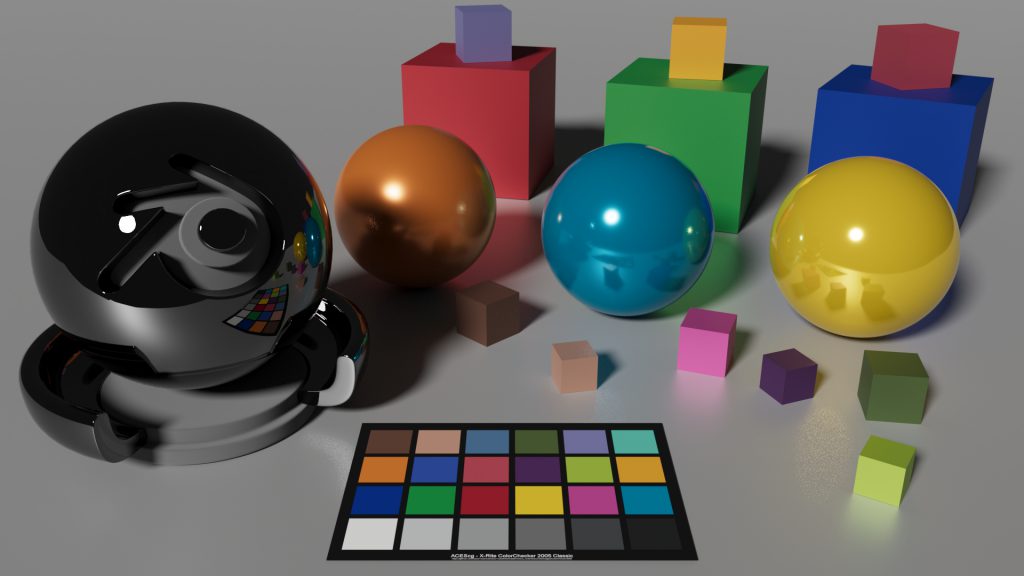
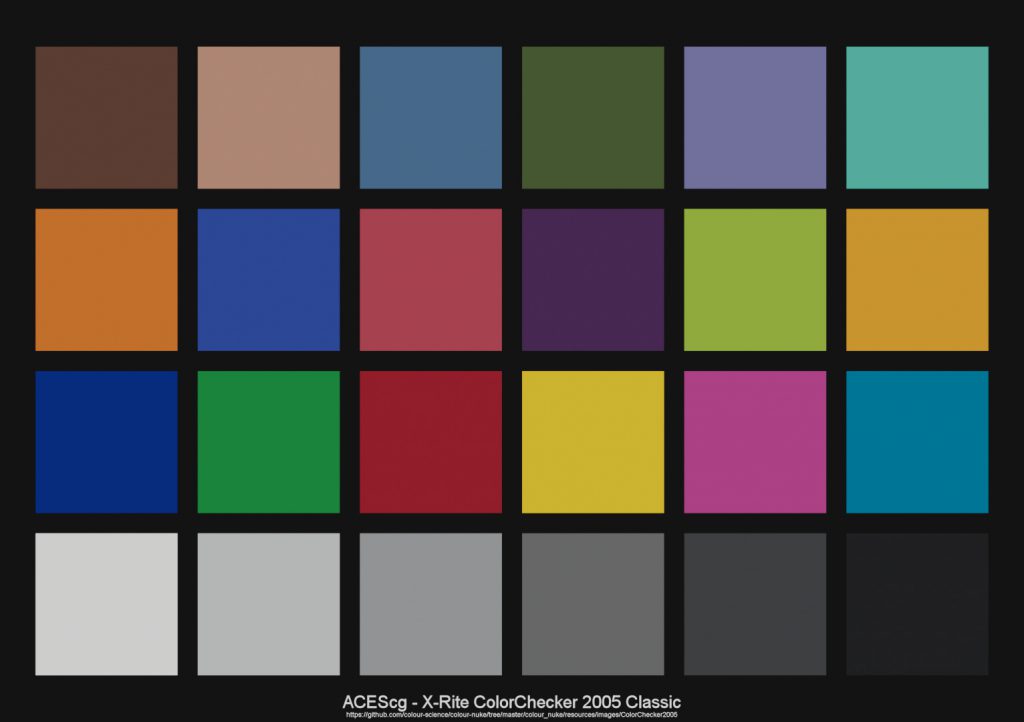
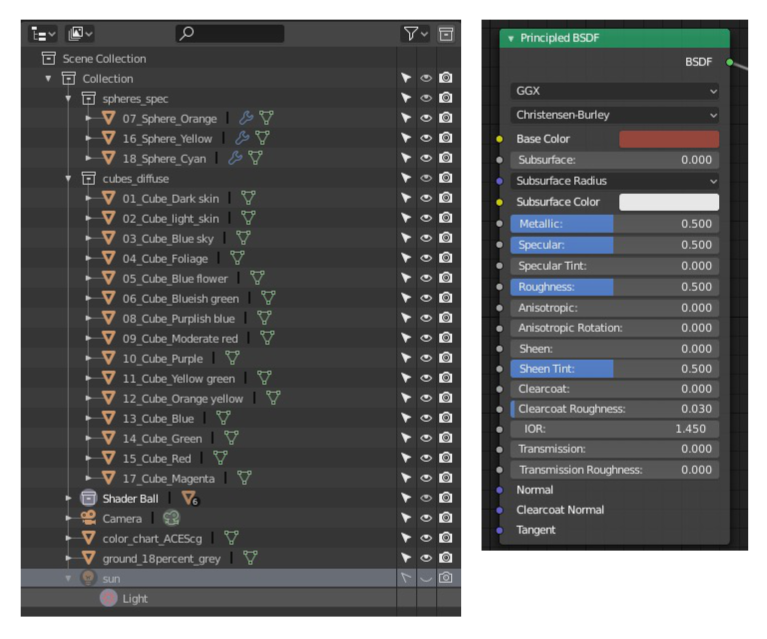
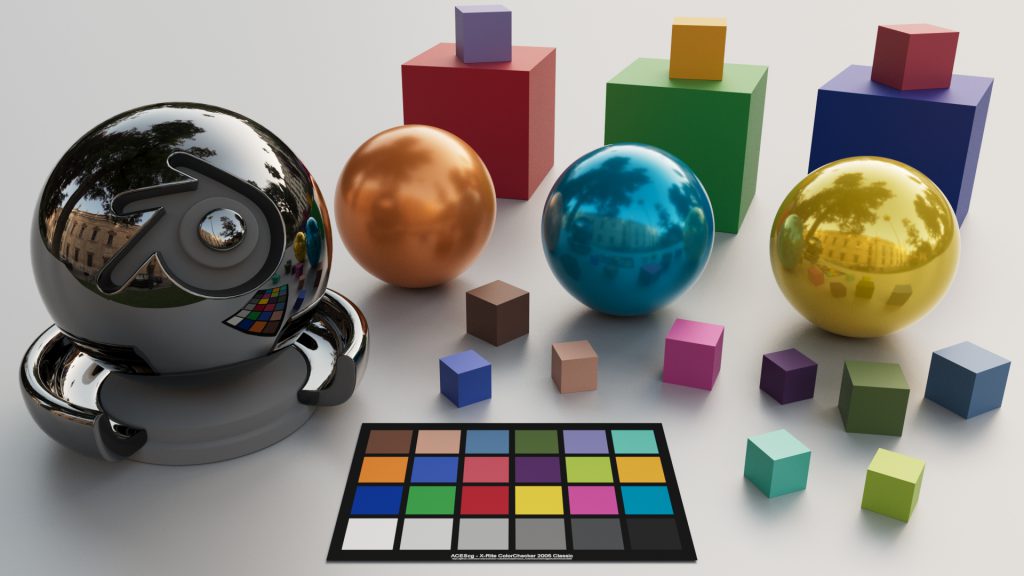
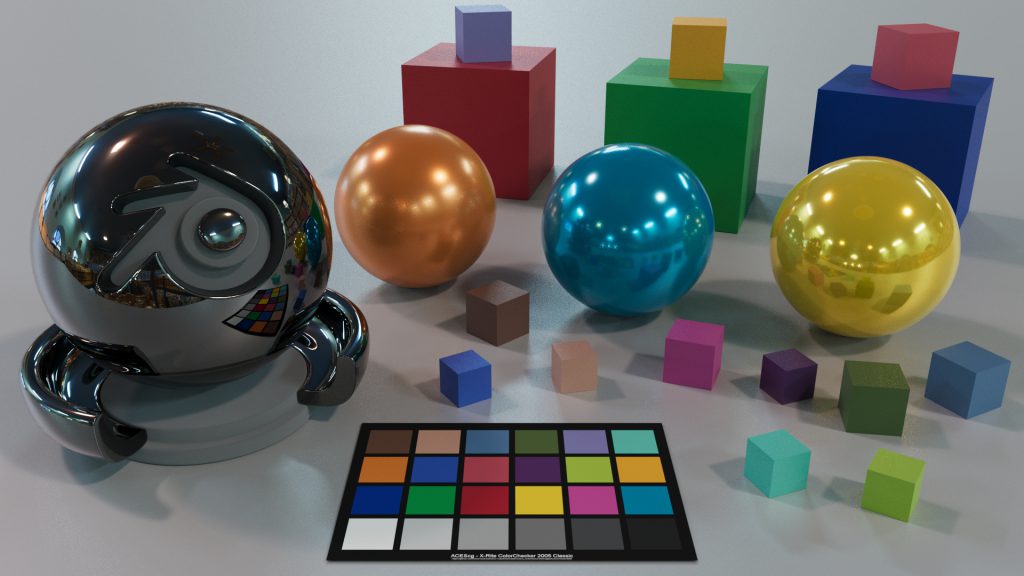
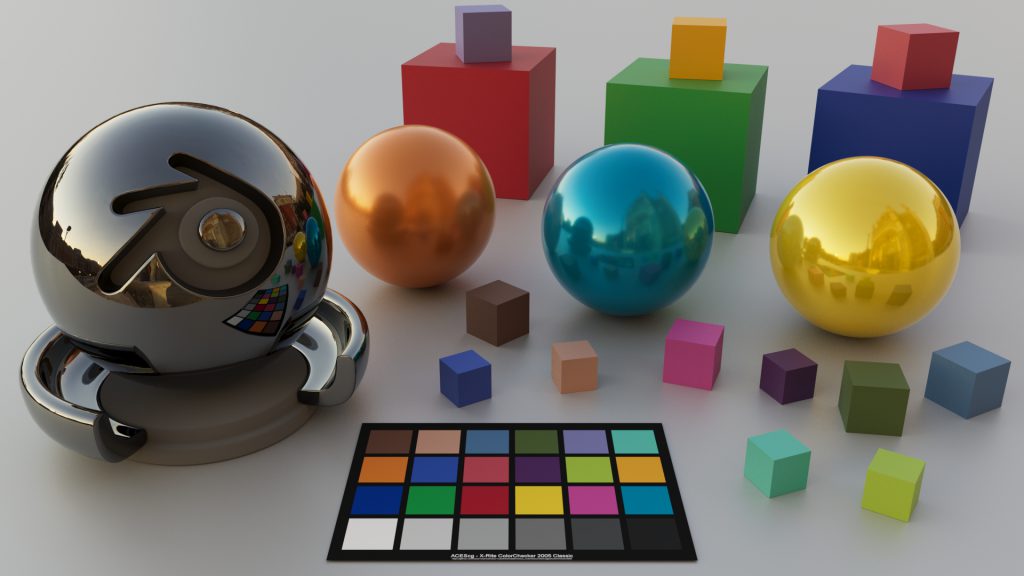
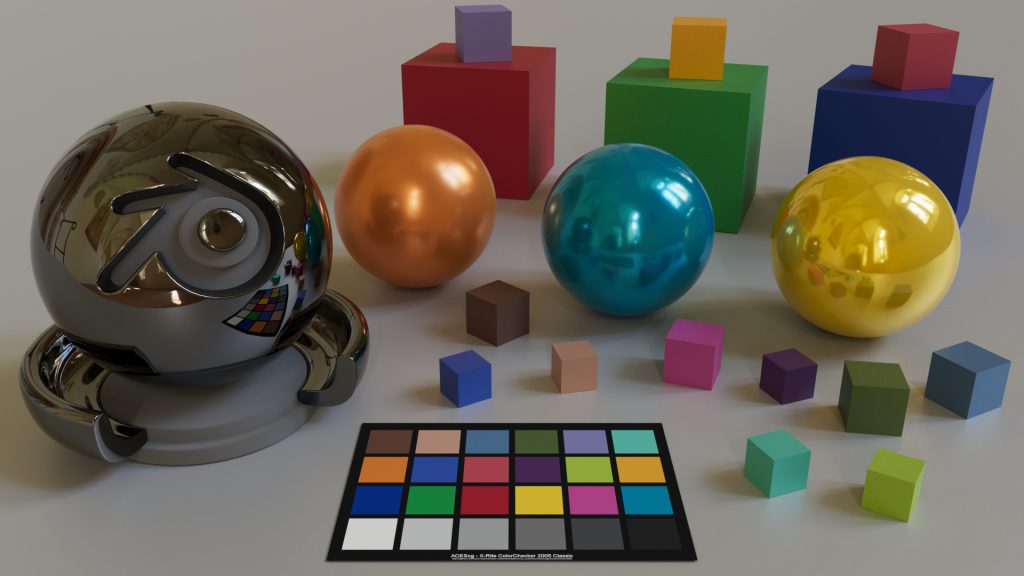
The Blender test scene with only pure red, green and blue cubes are not really natural colors. Thats why I added more cubes and spheres and assigned them the all the colors from the colorchart patches. Check the link to the ColorChecker – Wikipedia.
The Blender Scene and one Shader.All the cubes have the Principled BSDF shaders with the base colors of the colorchart patches. The spheres have different roughness settings and a clearcoat .
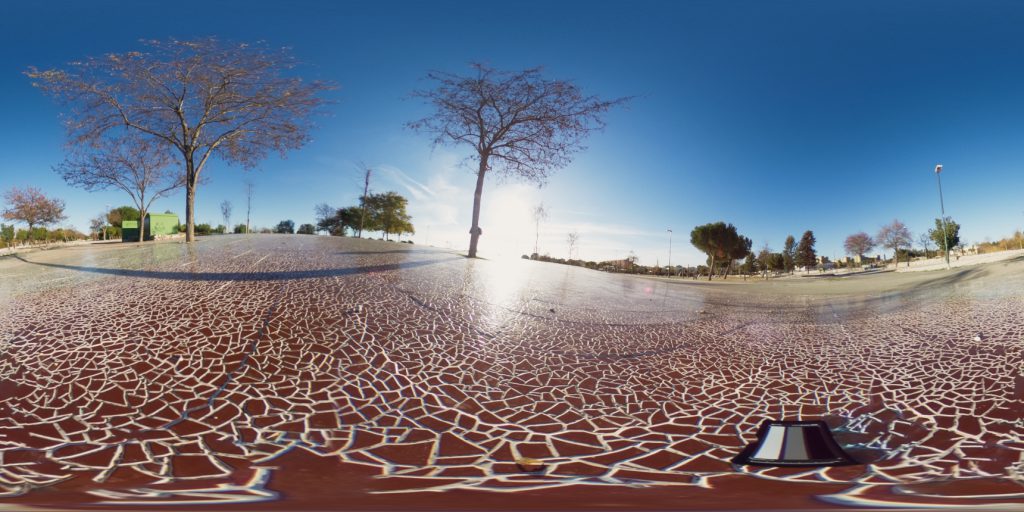
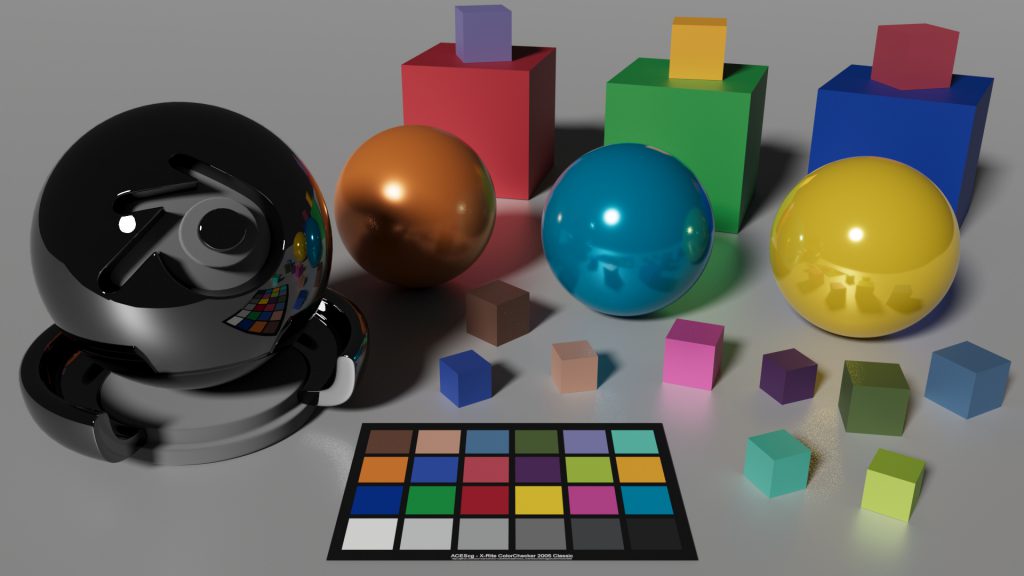
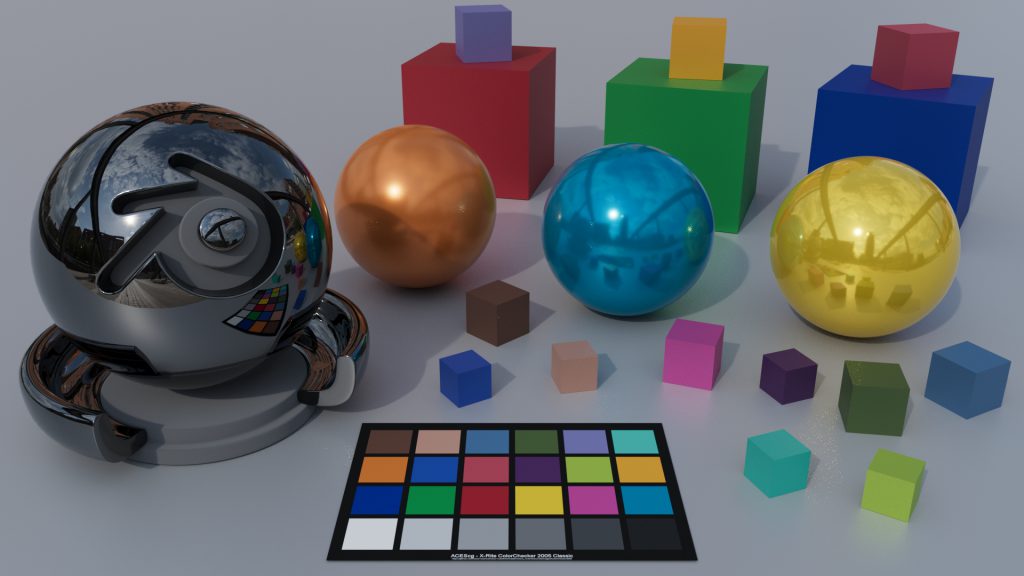
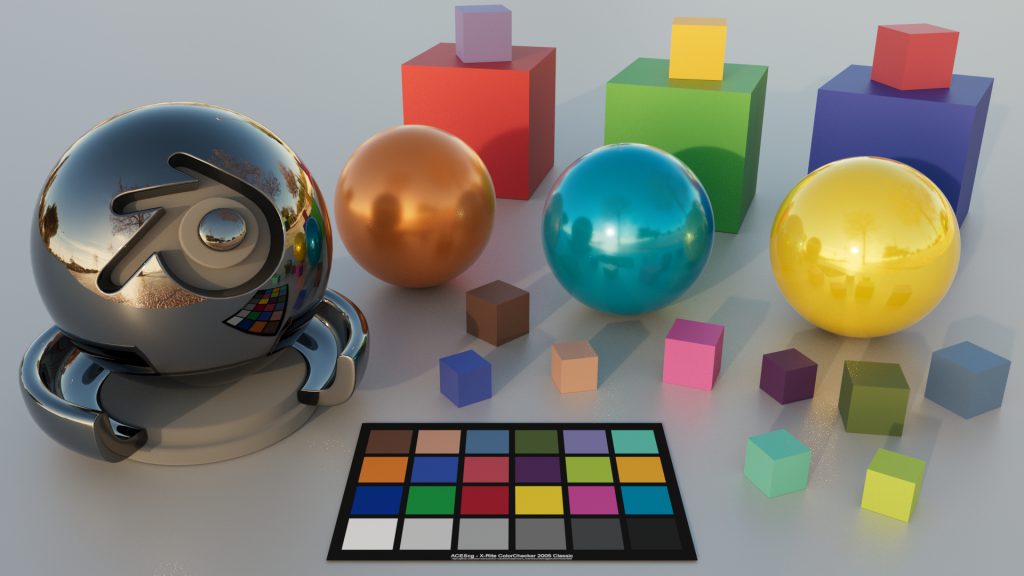
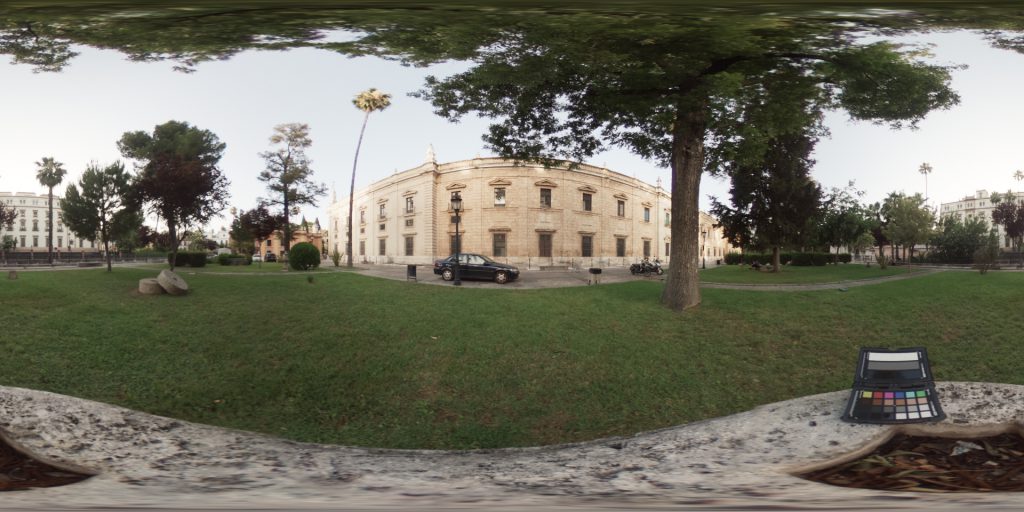
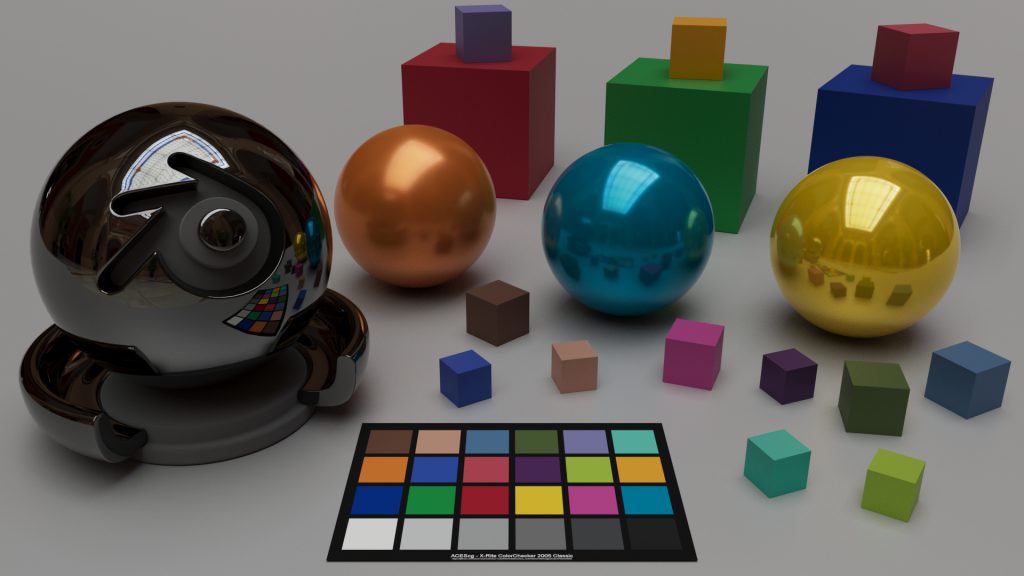
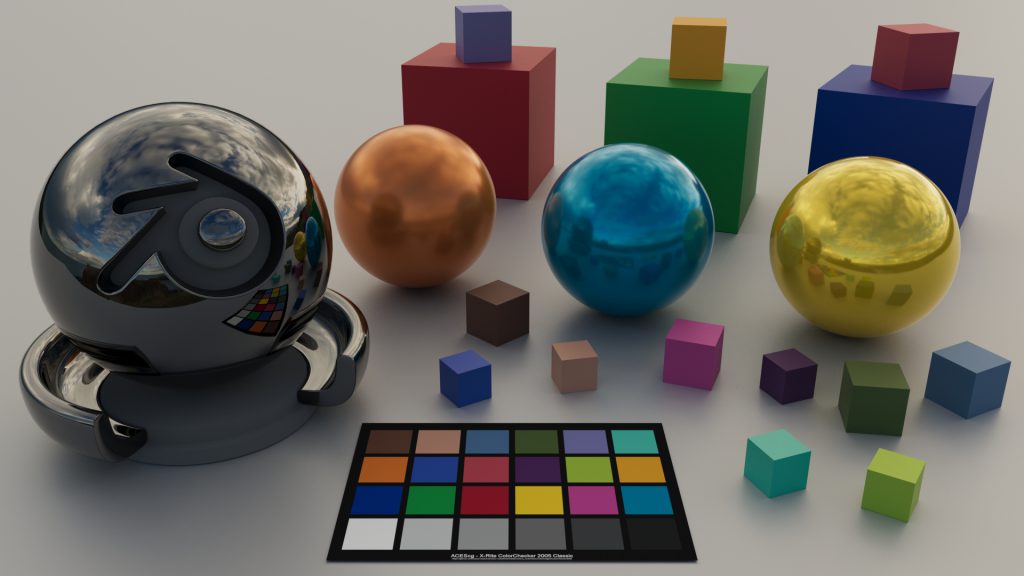
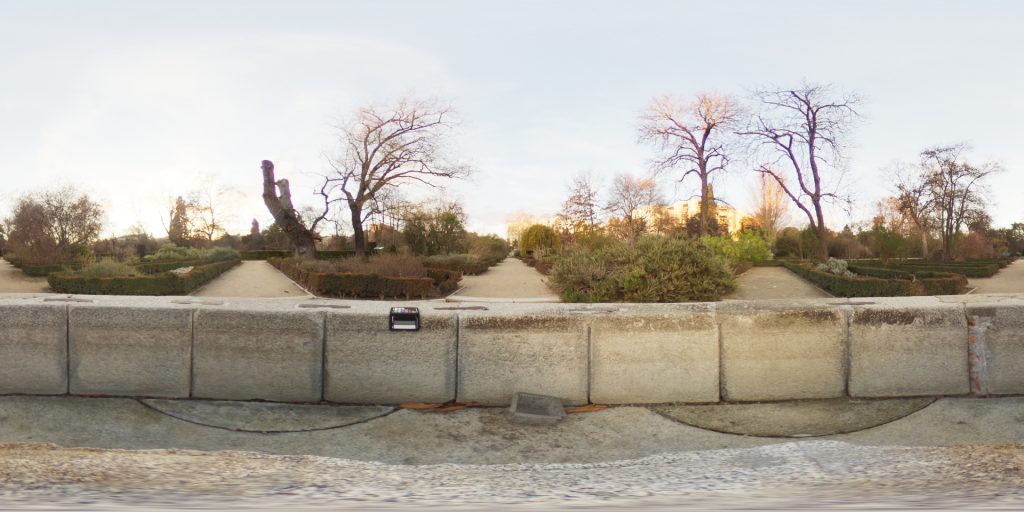
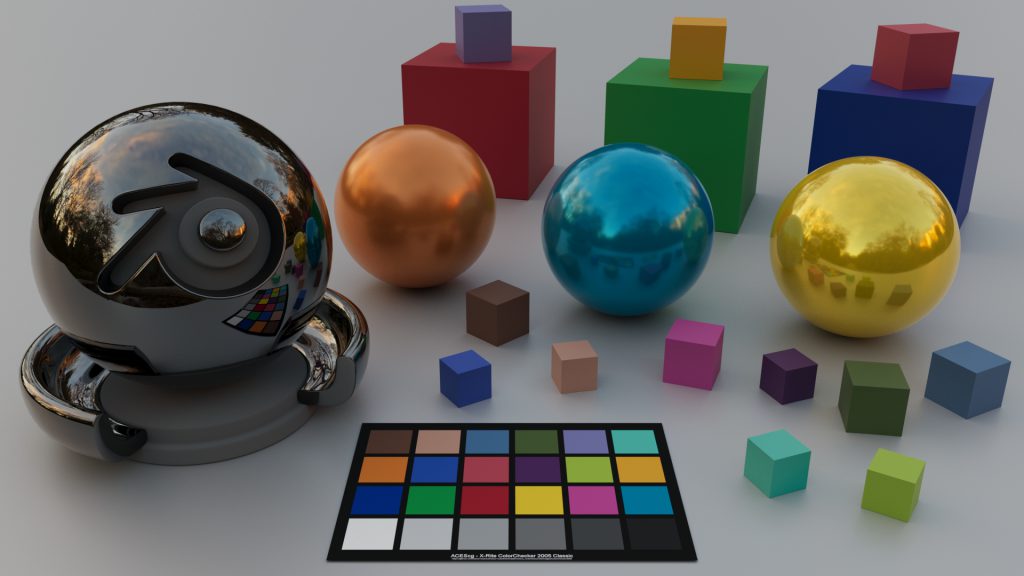
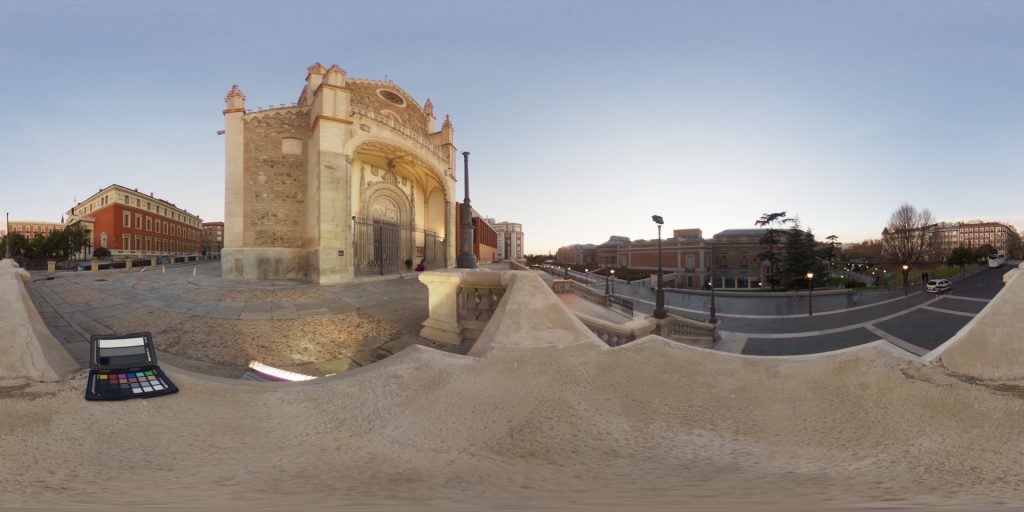
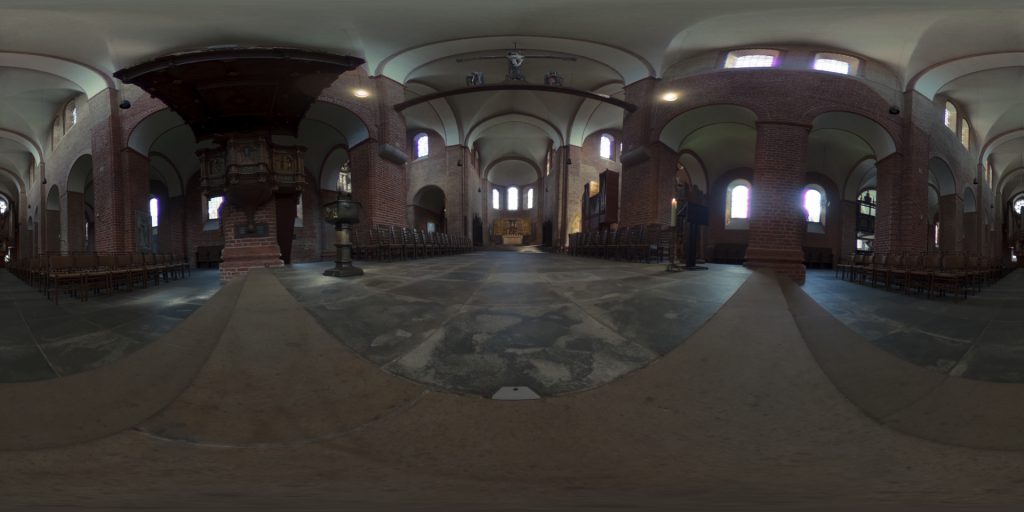
The Theta-S HDRI – Seville – Parque Miraflores
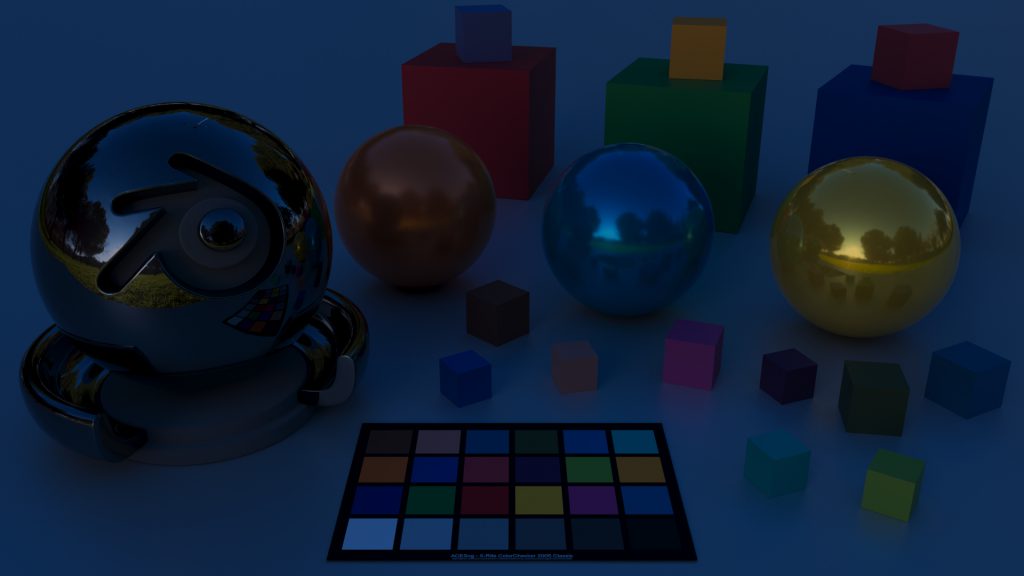
The sun in the Blender scene is turned off and the entire lighting is only coming from the HDRI.
This HDRI was taken in Seville on a sunny winter day on the 30th of December 2017 at 16:25. The low sun casts long shadows, which are not visible in the rendering.The rendering is very blue and light very soft, direct long shadows that are clearly visible in the HDRI are missing. The whole scene seems to be placed in a shadow corner instead of being out in direct sunlight. Balancing to the Colorchart and setting the 18% grey patch actually around 0.180 get a better feel of sunlight but somehow the power of the sun is missing.
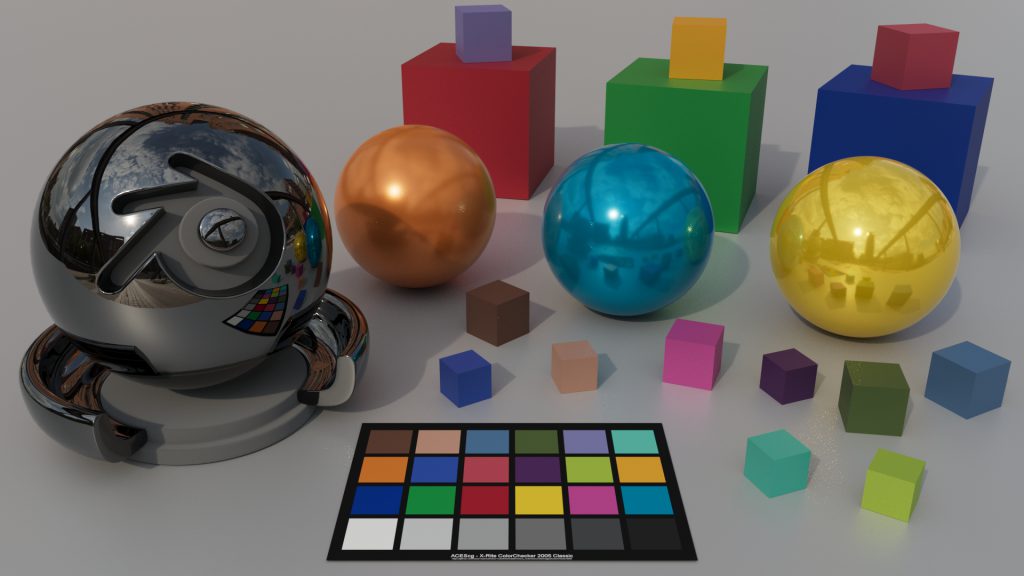
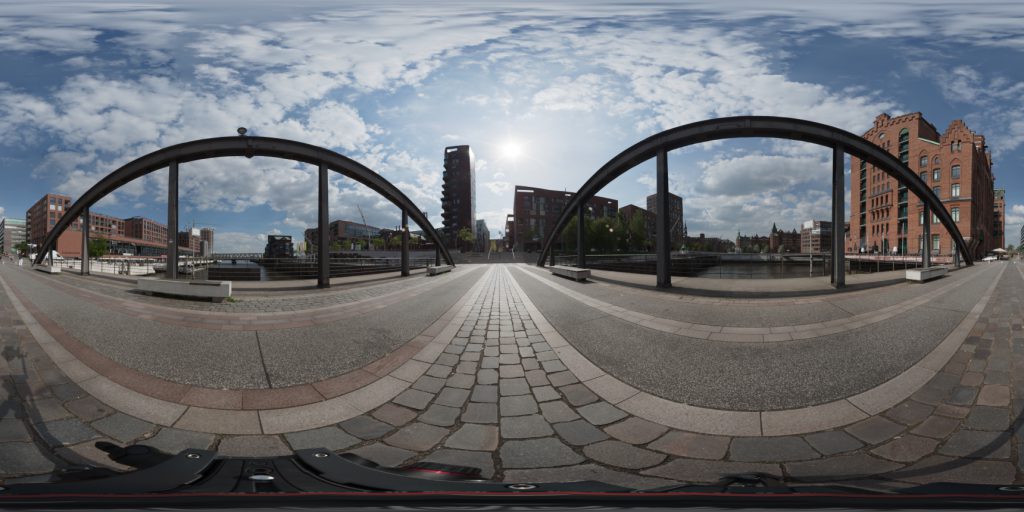
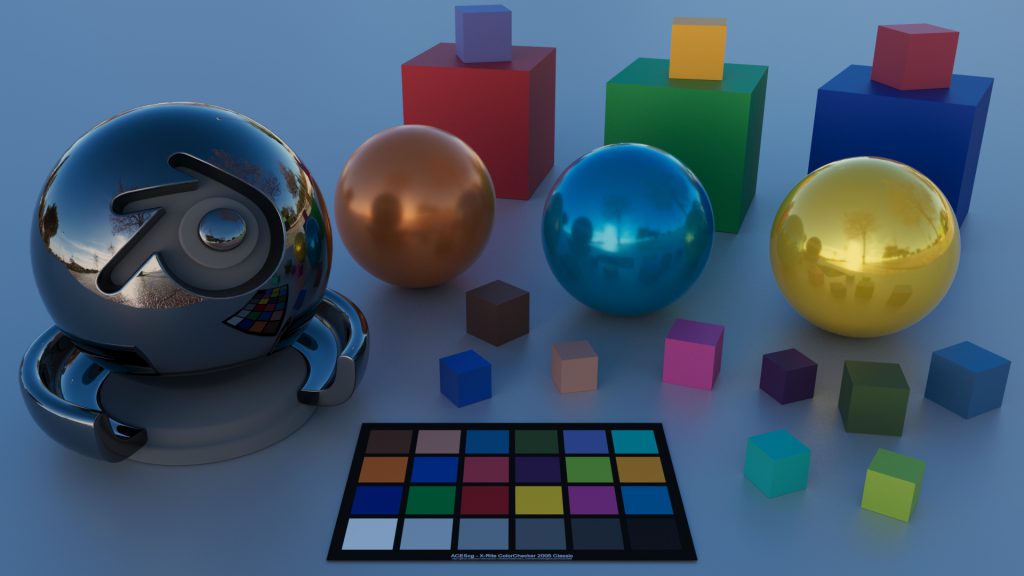
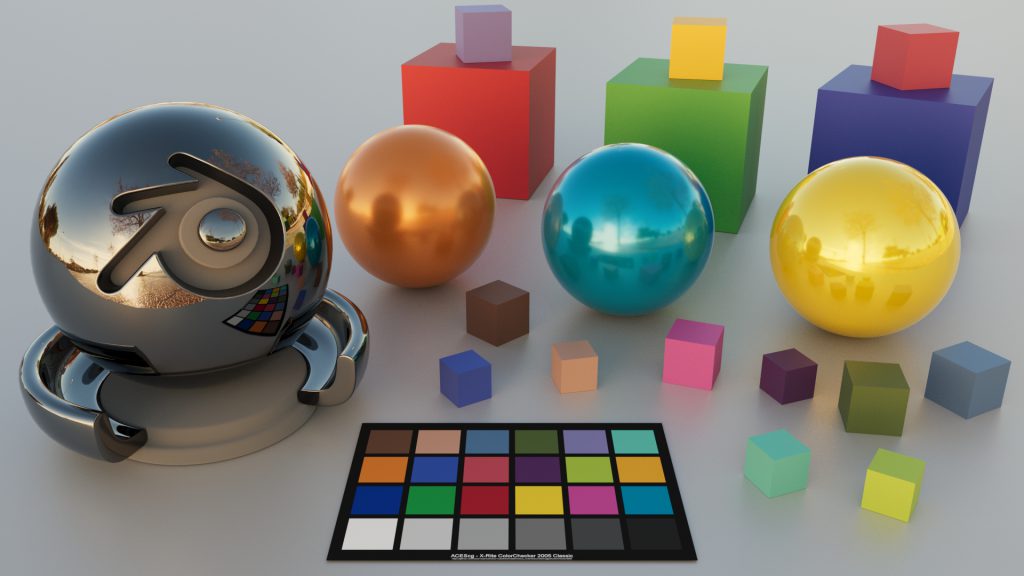
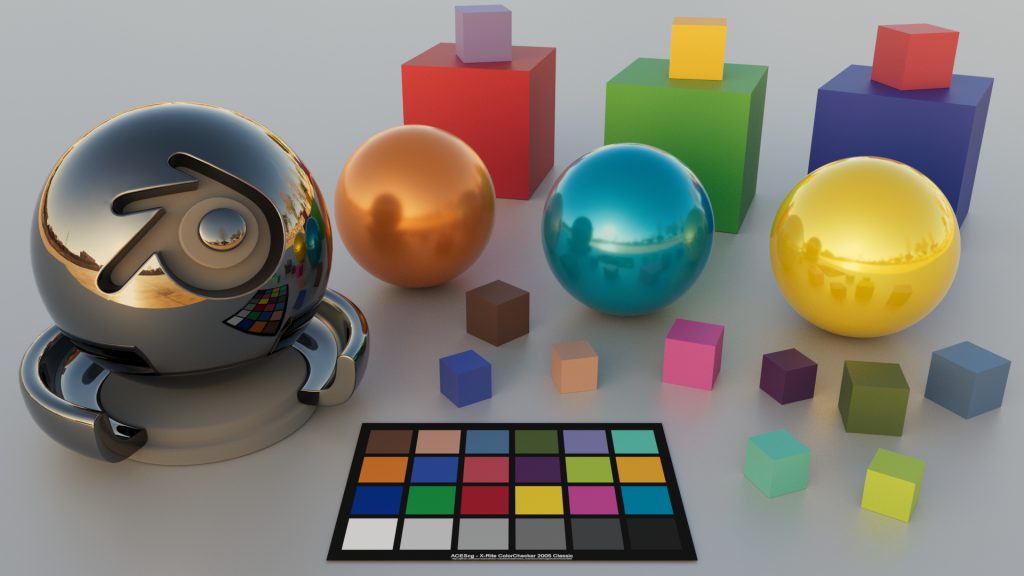
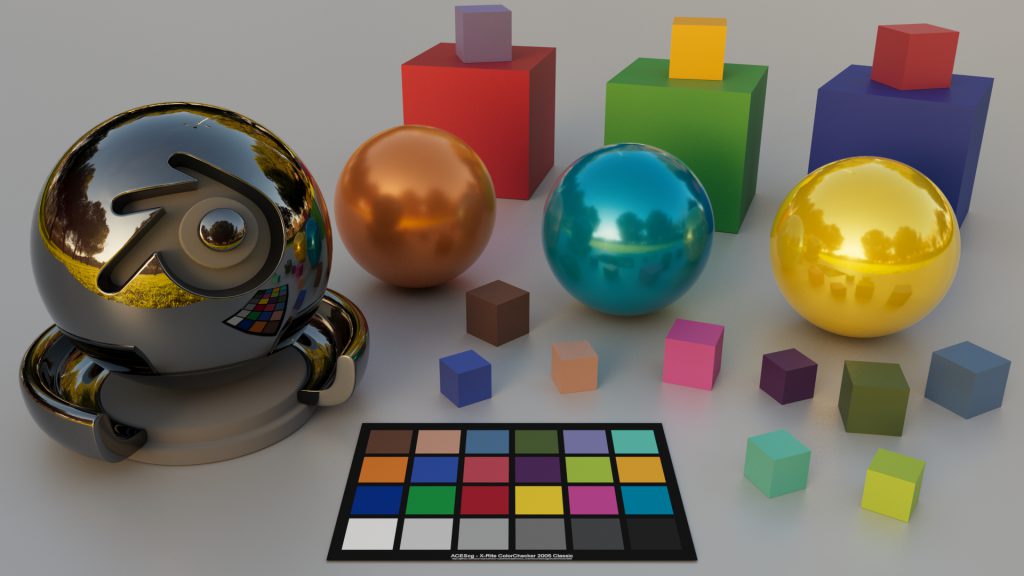
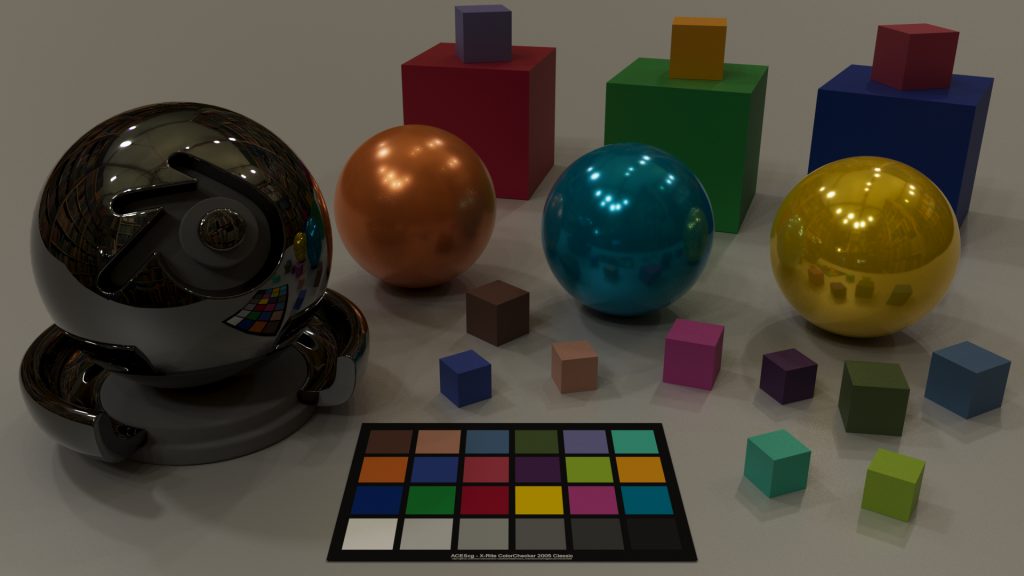
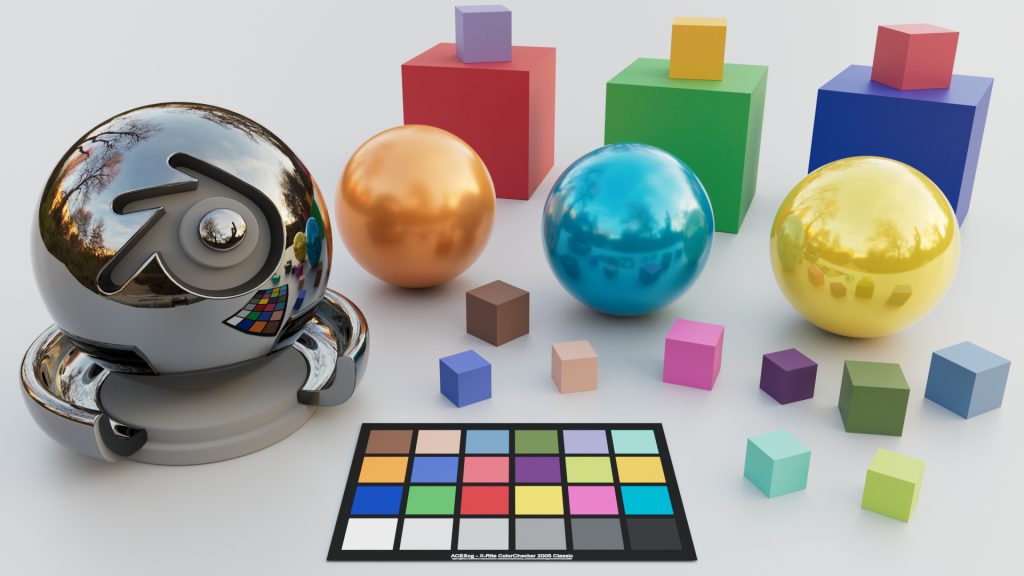
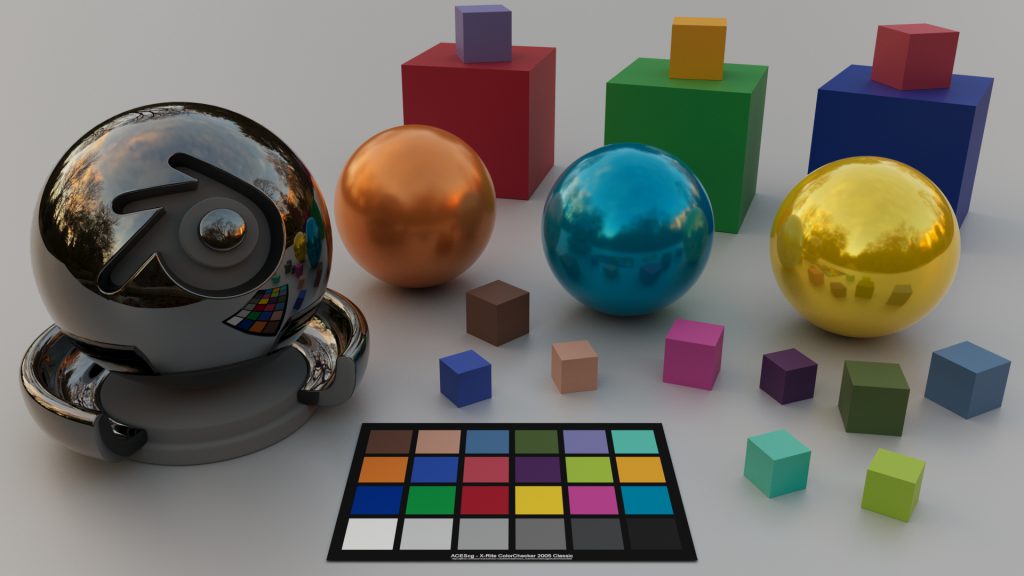
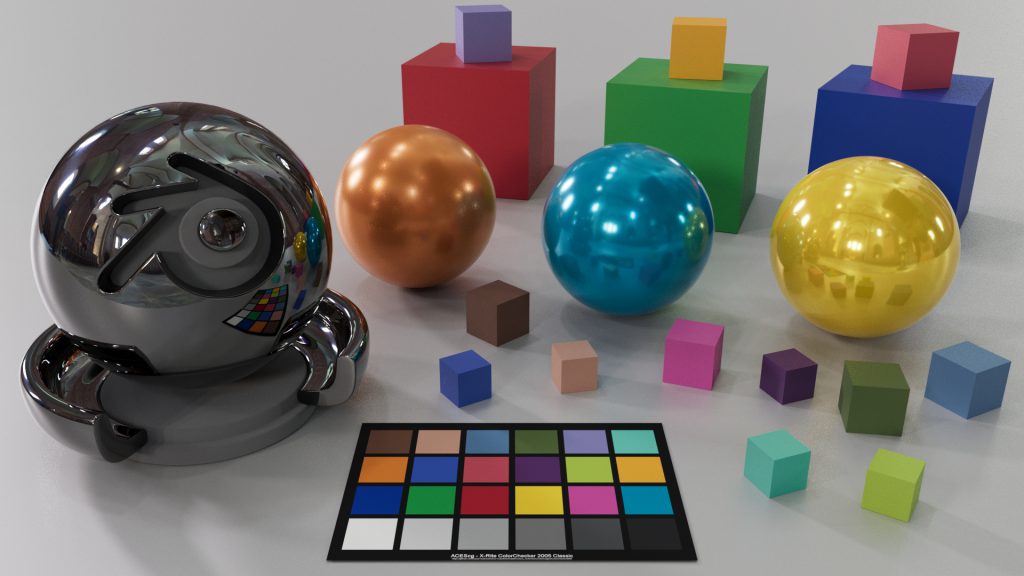
The Canon 5D HDRI – Hamburg – Hafencity
This HDRI was taken with a Canon 5D and additional equipment.The render result has a much better contrast, the objects casting a sharp shadow so that you can make out where the sun is coming from. The render has only a slight bluish tint from the sky.Balancing to the Colorchart is just taking out the blusish cast.This video shows both HDRIs from 100% to 1% of light intensity. At 1% it is clearly obvious how the quality differs between the two cameras and recording methods in this situation.
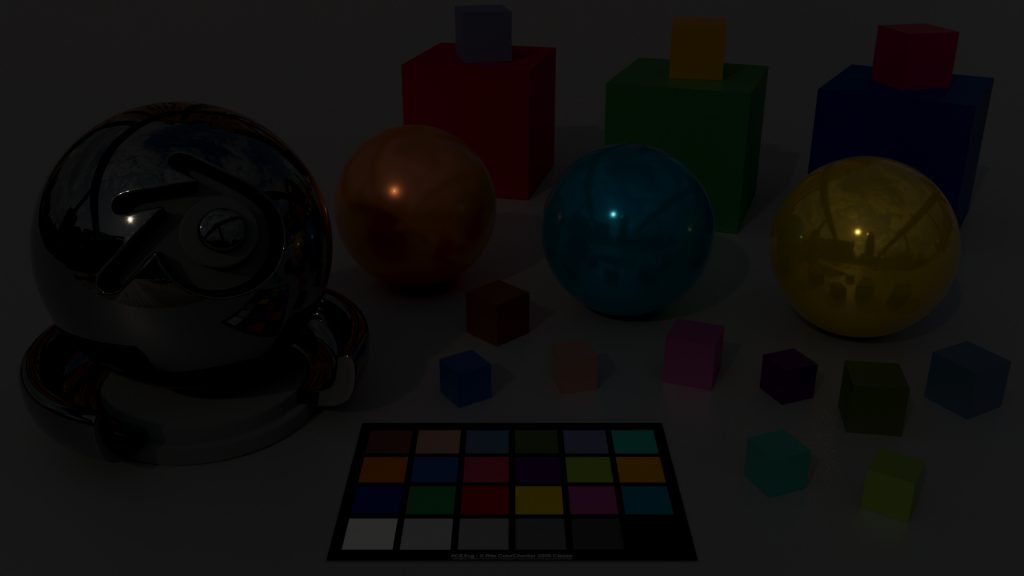
The balanced results of both renderings stacked.
The lighting looks natural.Especially the big cubes in the back have a weird light. Although the sun has so much less power, the area is actually bigger and the sky value are much closer to the values of the sun. Thats why the rendering was so blueish before the balancing step. Multipling the scene in Nuke by 0.05 show only 5 percent of the light. Everything is very dark, only the sunlight is still bright.This is only 5 percent of the light intensity. Some of the cubes seem to emit light, because they are still so bright.
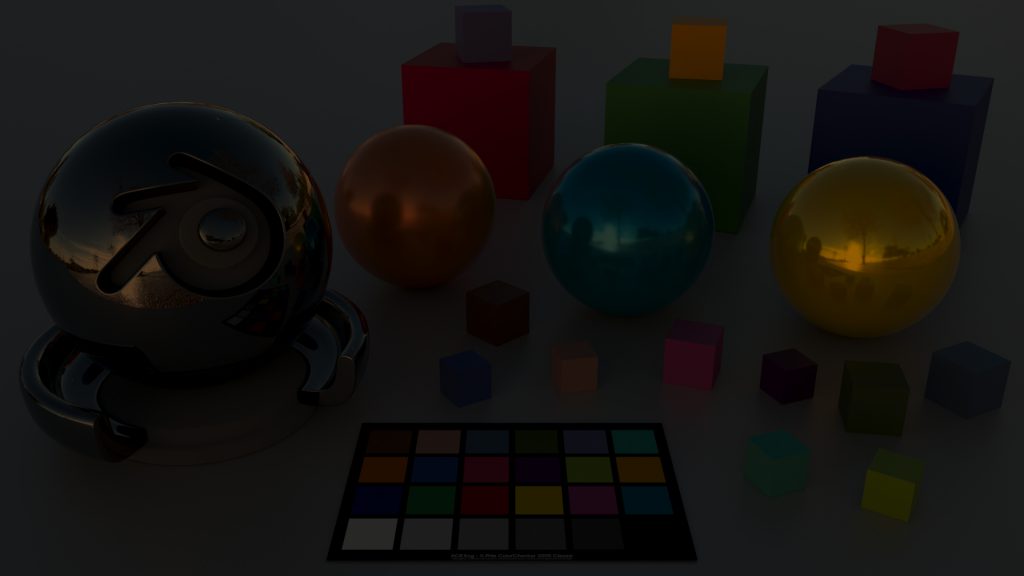
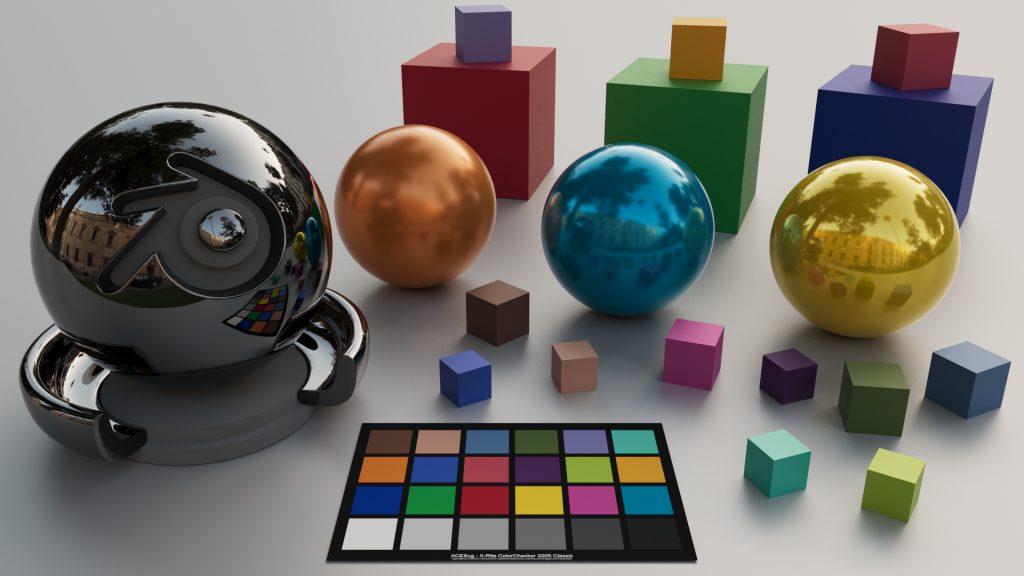
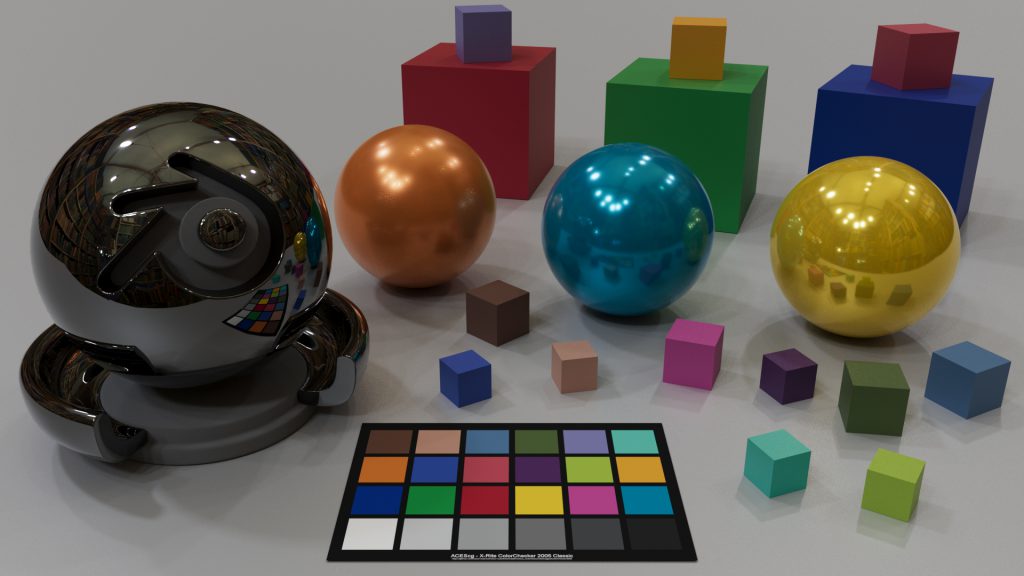
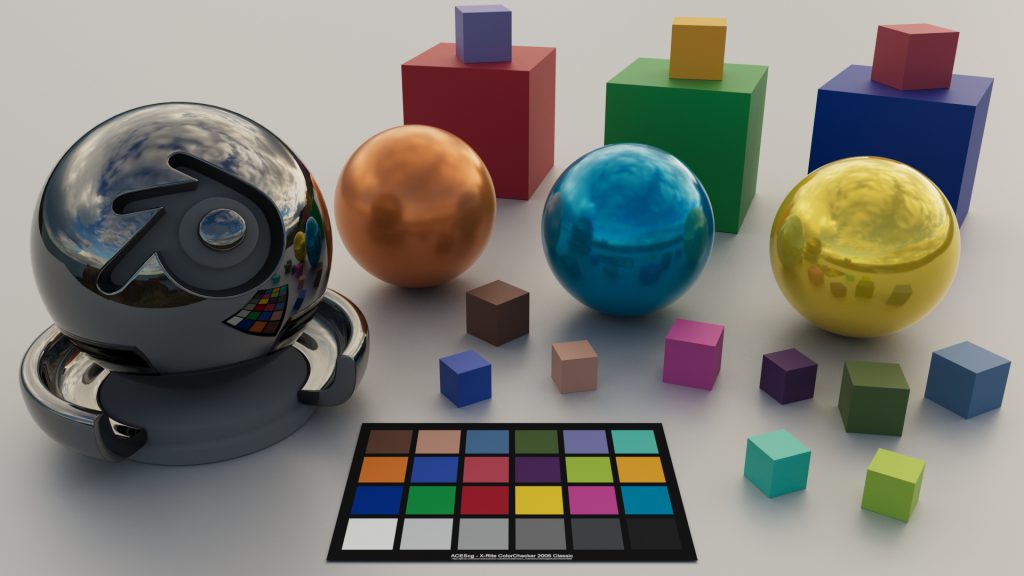
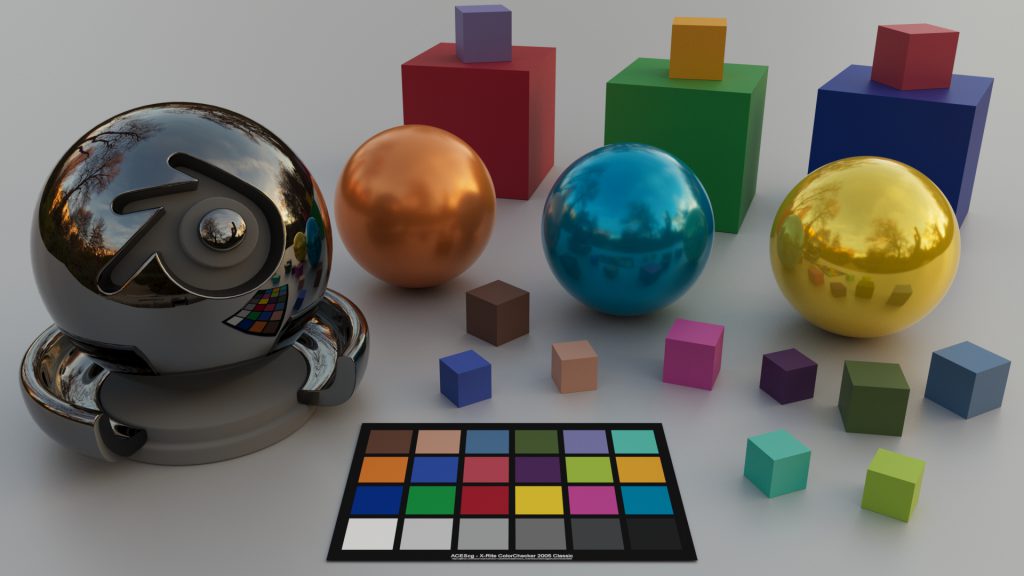
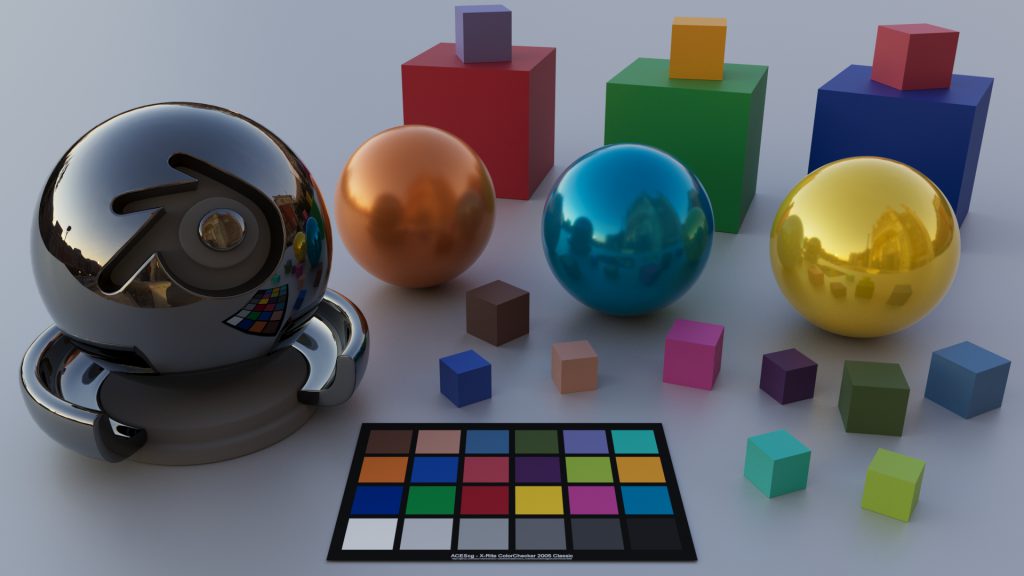
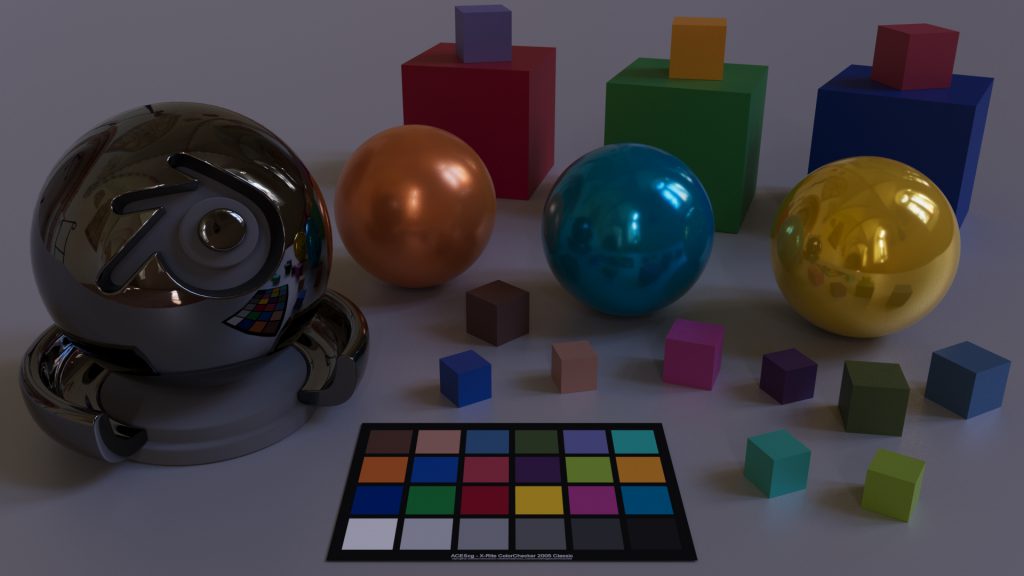
Theta S HDRI – “fake” a new sun.
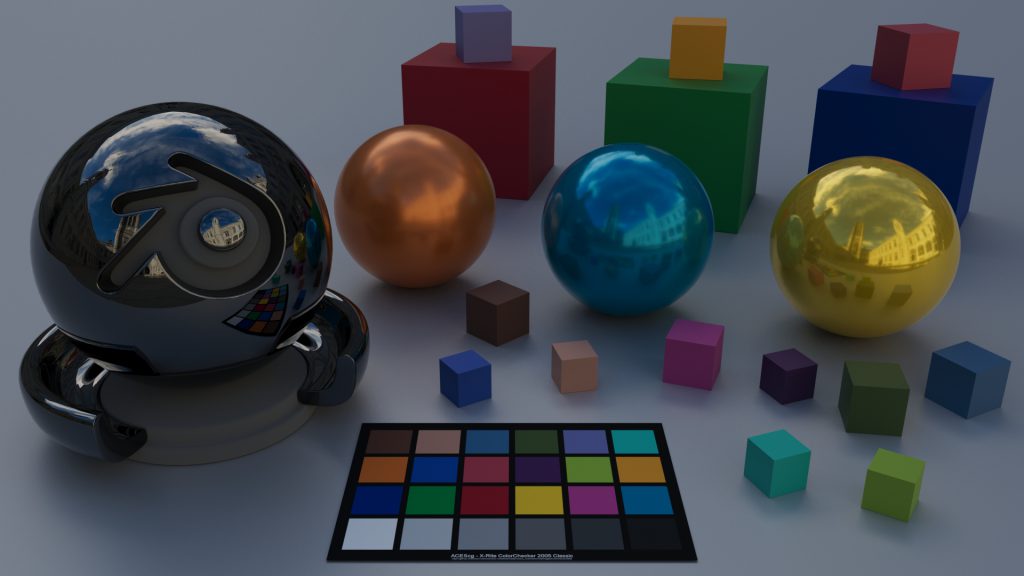
To make more out of the rendering with the Theta-S HDRI, I merged the sun from the Canon 5D HDRI and replaced the “weak” sun.
Now the shadows are back and the overall rendering looks better and more like sunlight. Also the long shadows visible in the HDRI are visible now in the rendering.With a little bit more of bad retouching the direct sun reflection on the ground tiles of the HDR is painted out and the halo around the Theta-S HDR is reduced. On the material ball on the left you can see the bad retouch work. But overall the fixed THETA-S HDRI looks now very similar to the…Rendering with the Canon 5D HDRI.
Conclusion
Comparing the last two images doesn’t show a lot of difference in the quality of light. Is the Theta-S HDRI with the sun taken from the Canon HDRI accurate? For sure not, but it looks good. But if the job is to comp in a CG car into the “Hamburg Hafencity” scenery and the camera plates & HDRI were taken only minutes apart – then it might be easier to place the 3D car with a realistic light in the scene when the camera plates and HDRI have the highest quality.
On the other hand at some point you will also get the desired look with a poorer quality HDRI – it might just take a lot longer to get there.
Examples with good and bad Theta-S HDRIs.
Last but not least – here are some more renderings of bad and good HDRIs that I made with the Theta S in the last years. Somehow I look forward to the new Theta-Z1, although it still cannot compete with a DSLR in bright sunlight of course.
The following examples are HDRI, the rendered image and the balanced result with the middle grey patch at about 0.180.
The bad…
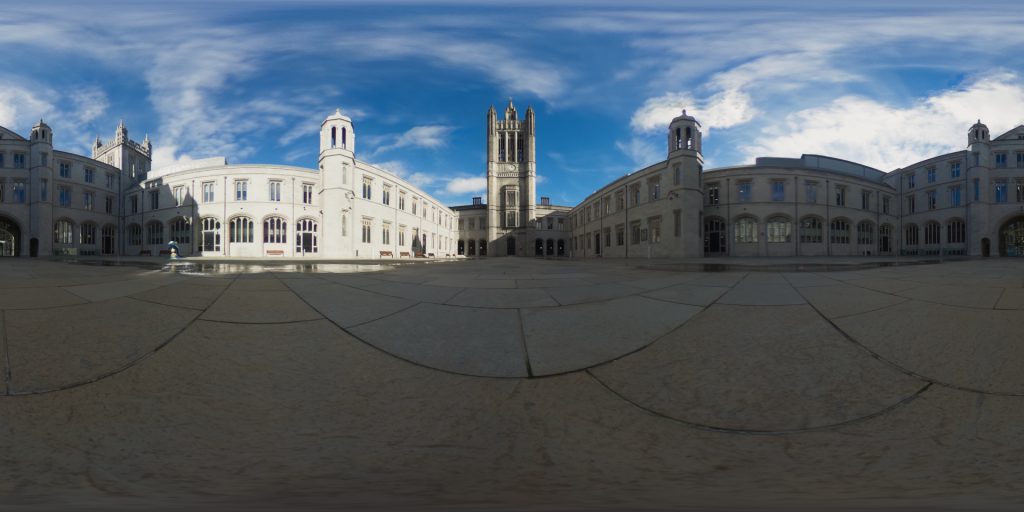
HDRI – Seville – Parque Miraflores – low sun – almost no dynamic range values in the sun not even 1.0.Rendering – very blue and very dark rendering – looks like day for night.Balanced to 18% grey – At least now it is bright, but no long shadows from the sun are visible.Seville again – Parque Miraflores – sun has a value of about 1.7.Again very blue, the blue sky is having far too much influence on the rendering.Balancing helps, but where is the sunny feeling?Aberdeen – university – sadly a bad example – the clouds clip at 2.0.Dark result.The HDRI was taking in the shadow – so the result is actually not that bad.
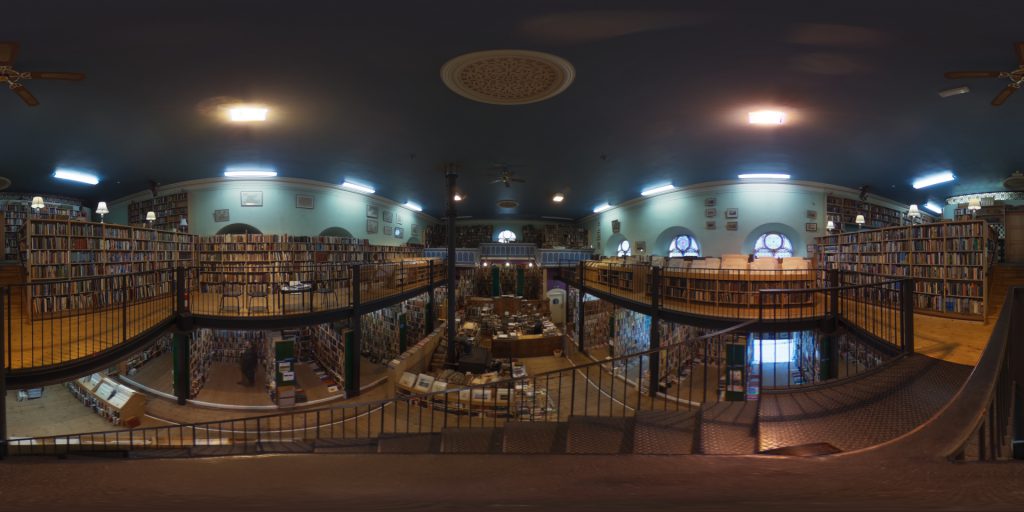
…and the good ones.
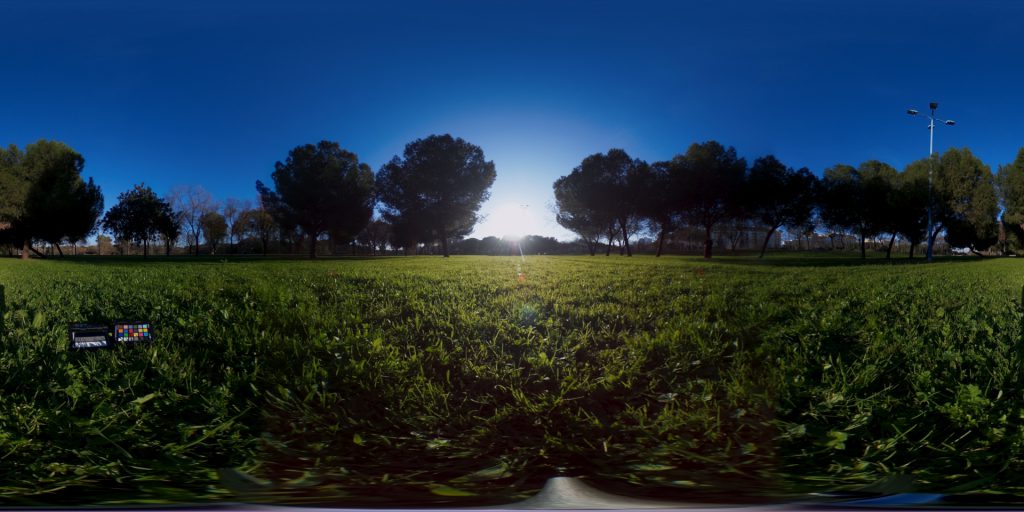
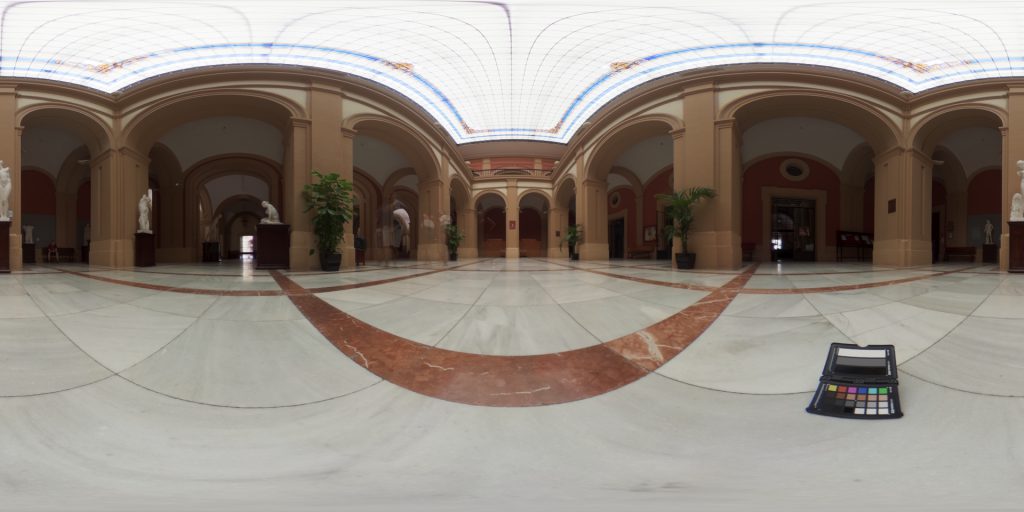
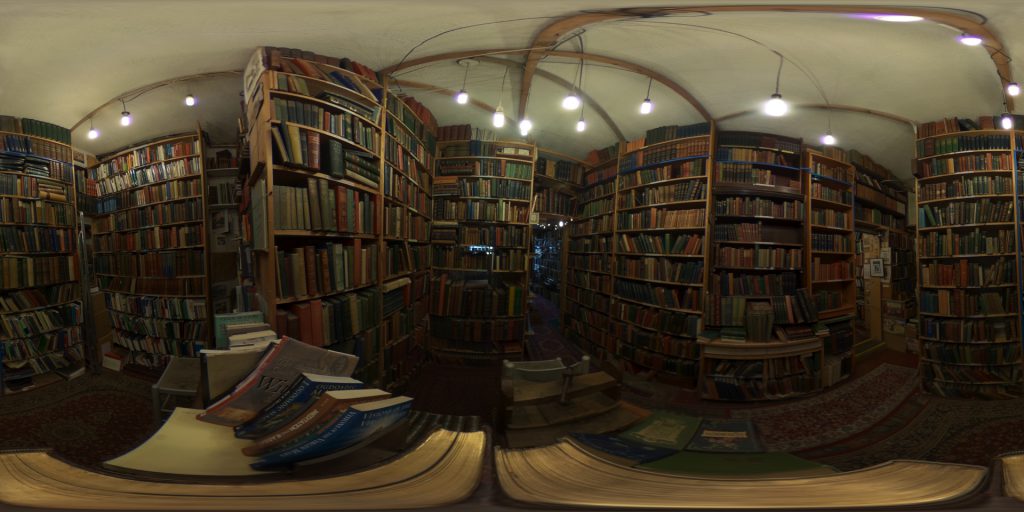
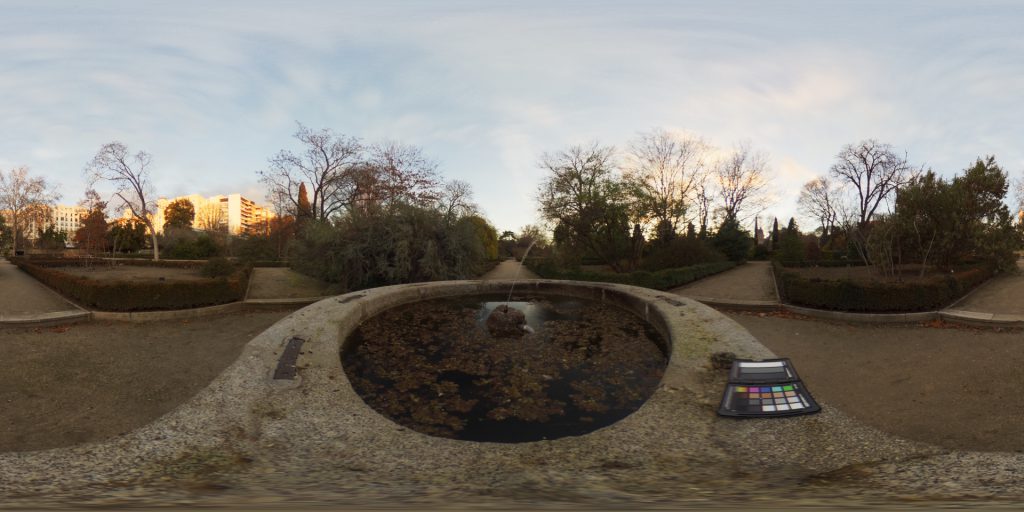
Seville – university, late afternoon the sun is not directly visible, sun values up to 25.A much better result with a good contrast.Balancing the image makes it actually slightly darker.Seville – university inside the building. The brightest areas on the ceiling are around 15.The ground I use is darker than the floor in the HDRI. The rendering feels a little dark.Balancing darkens the rendering even further.Edinburgh – Armchair Books – surrounded by books and lamps which clip at around 66!So many lights are creating a lot of interesting shadows and a good contrast.Balancing is not helping visually – the mood of this wonderful place is vanishing.Scotland – Inverness – Leaskeys Bookshop and Café – the ceiling lamps are around 55.A dark and moody rendering with multiple shadows.Balancing is taking a little bit the mood out again of the image.Scotland – Dunnottar Castle – sadly the clouds are clipping around 3.5.But the result looks quite good.Balancing brightens the image a bit.Madrid – Botanic Gardens – inside a turned off fountain for winter . No direct sun up to values of 60.The rendering is a little too bright.Balancing brings it back to a good level in this case.Madrid – Botanic Gardens – Some minutes later, on top of a small fountain. No direct sun, the sunlit houses having values up to only 6.Rendering has a good exposure.Balancing is nearly having any effect.Madrid – church next to El Prado. Small lamp areas are between 6 to 60 to over 120 for one small lamp.good contrast, but a little bluish.This light feels quite similar to the sensation standing there next to the church.Ratzeburg/Germany – inside a church – the brightest windows have a value of around 30.The rendering is quite dark.I dient have a colochart for the HDRI – that’s why the balancing is a little too bright here.Ratzeburg/Germany – inside a church – the brightest windows have a value of around 55, but only in the blue channel.And the rendering has a blue tint.Again no colorchart was used for this HDRI. But the balancing feels more right here.