From DaVinci-YRGB to ACES 1.1
A while back I as was listening to a Resolve & ACES webinar. In there there were some claims about how Resolve works internally that I thought were different from what I know, both from the manual and other sources.
I am not a colorist so Resolve is not my main tool. I use it as a conform and online tool like I am using Flame. But as I like to understand how things work, I was thinking how I can use my main tool Nuke to understand what it means to grade color managed in Resolve in ACEScct in comparison to the standard DaVinci-YRGB default setup of Resolve that is not color managed. The manual says: “This a display referred grading and you are the color management.”
DaVinci-YRGB & Nuke-Default (sRGB)
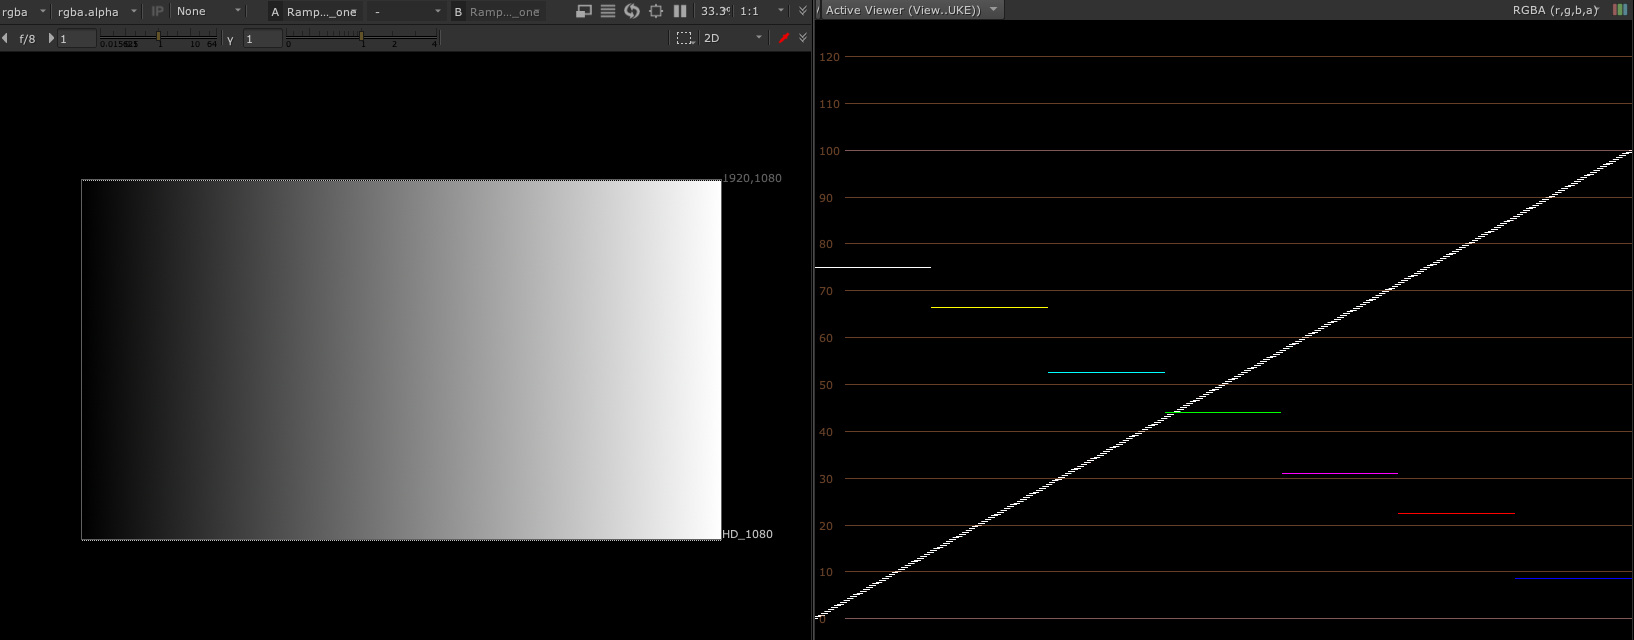
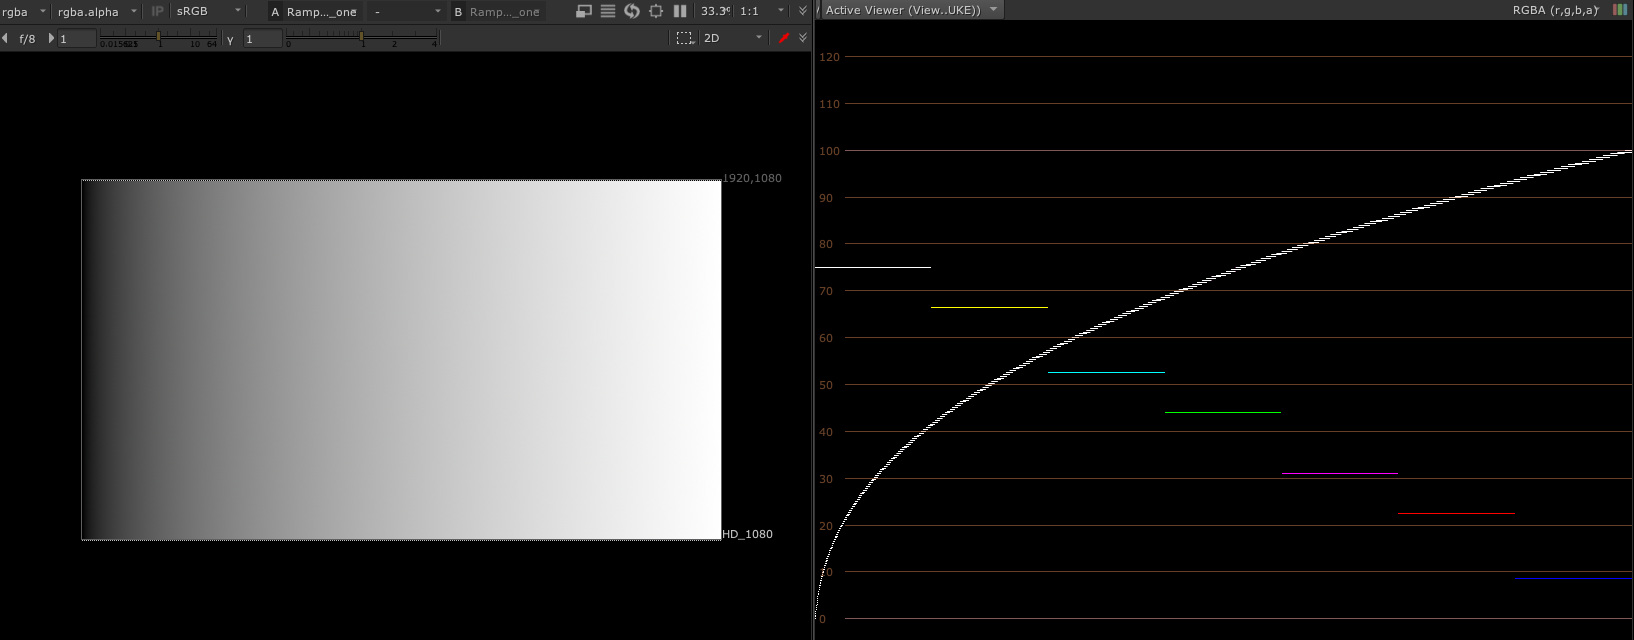
Before jumping into ACES and color management, why not look at the default settings, which is DaVinci-YRGB with a timeline colorspace setting to Rec.709 with a gamma of 2.4.
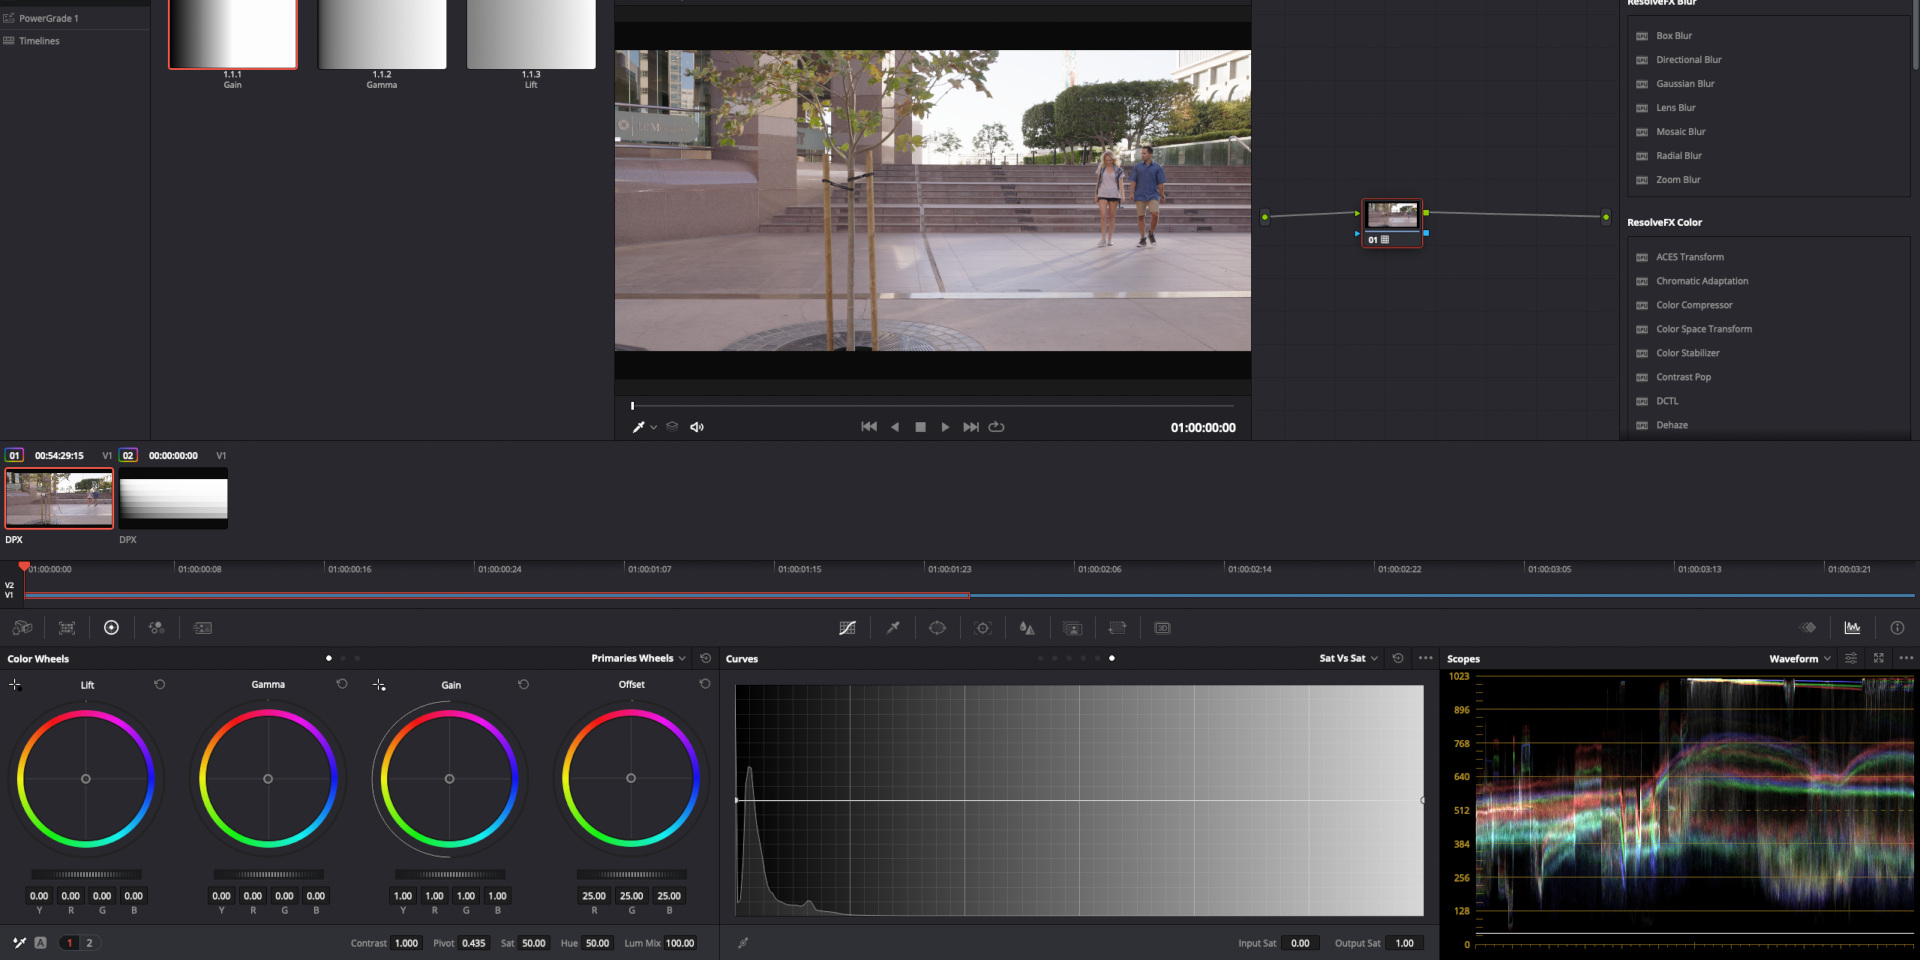
The first example is a simple ramp from 0-1, which I can create in Nuke with the “ramp” node or directly in Resolve with the generator “Grey Scale” (Note: A generator needs to be placed into a compound clip to be able to grade it, so its not the best source for tests in my opinion). A ramp is a good tool to understand what the grading tools are actually doing and easy to read in the histogram.
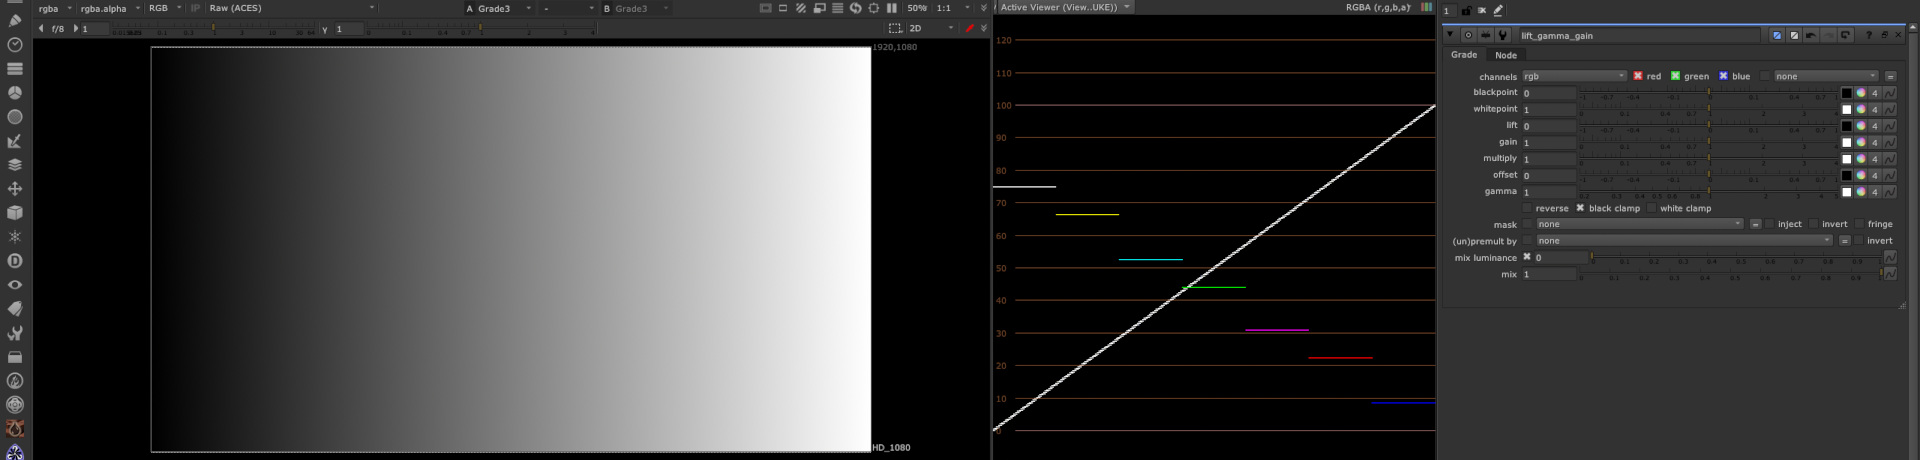
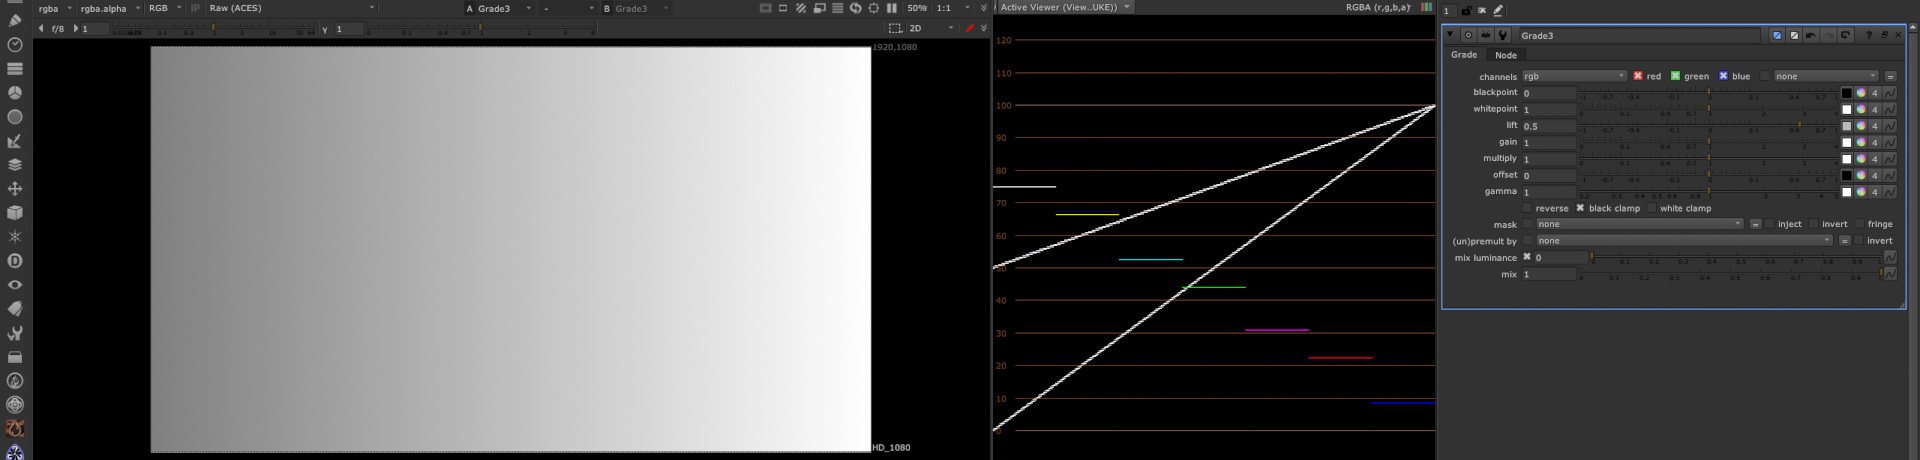

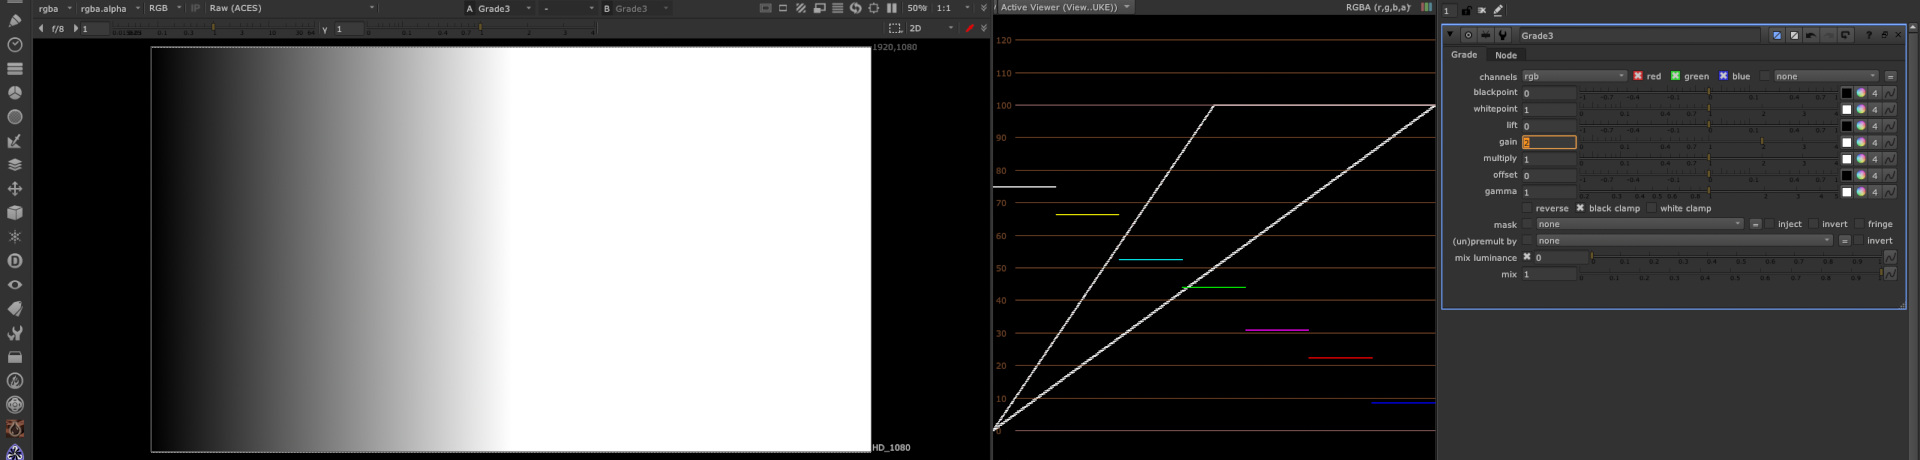


The grading tools in Resolve are operating in the exact same way as they do in Nuke at the moment, although the scale and ranges in the numeric fields are different for sure.
But what is a ramp from zero to one? What does this represent?

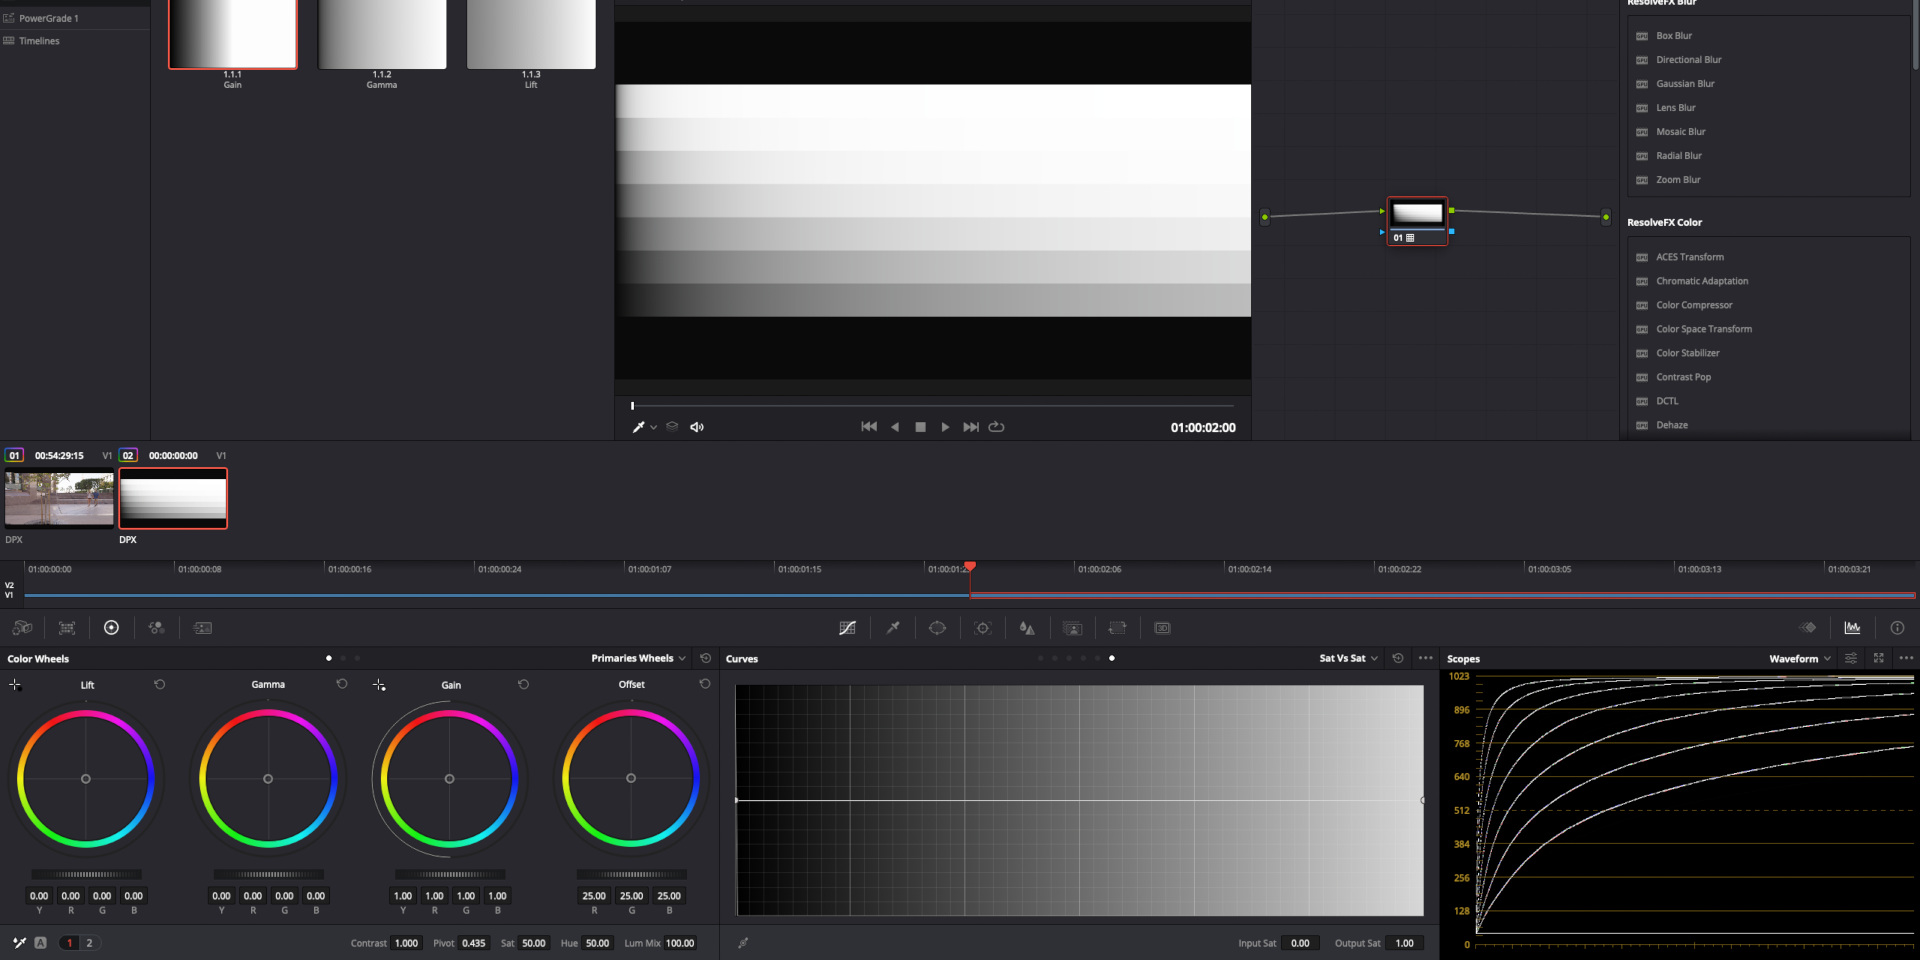
In a display referred environment the ramp shows a gradient from the darkest to the brightest pixel on the screen. And this is usually not what you want to grade in Resolve.
A professional digital camera can record a lot more dynamic range than a normal SDR display can show. In the case of an ARRI Alexa camera, the scene linear values it can represent are around 55.0. So I created a ramp with much higher values that I can’t display at once. That’s why I split the ramp in slices each one step down or half the amount of light. A economic way to store the image data is log encoding.


A better real world footage example is this Alexa65 .ari file that is available for download from ARRI. I used it already in my first ACES article.


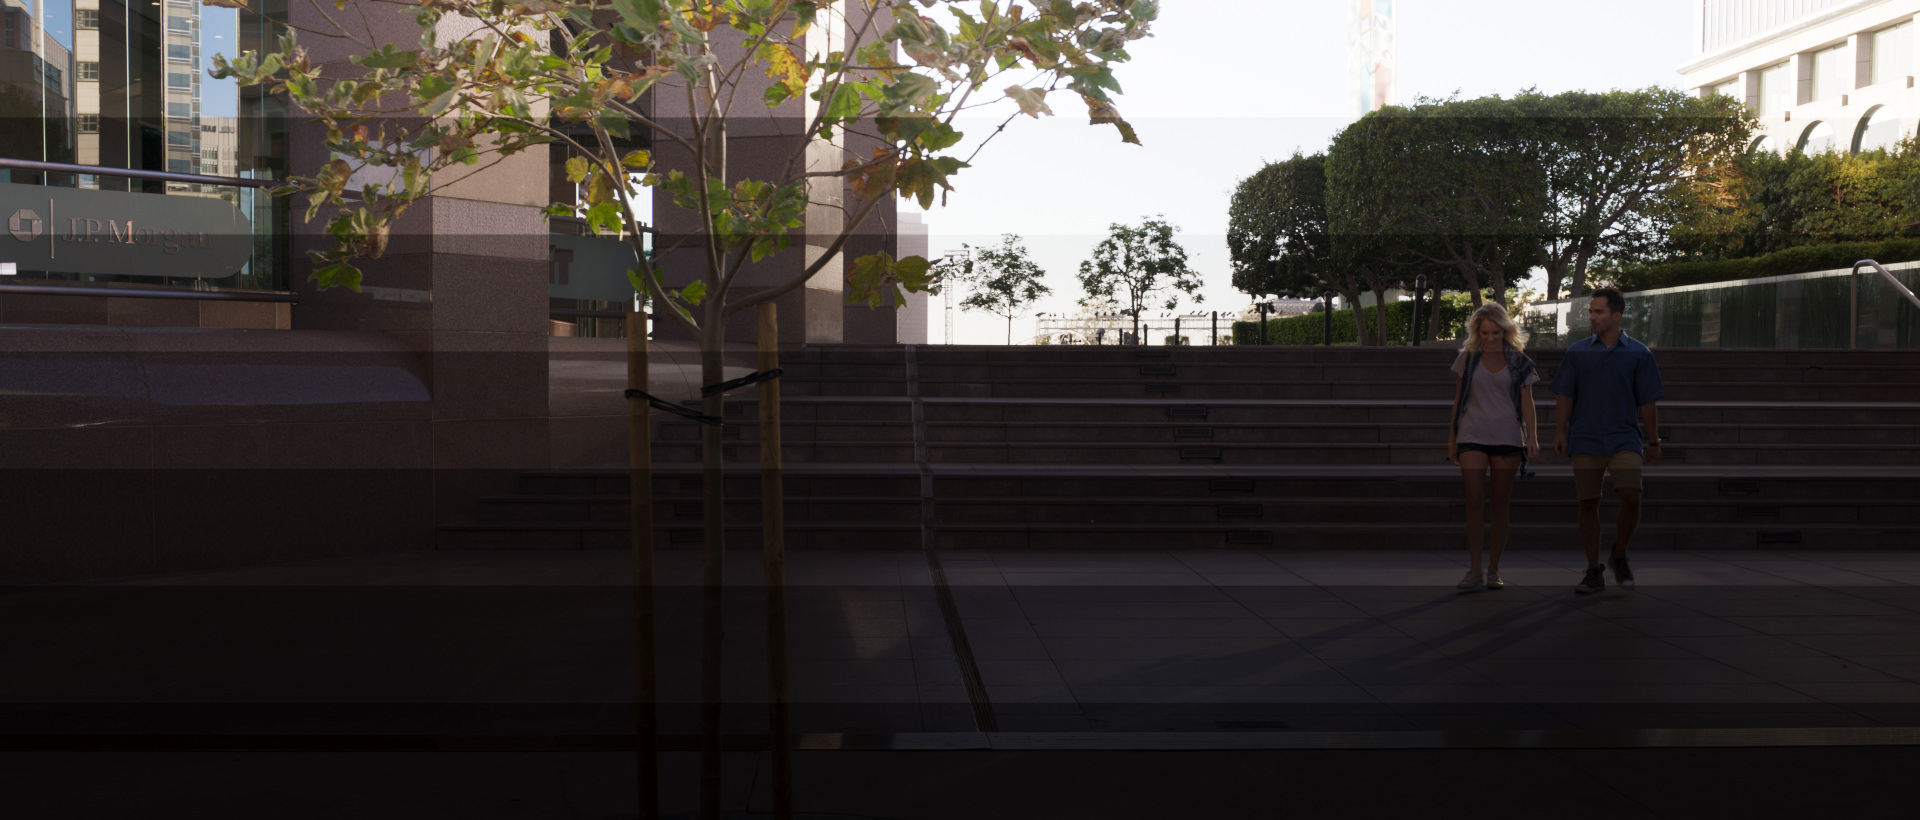
Back in Resolve with the Alexa 65 frame and the ramps in stripes, both encoded in LogC. Both frames contain scene referred data and a manual grading approach would result in in a display referred image output. The grading controls are still working in the same way as they did in the first example, just the initial data is not linear anymore but log encoded.
Comparing this workflow with “developing” raw photo images like using CaptureOne seem outdated to me as I always start in a RAW converter with a display referred image. Resolve offers this way of working too, but I need to do it by hand and I need to know what data the 3D-LUT expects to get a proper result.
3D-LUTs are nothing more than a “sponge” in cube form that is pre pressed into a different shape. Whatever data it gets will be always processed, compressed, stretched and twisted to the destination shape in the same way without being aware of the source and the resulting data.
Here is a more detailed and fun to read article about LUTs from Cédric Lejeune: LUTs are just stupid tables!
In the case of ARRI Alexa footage and a standard HD Rec.709 display this is rather easy by applying an ARRI default 3D-LUT that expects LogC image data as the input and the output will be Rec.709.
The node in which I apply the 3D-LUT are first processing the grading controls. The 3D-LUT is applied in the same node after the grading controls. You can say Resolve has now already some sort of manual clip based color management enabled, and the grading method turned to scene referred instead of being display referred. But the output is display referred to a HD Rec.709 screen.
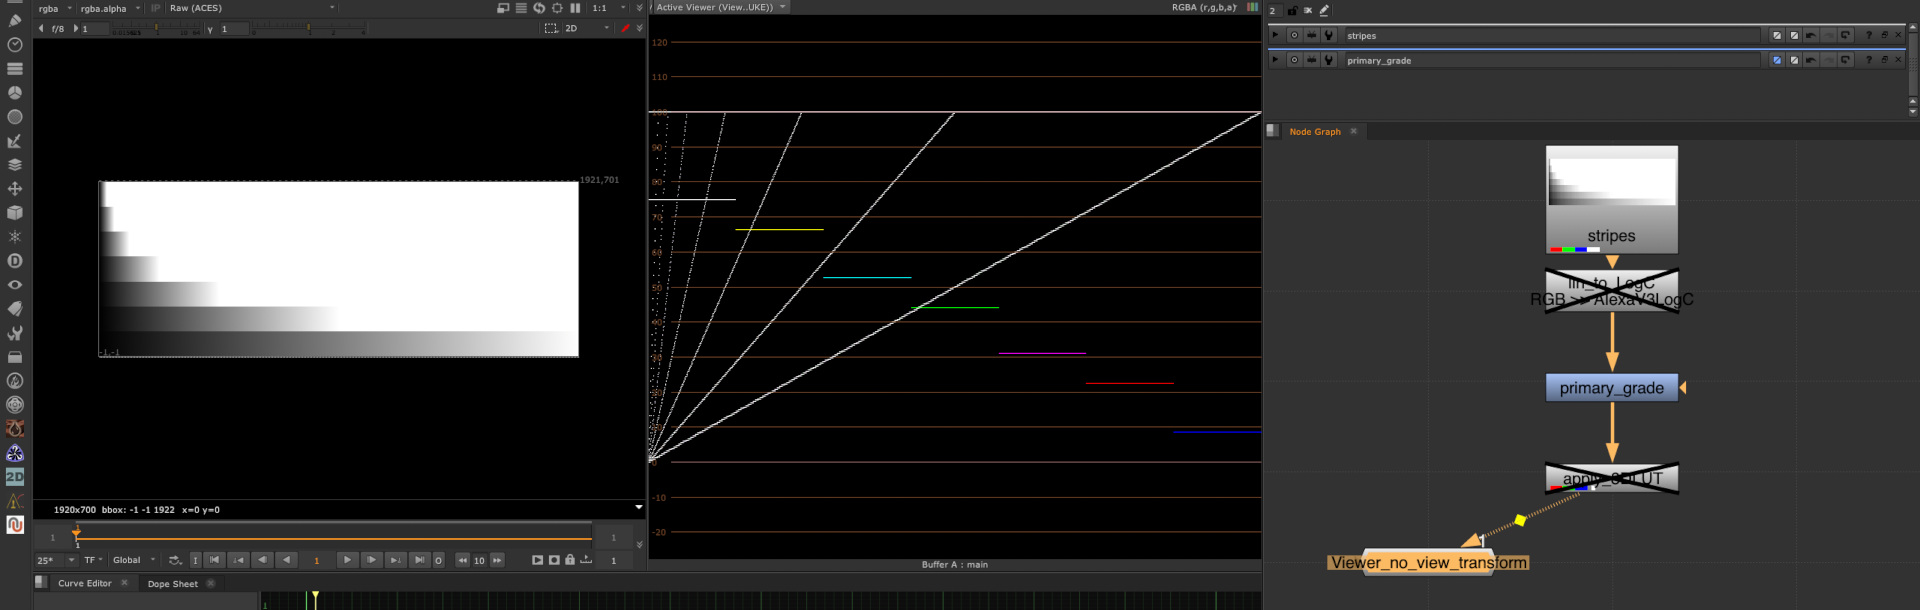
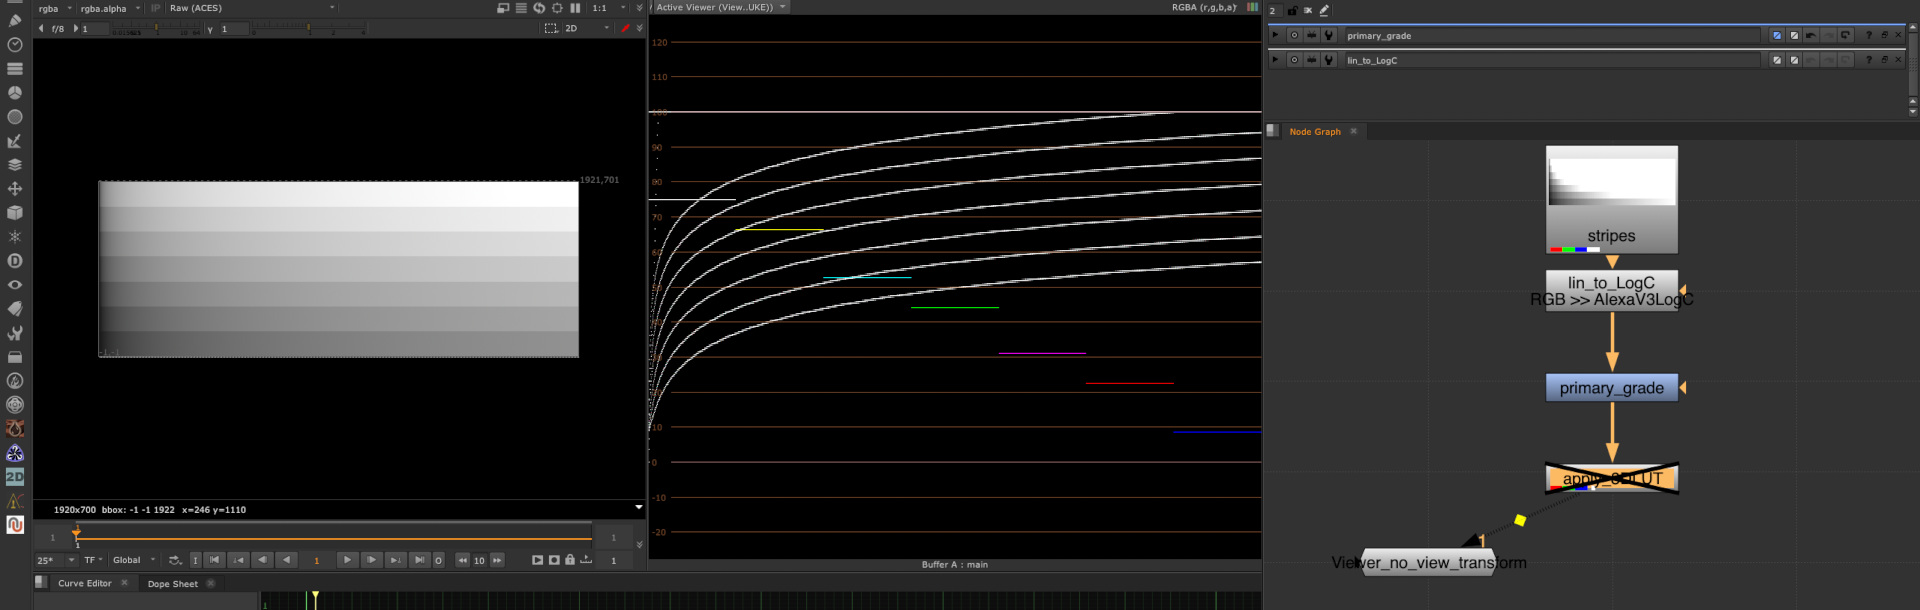

Nuke is designed to work with scene linear data, so to emulate the Resolve workflow I need to convert first the image data to AlexaV3LogC (gamma and gamut), then do the grading operation and then apply the 3D-LUT.
Every grading operation after the 3D-LUT is display referred, the available range is limited to values between 0-1, both in Resolve and Nuke.
Note: All the time I need to disable the default view transform in Nuke (sRGB) for these comparisons between Resolve and Nuke. Normally the viewer would be set to sRGB and therefore the 3D-LUT output would have to be compensated for it.
This is the big difference between both Resolve and Nuke. By default the view transform would be set to sRGB, so although I am working on scene linear date I never “see” this data without a view transform. I “see” a display referred representation in the viewer. In Resolve the view transform would be in this case the 3D-LUT optionally.
Resolve ACEScct & NUKE acescg
In a color managed environment like ACES, the working steps are pre defined: The input device transform converts the image data from its native (camera-)source colorspace and gamma encoding into the ACES AP-0 scene linear colorspace. The image is then processed in the working colorspace AP-1 as ACEScg (scene linear for Nuke) or ACEScc or ACEScct (scene referred log encoded for Resolve). At the end of the processing the image date will be transformed back into AP-0 again and from there the reference rendering transform (RRT) and the output device transform (ODT) is applied in tandem to create the final output.
In Resolve a ODT must be always selected unless you want to export EXR AP-0 image data. In a normal HD environment the ODT Rec.709 is selected.
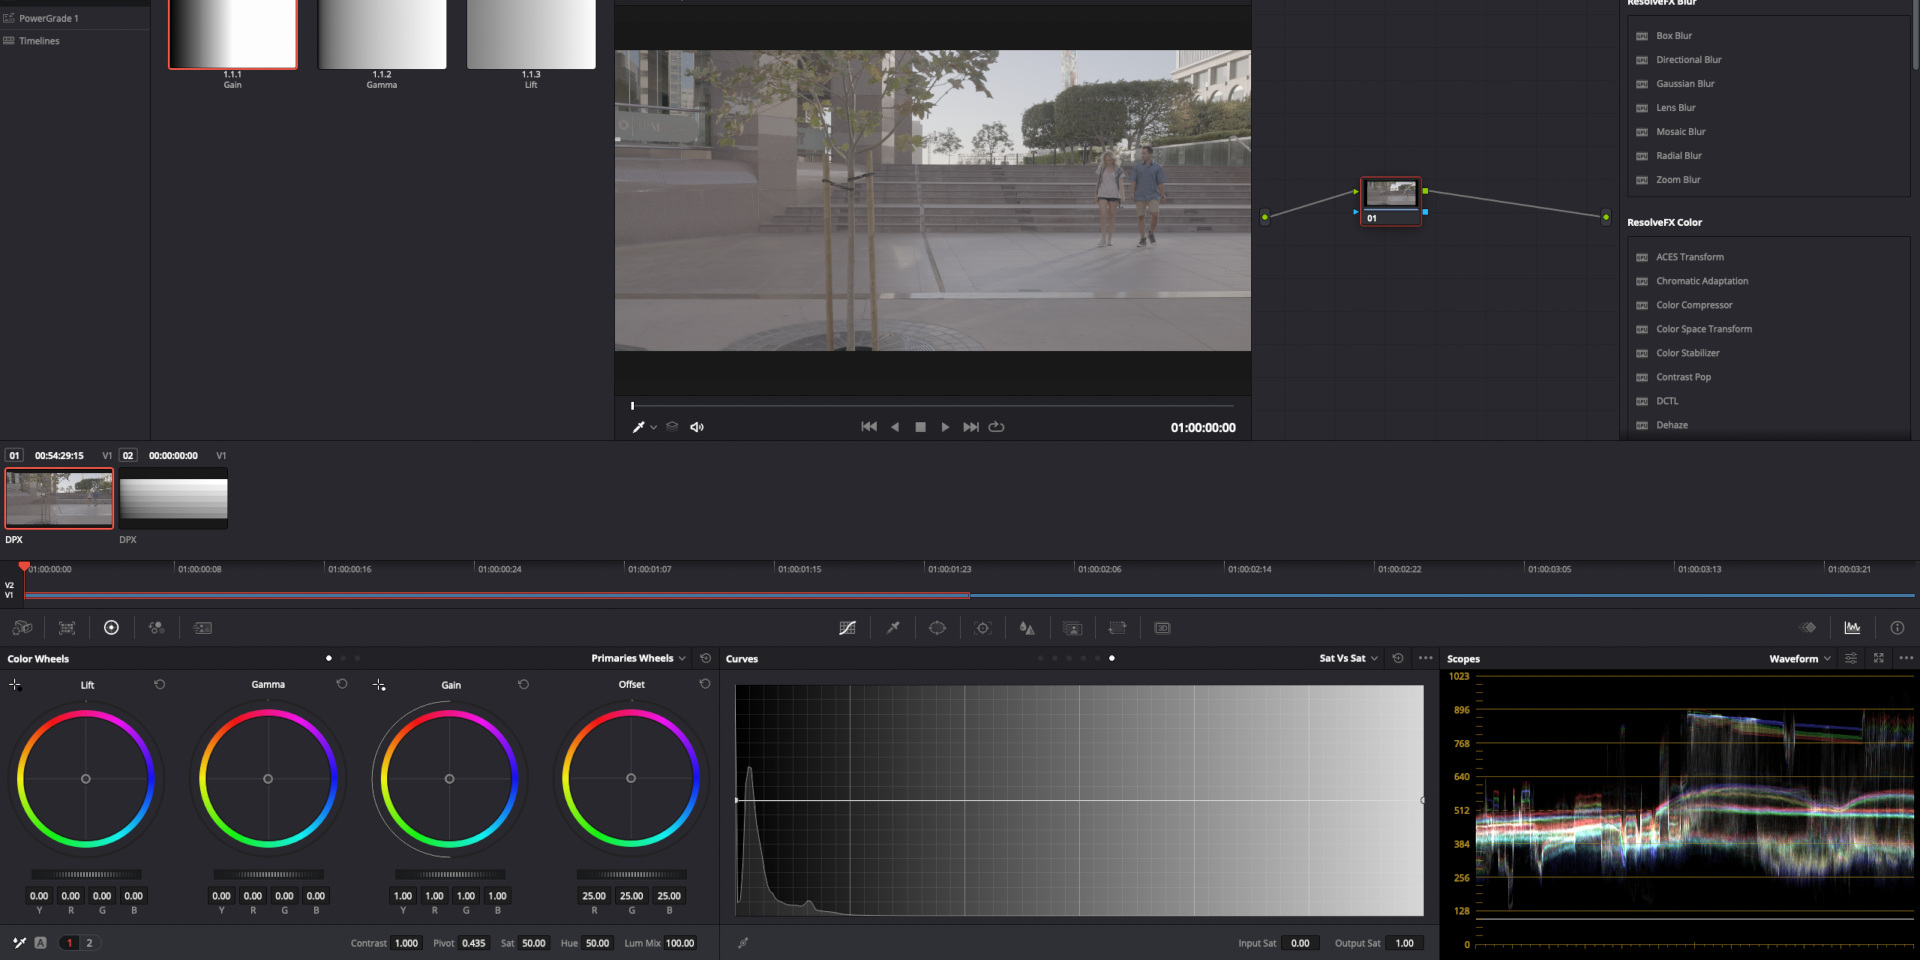
I start again with the simple ramp from 0-1 which I exported from Nuke as a AP-0 EXR file. In Resolve I select no input transform for the ramp image (Check the IDT and ODT rules in the preferences).

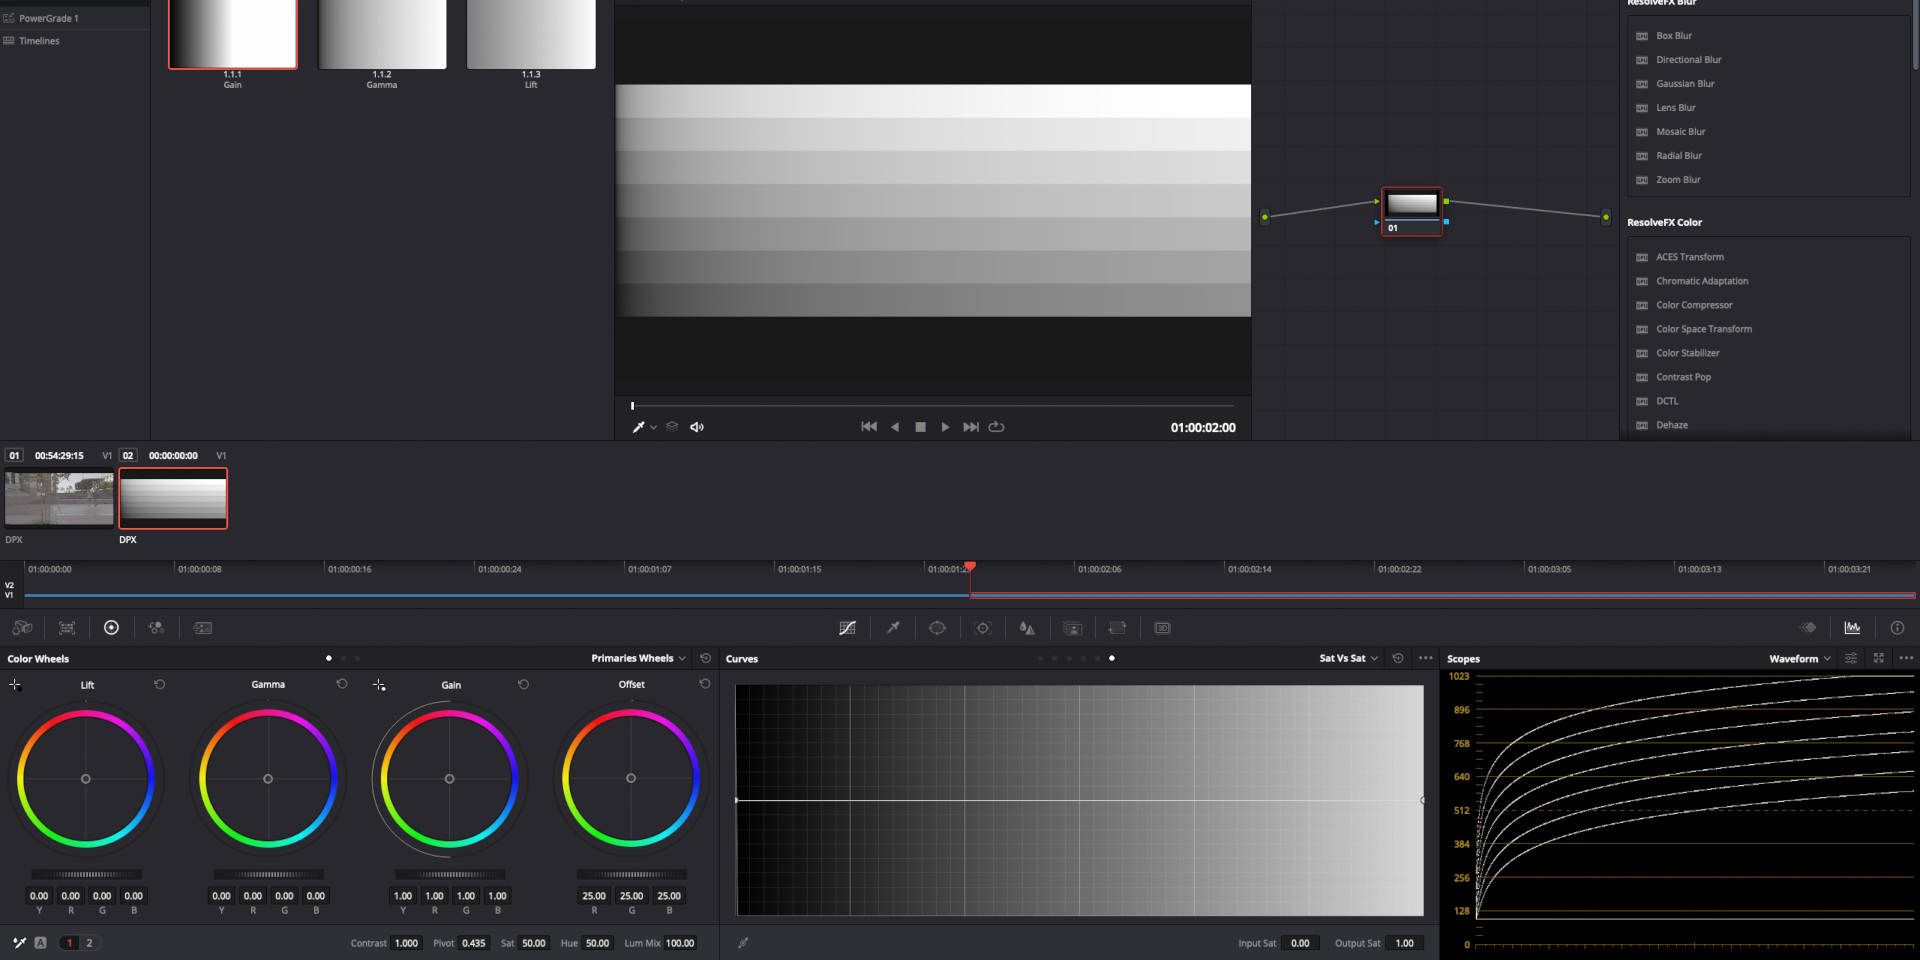
This looks like the first screenshot up at the beginning of the page with the color management set to DaVinci-YRGB. But two things are missing. The first one is the ODT which is in my case Rec.709. This results in a waveform display like it is shown below.
Note: Do not try this with a Resolve internal generated ramp. This will not work in ACES and could be very misleading. Resolve internal generators seems to follow another pipeline than media ingested into the program.

The second thing that is there but not visible is the internal colorspace transform to the working space ACEScc(t). I chose ACEScct, which is newer and selected by default in Resolve once ACES is selected as the desired color management system.
To better see what is happening under the hood in Resolve I turn back to Nuke. After the scene linear ramp is created, I need convert the image data to the Resolve working color space ACEScct, then add a Grade Node and after that again color space conversion from ACEScct to ACEScg to get back into the working color space of Nuke. Resolve is doing these steps automatically and they are invisible to the user in the interface.
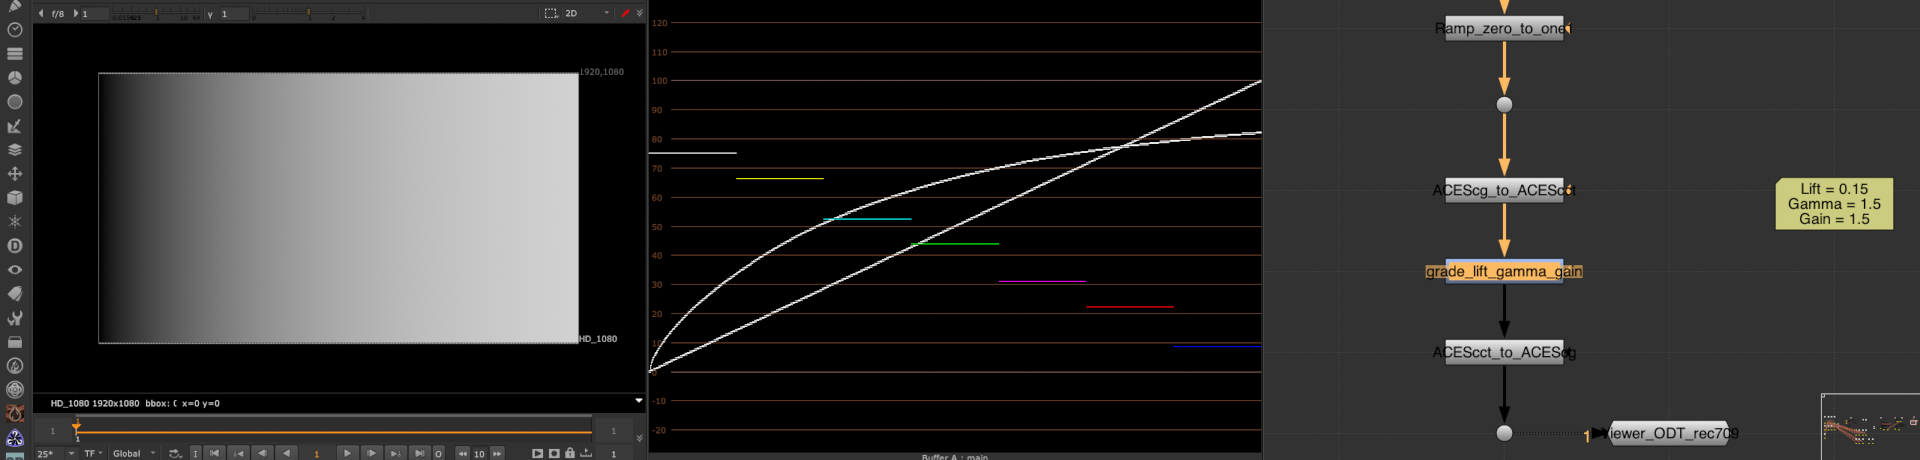

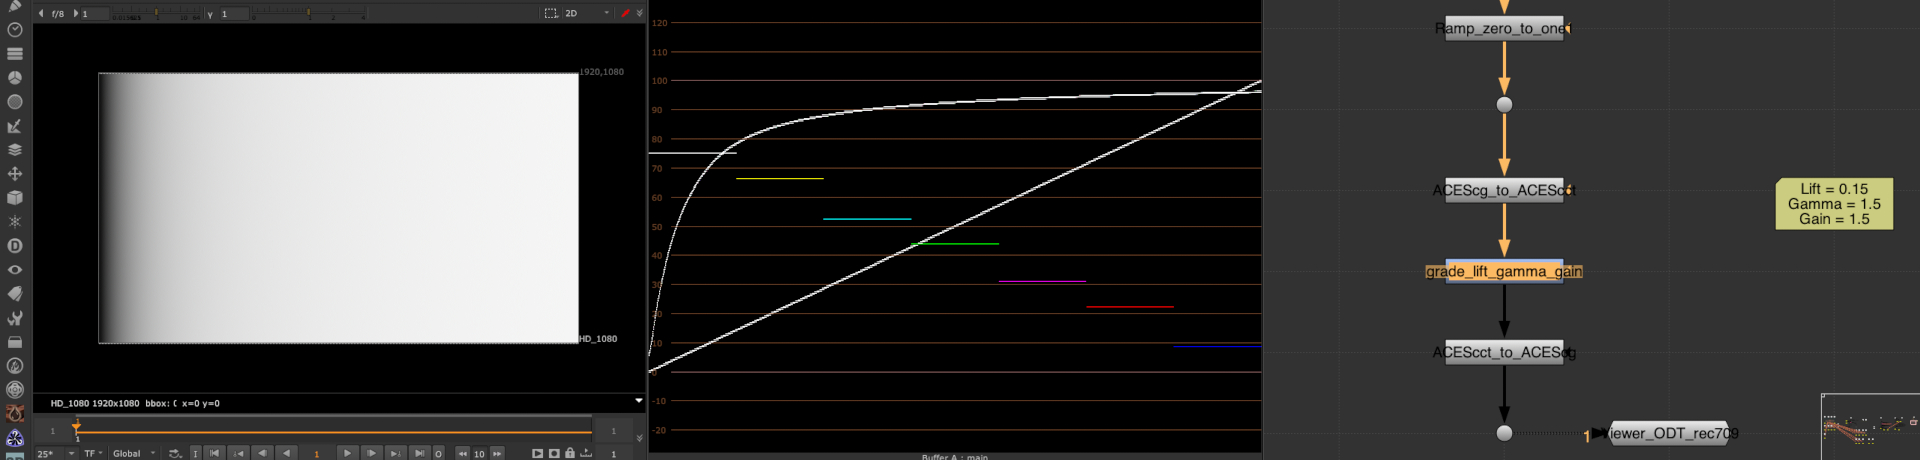
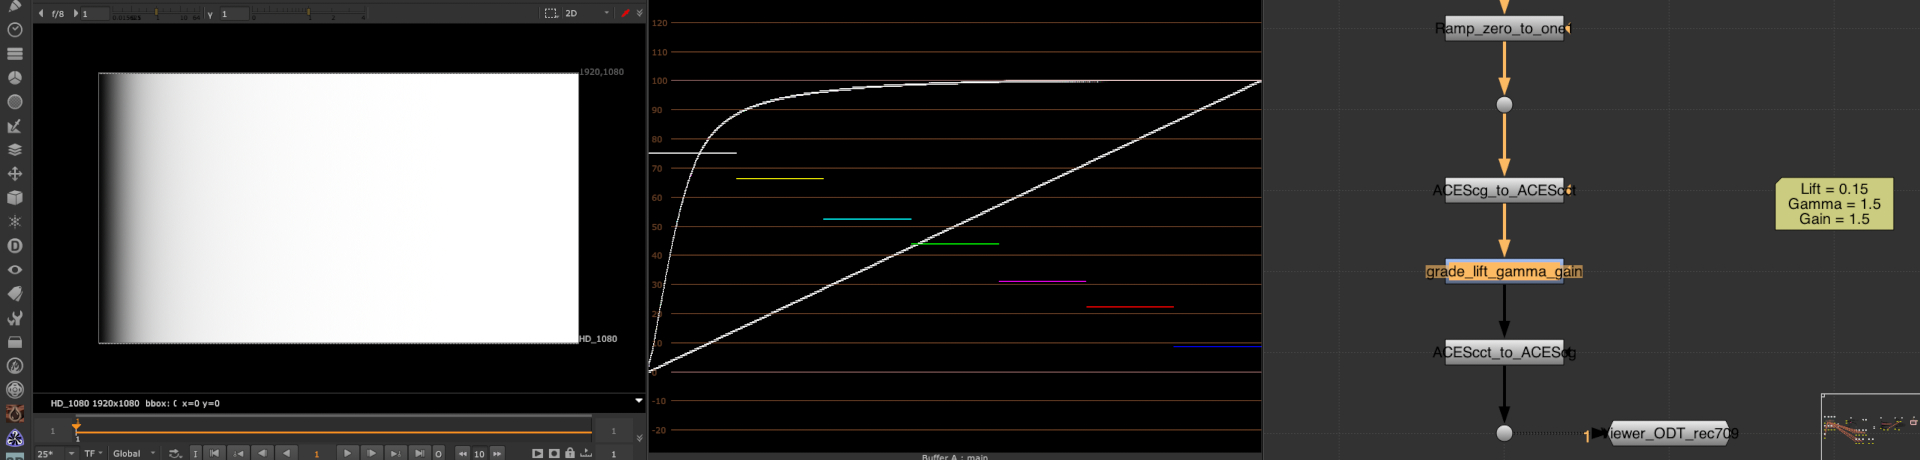


in ACEScct

I am able to emulate the Resolve image processing pipeline in Nuke, but this would not be the normal way to work in Nuke as a compositor. I am used to work with scene linear image data. Using the grade node in Nuke in ACEScct log feels weird and unintuitive. Plus in Nuke I am used and forced to always comp & grade before the view transform.
A colorist who working with Resolve and is used to be his or her own “color management”, means working in DaVinci-YRGB, might feel weird to have a view transform always active. Although a 3D-LUT is behaving in a similar fashion, in ACES the RRT&ODT is always the last step of the process and you are not able to grade after it. This is opposite to the possibility to add just another node in Resolve after a 3D-LUT and continue grading display referred to archive a special look for example.
I think it is very important to learn and understand each method to make the best use of each tool and one or another type of color management system. When I started with ACES in Nuke some years back, I didn’t understood it then, but I felt immediately the benefit when using a grade node on a filmed plate. The grading controls were behaving in a very intuitive way. It felt right.