(Too) many possibilities to go from RAW to HDRI
In late 2017 I was involved in the preparation for an upcoming job for which we needed some 360° HDRIs to light some scenes in Maya. We have an established workflow to convert the RAW brackets with Lightroom to TIFF images and the stitch the 360° panoramas with PTGui Pro.
This process is time consuming and wastes a lot of space on the server. Can’t I just use PTGui to convert directly from RAW brackets to a 360° panorama in EXR format? Does it matter if I don’t use Lightroom and use other raw development tools instead? If I need to convert to TIFF first, which colorspace should the files be exported in?
In the end we used the established workflow for the job and all the test results were wasting even more space on my hard-drives. Years later I felt it was the time to dig them up again and share the results of these tests.
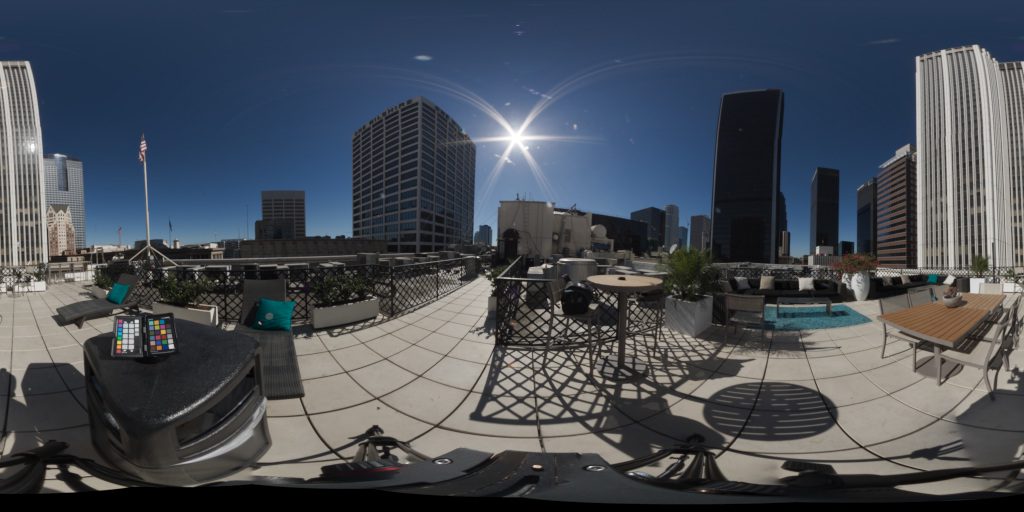
Canon 5D 360° HDRI from a production in Los Angeles
This HDRI is made of 7 RAW brackets and 7 directions with a 8mm fisheye with a Canon 5D.
Usual working steps:
- Canon RAW images – white balance in Lightroom.
- Export TIFF images (sRGB).
- Stitch all TIFF bracket in PTGui Pro to a OpenEXR file.
- White Balance again the “linear-sRGB” EXR file to the 18% grey patch in Nuke.
The workflow that we use is based on a lot of tests that were done by Sönke Heuer from INFECTED.DIGITAL.
Examining the RAW brackets and the result
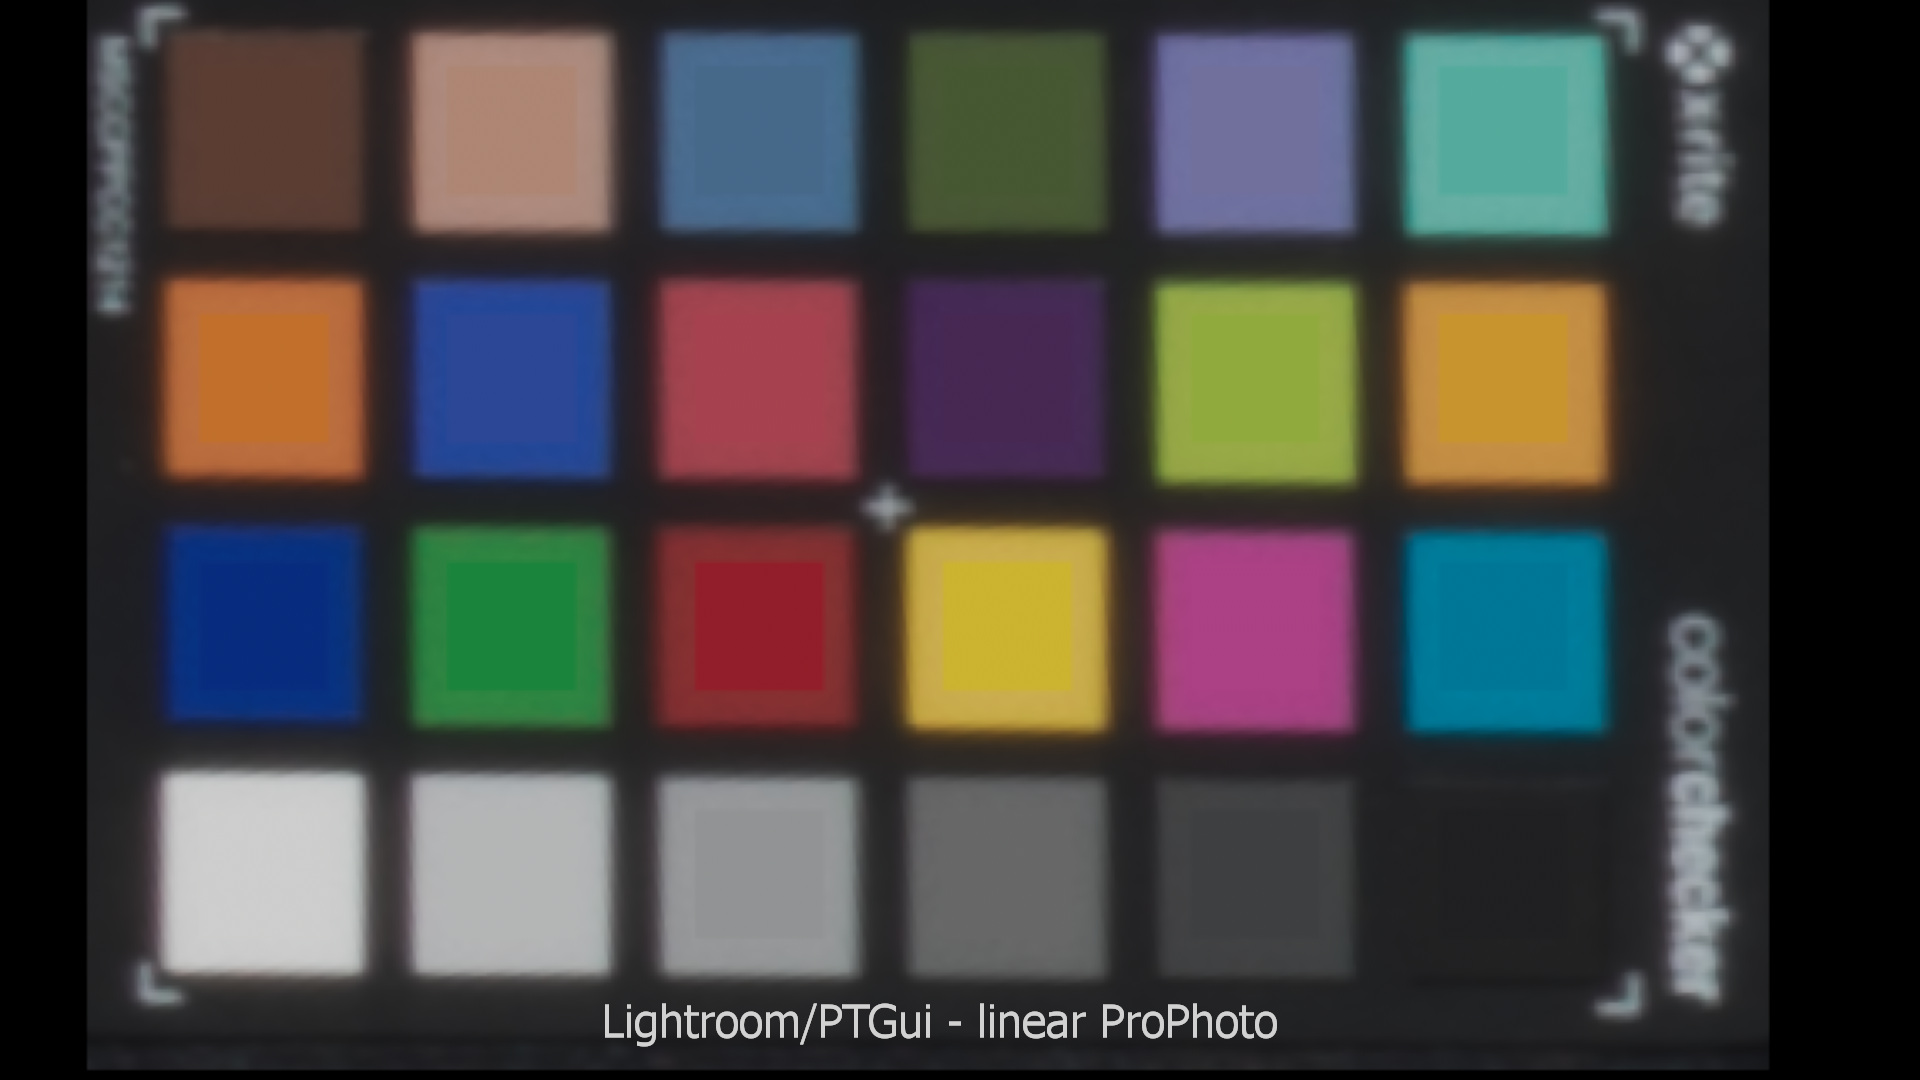
First I checked only one RAW bracket in Affinity Photo. On some colors you need to look twice to see the square shaped reference color patches overlaying the photo (1).
And then there is is best result I got from finish stitched HDRI with PTGui (2).
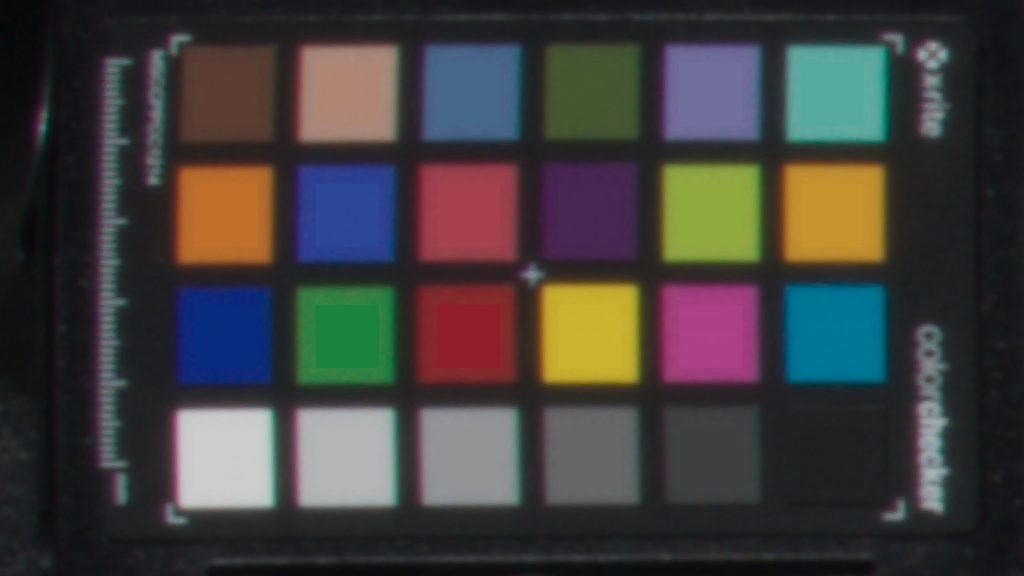
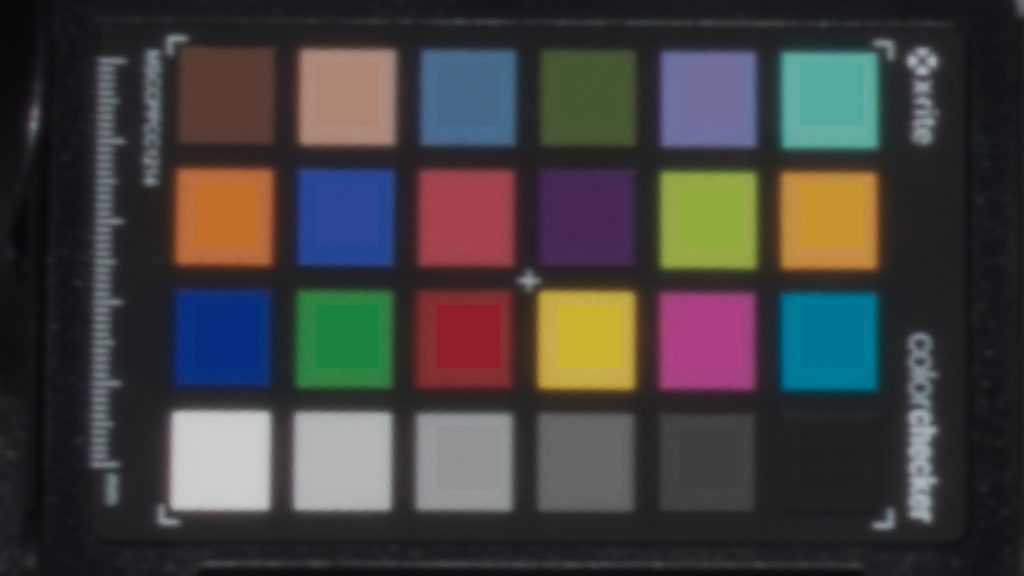
These are both very good results. Usually the colors are more off because of many reasons: The Color-checker is not receiving the light evenly, mixed light temperatures, reflections by nearby objects etc.
The result in (2) is not using exactly the working steps described above. I used the ProPhoto profile instead of the sRGB profile for the TIFF exports. The idea was – when a DSLR camera can capture a wider gamut than sRGB, why should the TIFF export limited to a smaller colorspace?
I found a link that says that the internal working colorspace of Lightroom is actually ProPhoto, means I can assume no gamut mapping/compression has to happen during the TIFF export when using the ProPhoto gamut.
CANON RAW over Lightroom / PTGui to EXR

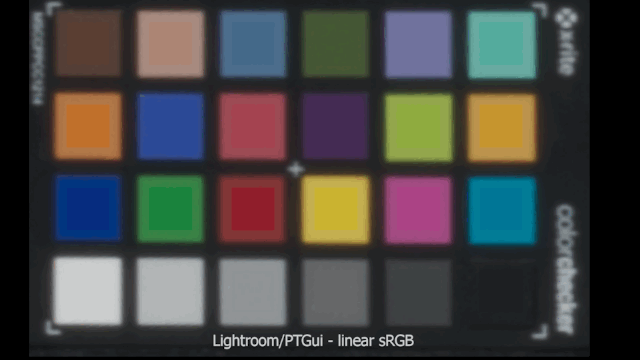
The differences are not very big, but why not making the result better by using a wider gamut than sRGB?
CANON RAW over Canon DPP and Capture One to PTGui
Also, on my MBP I don’t use Lightroom, but I have the Canon DPP (raw converter from Canon) and I use Capture One to grade my photos. So this is were I started to do a lot of conversion tests and stitches in PTGui.
- Capture One (TIFF sRGB export)
- Capture One (TIFF AdobeRGB export)
- Capture One (TIFF ProPhoto export)
- Capture One (TIFF use the linear response curve and ACEScg export – a very bad result!)
- Capture One (TIFF linear response-sRGB export)
- Lightroom (TIFF sRGB export)
- Lightroom (TIFF ProPhoto export)
- Canon DPP (TIFF AdobeWideGamut export)
- Capture One (DNG export – another a very bad result!)
Last but not least I took two more sets of RAW images that were taken on the same day but at a different times (11:00 and 12:15 – the main set of images were taken at 14:00)
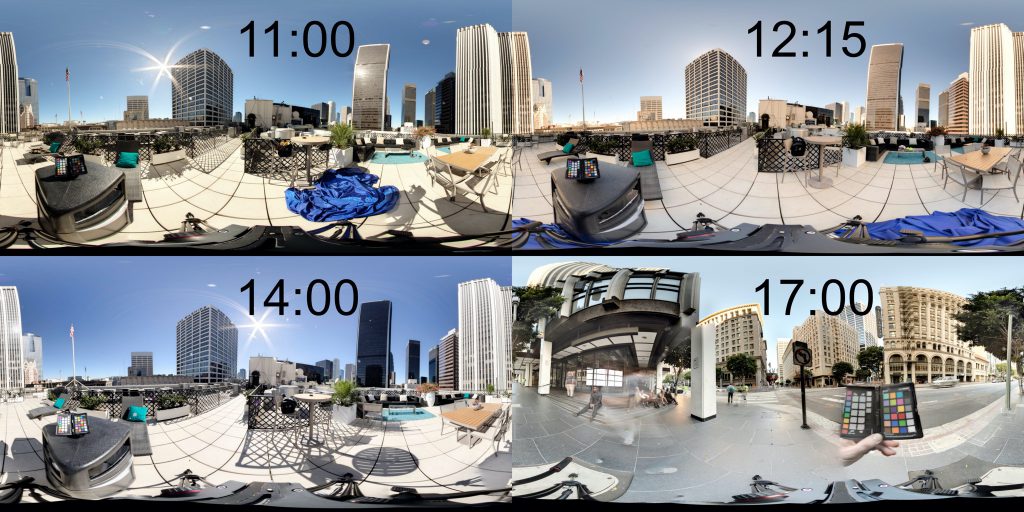
- Lightroom (TIFF sRGB and ProPhoto export) at 11:00
- Lightroom (TIFF ProPhoto export) at 12:15
- Lightroom (TIFF ProPhoto export) at 14:00
Notes
It’s very obvious that it matters a lot how you convert the RAW images to TIFF. With some more tests I was able to get nearly the same results with Capture One instead of Lightroom.
Newer versions of PTGui can work now better with RAW images, but I was told by the support that the RAW images are always converted by DCRAW internally to sRGB 16-Bit before the stitching happens.
It can make also a big difference how the settings inside PTGui are for example, if you use the Optimize Now! button or not. There you can choose to use the default camera response curve (gamma curve) or calculate a custom one – the support suggests to always calculate it.
First conclusions
So which way is right? Is there any “one” right way to do it?
It appears to me – it depends a lot of the light situation when you capture the brackets, the time you need to capture the brackets because of changes of light intensities and of course the whole process of getting to the final HDRI.
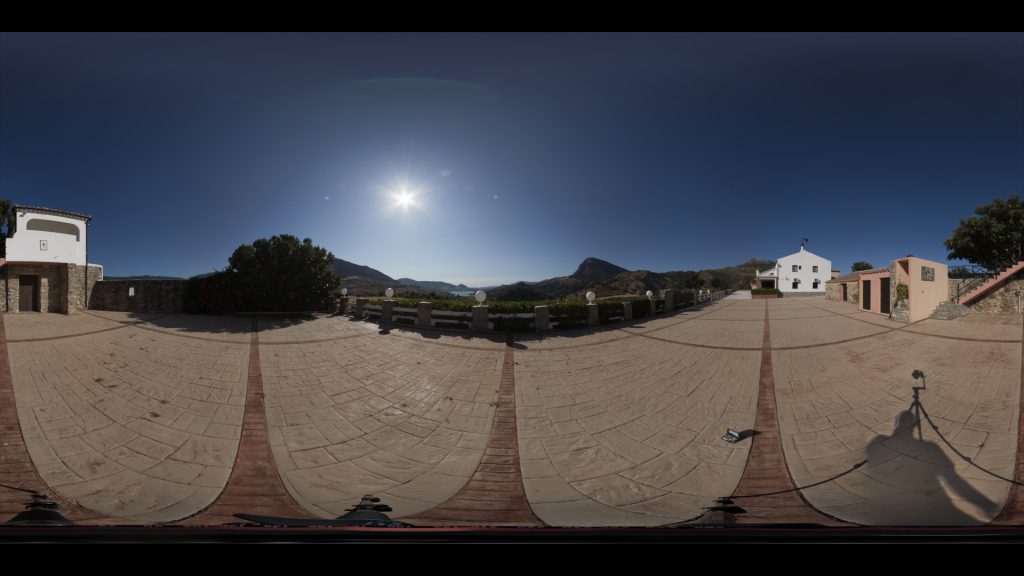
On the next page I will dive in a little deeper with a more recent set of images that I took last summer in Ronda/Spain (2019).