Colorsync or not – that is always the big question on a Mac
Important note for Blender 4.x:
I found out while testing Blender 4.1 on my MBP today (3rd of April ’24) that the described behaviour with Blender in this article is not up to date anymore. Hopefully I can post soon an update or additional page about this topic.
Since late 2020 I own a 27″ iMac with a 5k Retina display. The iMac that I had before had a sRGB display, but the 5k iMac has a Display P3 capable screen. All the last years I created tests and articles on that P3 display for this website with Blender, Nuke, Affinity Photo, Capture One, FCPX, Motion, Resolve, etc.
MacOS uses ColorSync and ICC profiles for color management. ColorSync makes sure that tagged image files are display properly for example and that supported apps show me right colours on my display. Some apps that I mentioned above support ColorSync, others not.
To my knowledge Affinity Photo, Capture One, FCPX, Motion, Compressor and Resolve support ColorSync. Fore sure Blender does not support it, Nuke’s support is in “beta” for years.
In this article I want do dig into what it means when an app has ColorSync support or not. But first, let’s do a Display P3 image check:
The two images of red, green and blue stripes “must” look different in order to see the differences between sRGB and Display P3.
You should be able to read “P 3 RGB” inside the right image.
On my iMac and MBP with XDR display, this works for me with Safari and Chrome, but not with Firefox.
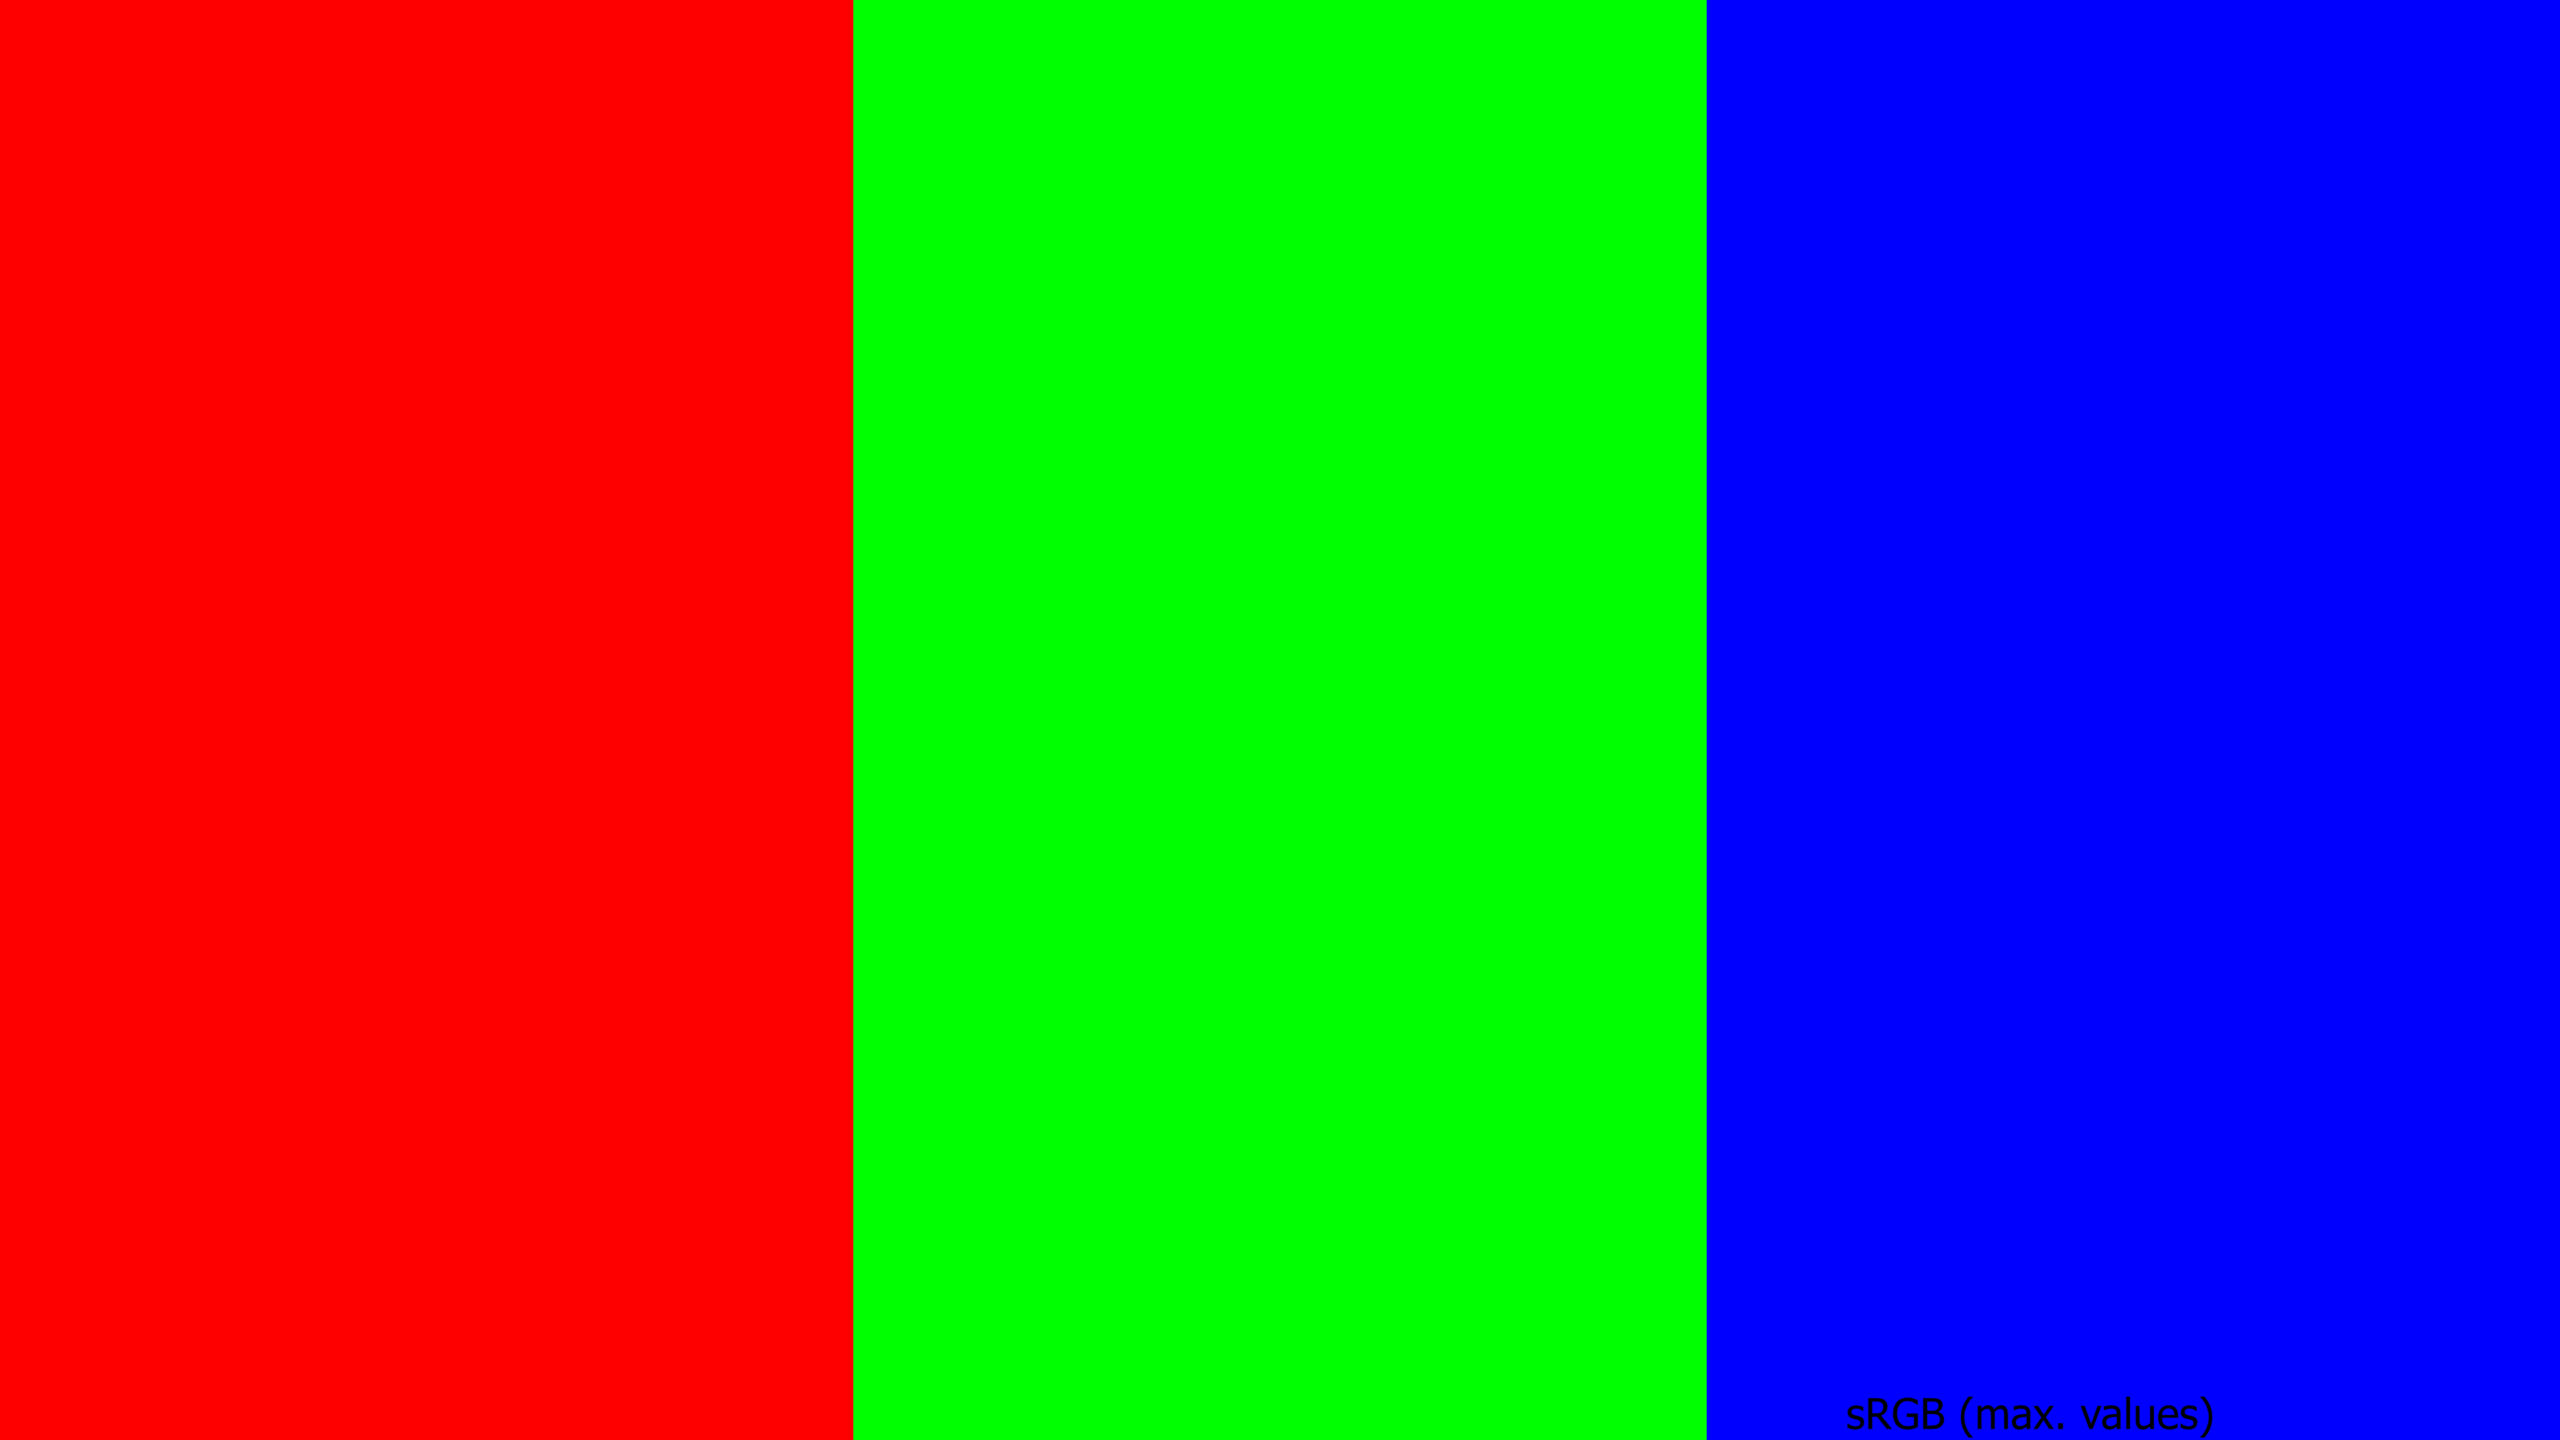
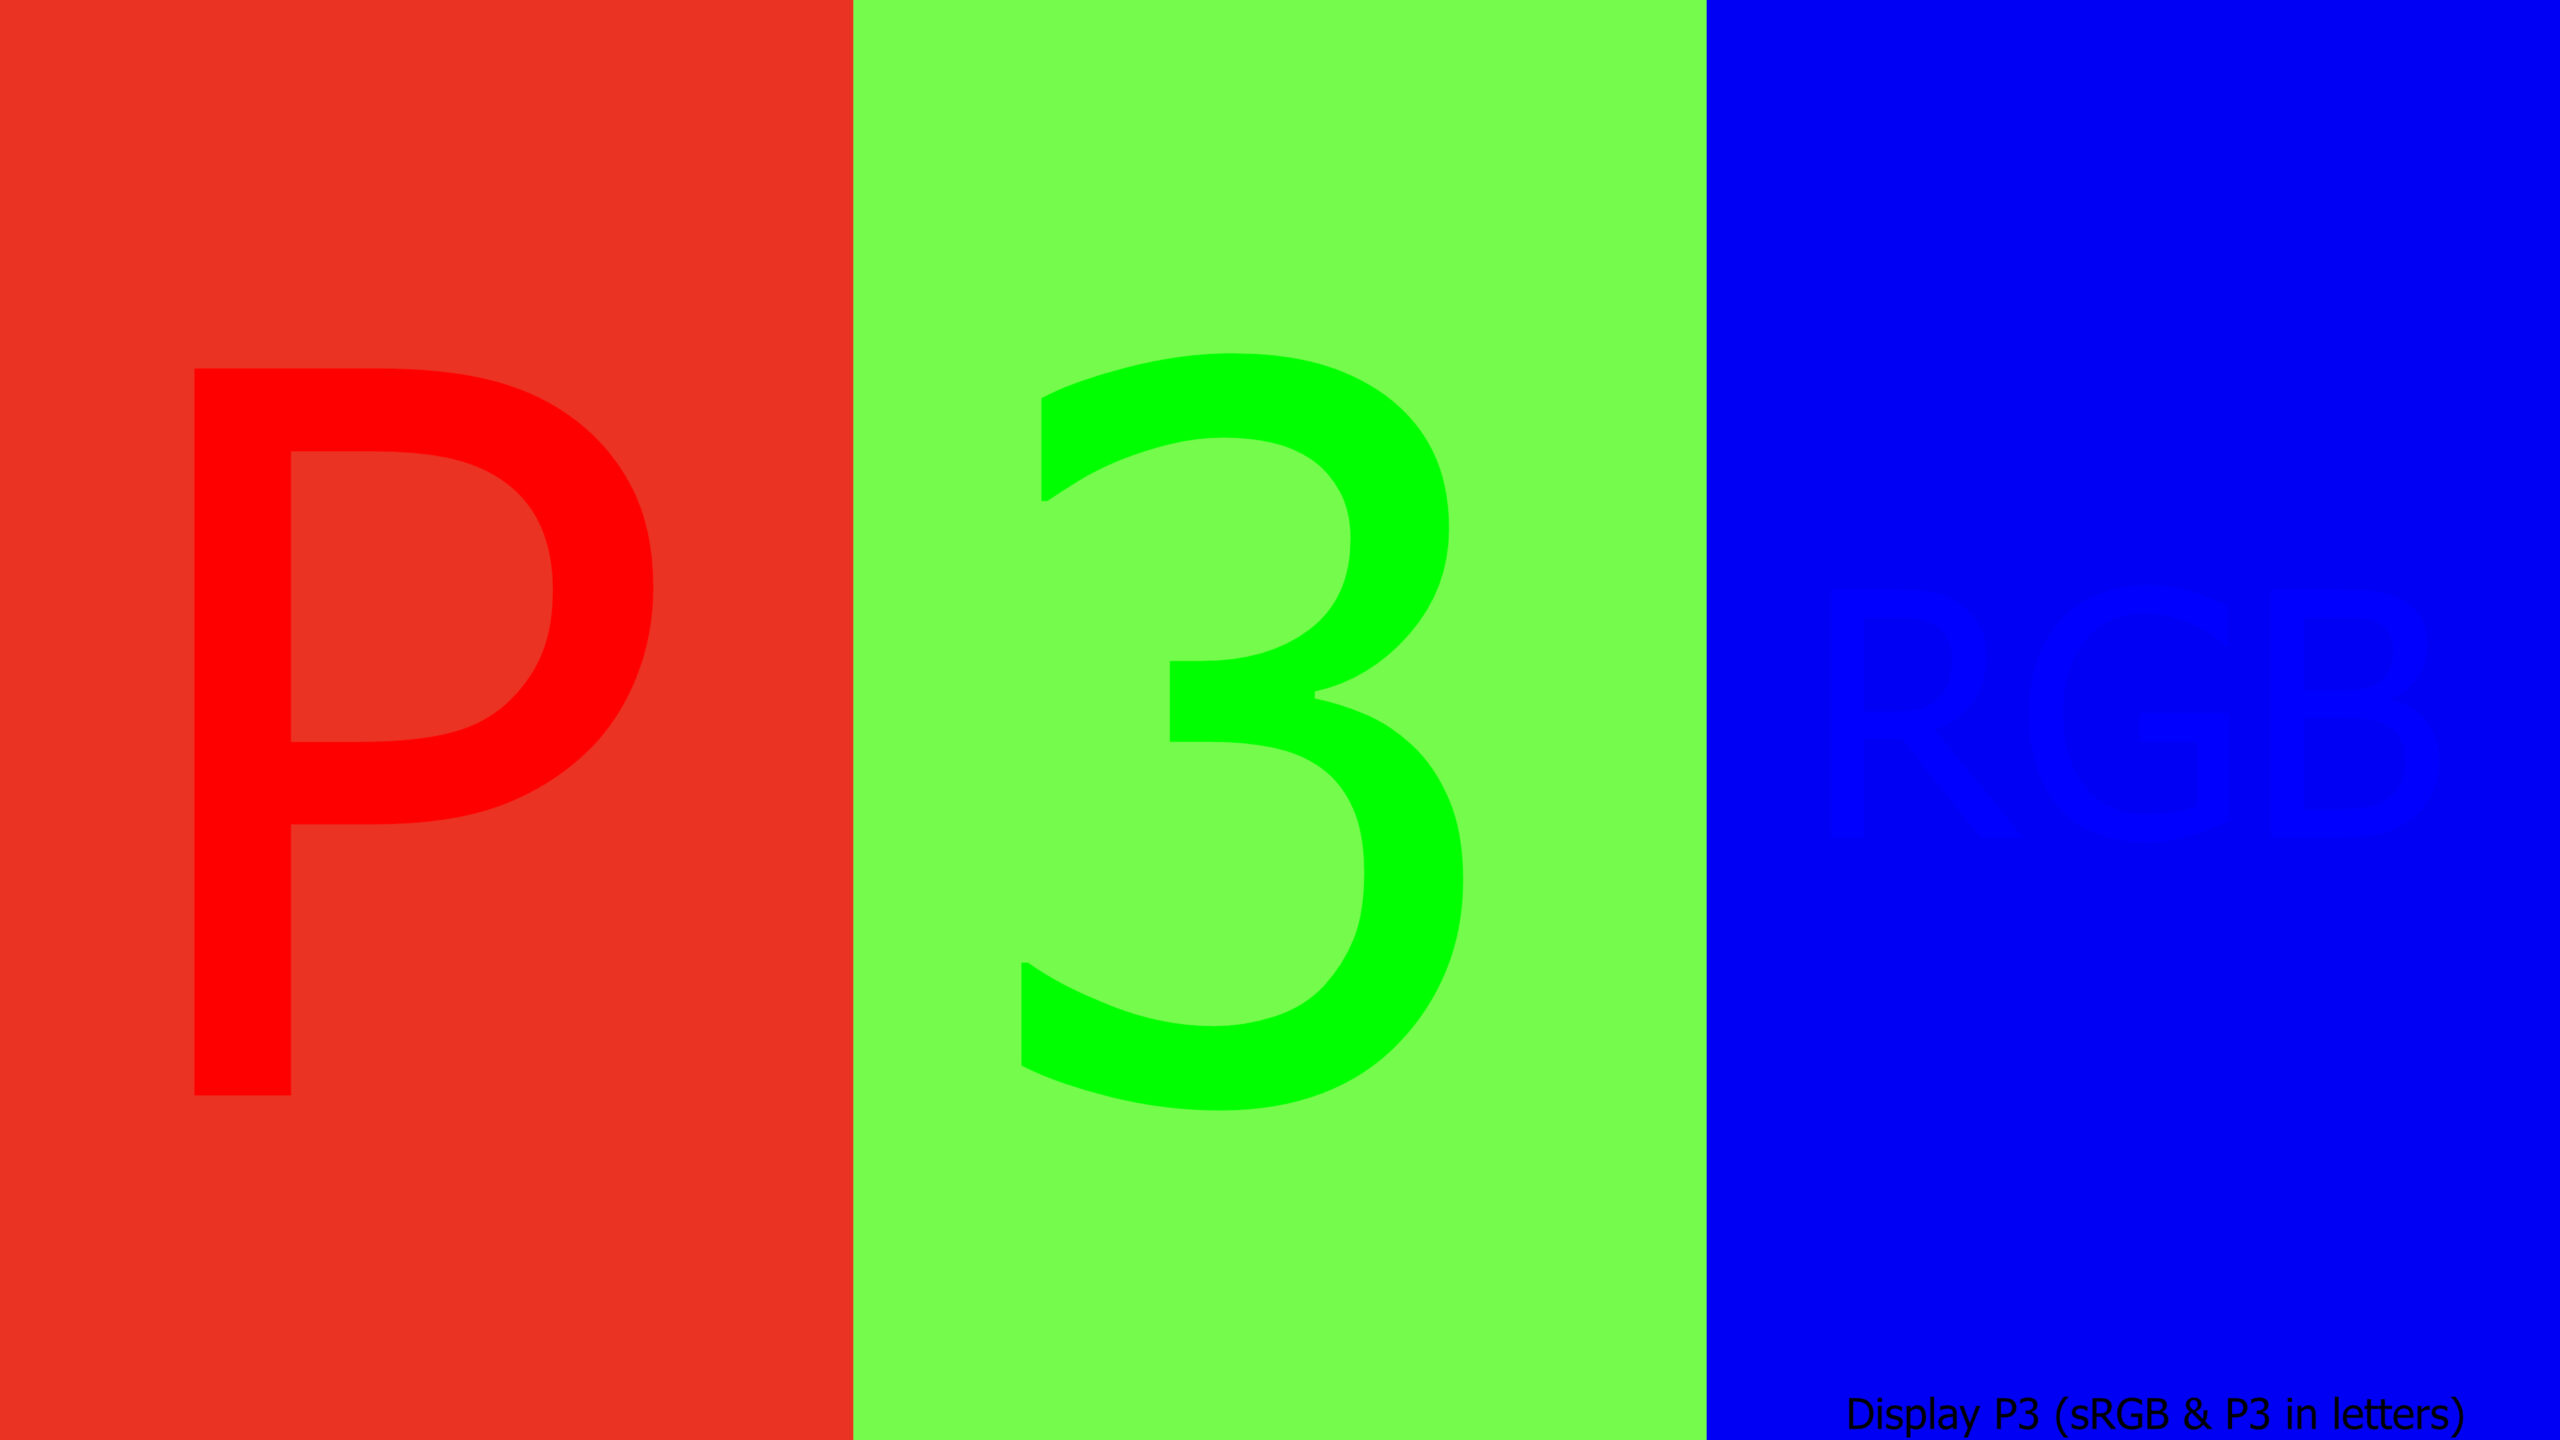
Most of the images in this article only make sense when viewed on a P3 display and by using a browser that is color managed as well like Safari or Chrome.
from nuke to affinity photo
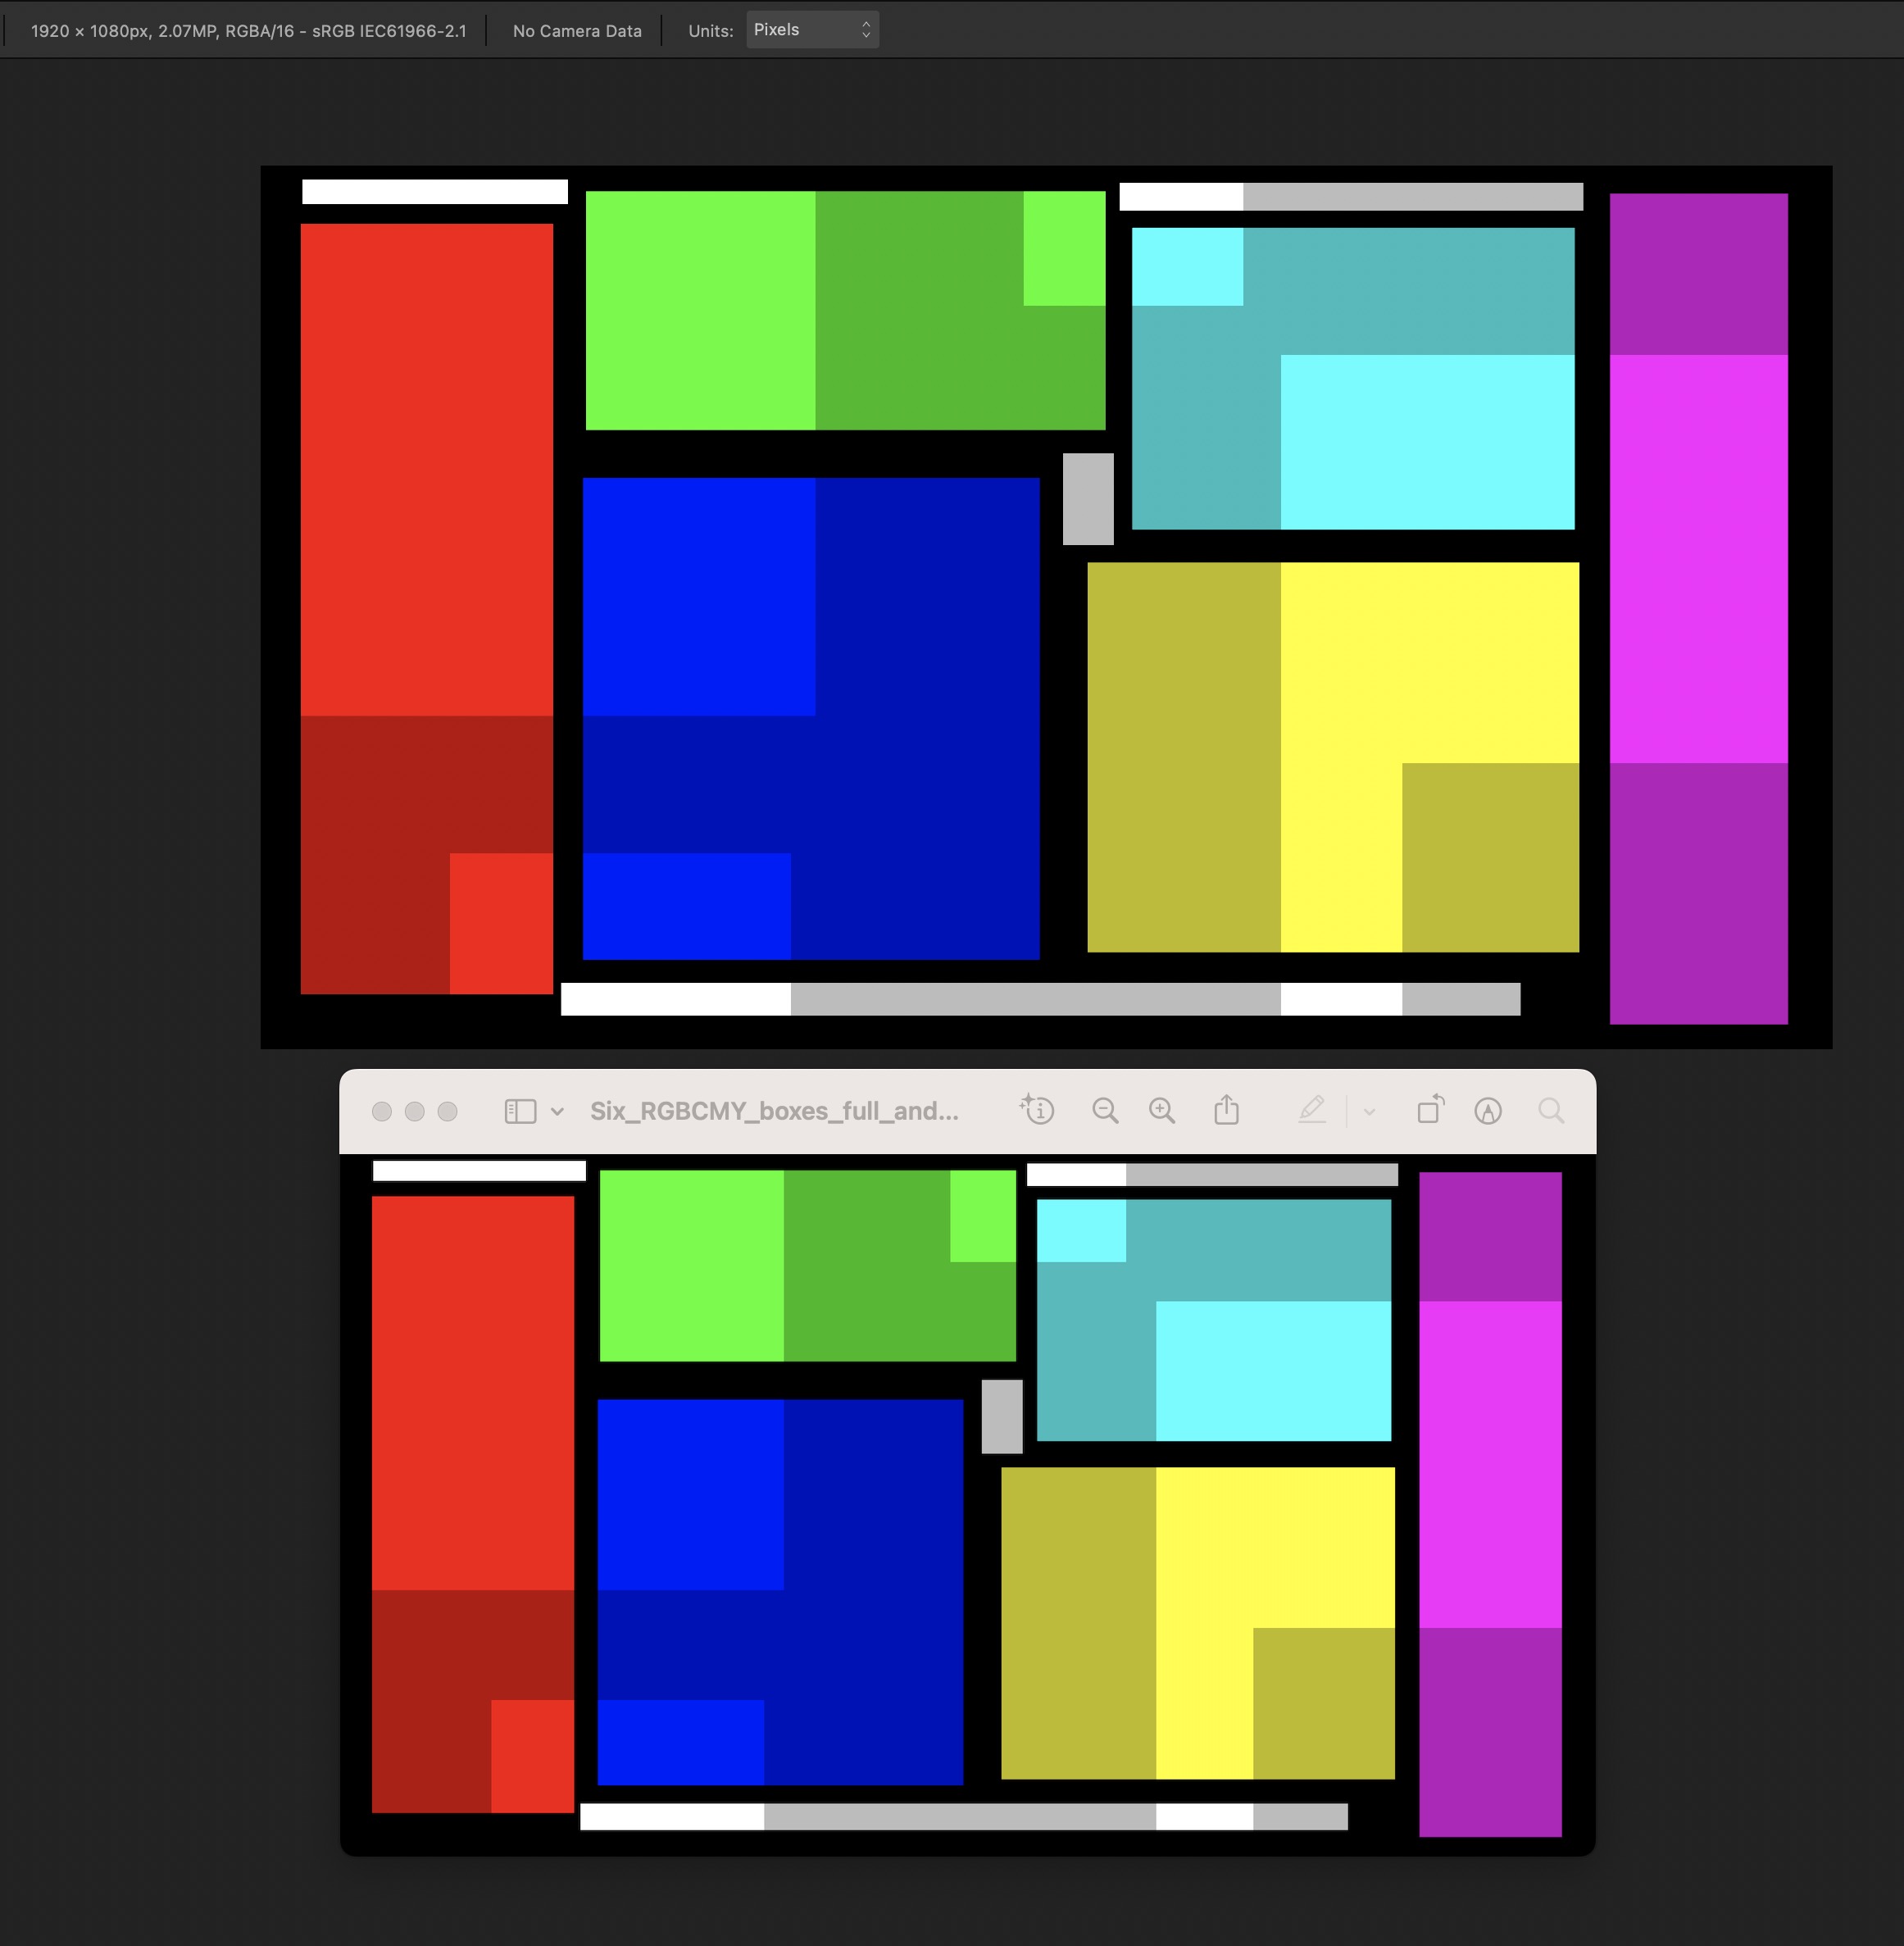
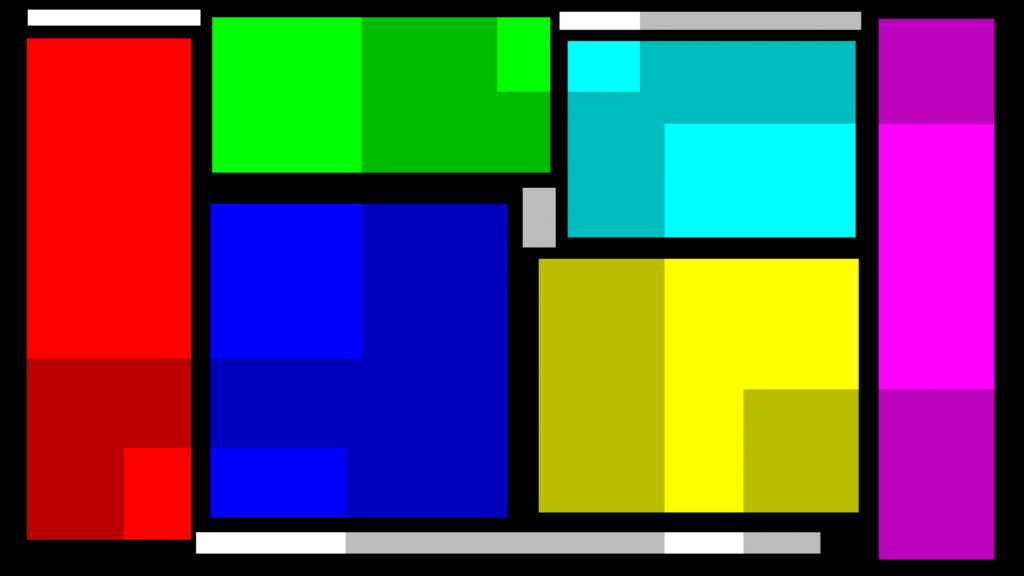
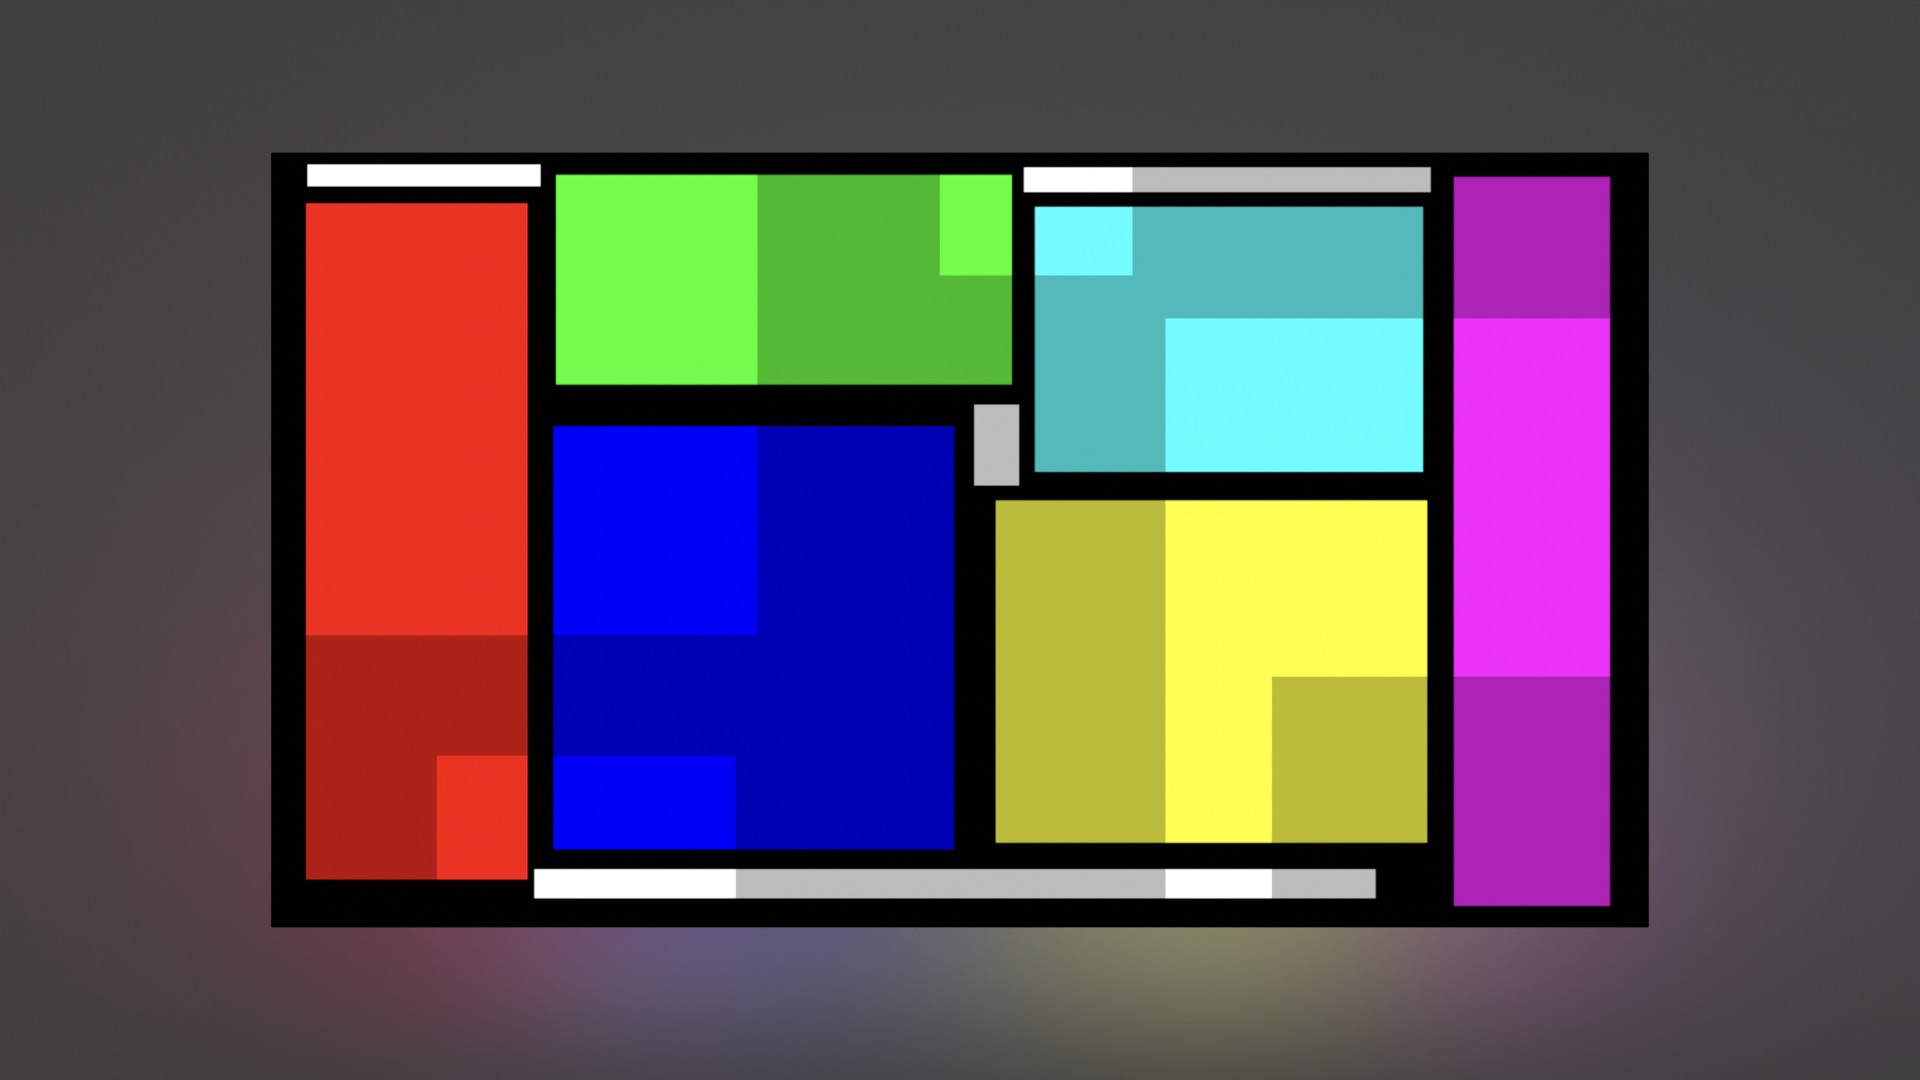
In Nuke I created a simple image that has six rectangles filled with maximum display color RGB (1/0/0 ; 0/1/0 ; 0/0/1), CMY (0/1/1 ; 1/0/1 ; 1/1/0) and full display white (1/1/1) emissions for an sRGB display. And some areas of the rectangles are reduced by 50%, so (0.5/0.0/0.0) for red and (0.5/0.5/0.5) for grey etc.

The Nuke viewer is set to sRGB and all the values get encoded by the inv. EOTF. The same inv. EOTF is baked into JPG or TIF files when writing them out from Nuke. The display hardware applies again the EOTF and the display emission are ranging between 0%, 50% and 100%.
note:
Nuke actually encodes the image with the sRGB OETF, which is not a pure 2.2 power function like the EOTF of the display. Therefore Nuke labels ColorSpace transform as sRGB (~2.20).
The exported TIF file from Nuke is not tagged, whereas the JPG image is tagged as an sRGB image. Both images look the same in Preview. The Apple preview app assumes that an untagged image is sRGB.

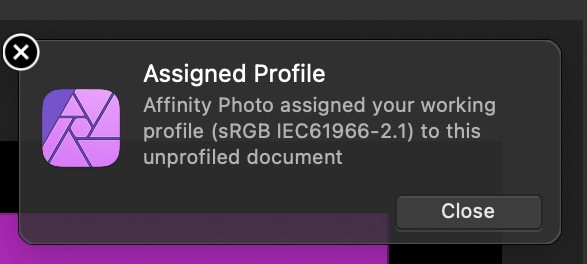
As soon as I load the untagged TIF image in Affinity Photo, it is assumed this should be an sRGB image and it gets there for automatically tagged as such. Untagged images are assumed to be sRGB as this is the smallest colourspace that any display should support.

The image document’s color space in Affinity Photo is sRGB. The JPG image that I exported from Nuke is tagged as sRGB. I placed the Preview window under the open image in Affinity Photo and took a snapshot. The snapshot is tagged as Display P3 (or iMac profile), but the color management in Preview and Affinity Photo make sure that on both apps I only show maximum sRGB values.
assigning a display P3 profile
While I am still in Affinity Photo, why not simply assigning to this image a Display P3 profile. I am working on a 2020 iMac 27″ with a P3 display as most modern Macs have these displays. The now Display P3 document got then saved as a P3 JPG image and uploaded here.
The two following images are both created from the same Nuke TIF image. The first is an sRGB image and the second image is coming from Affinity Photo, the assigned Display P3 document.

If you read this article on a P3 capable screen and use a browser that supports ColorSync on the Mac like Safari and Chrome, the two images will look different. On the second image all the colours are more intense and saturated than on the first image.
By assigning a new profile to the image, I changed the meaning of the RGB values that are in the image. If I was converting the document from sRGB to Display P3 instead, the two images would look identical again.
Im always seeing full display P3 colors in Nuke!
Nuke in the default configuration allows me to use only a sRGB viewer. The coloured rectangles RGB values get a meaning by using the EOTF for sRGB.
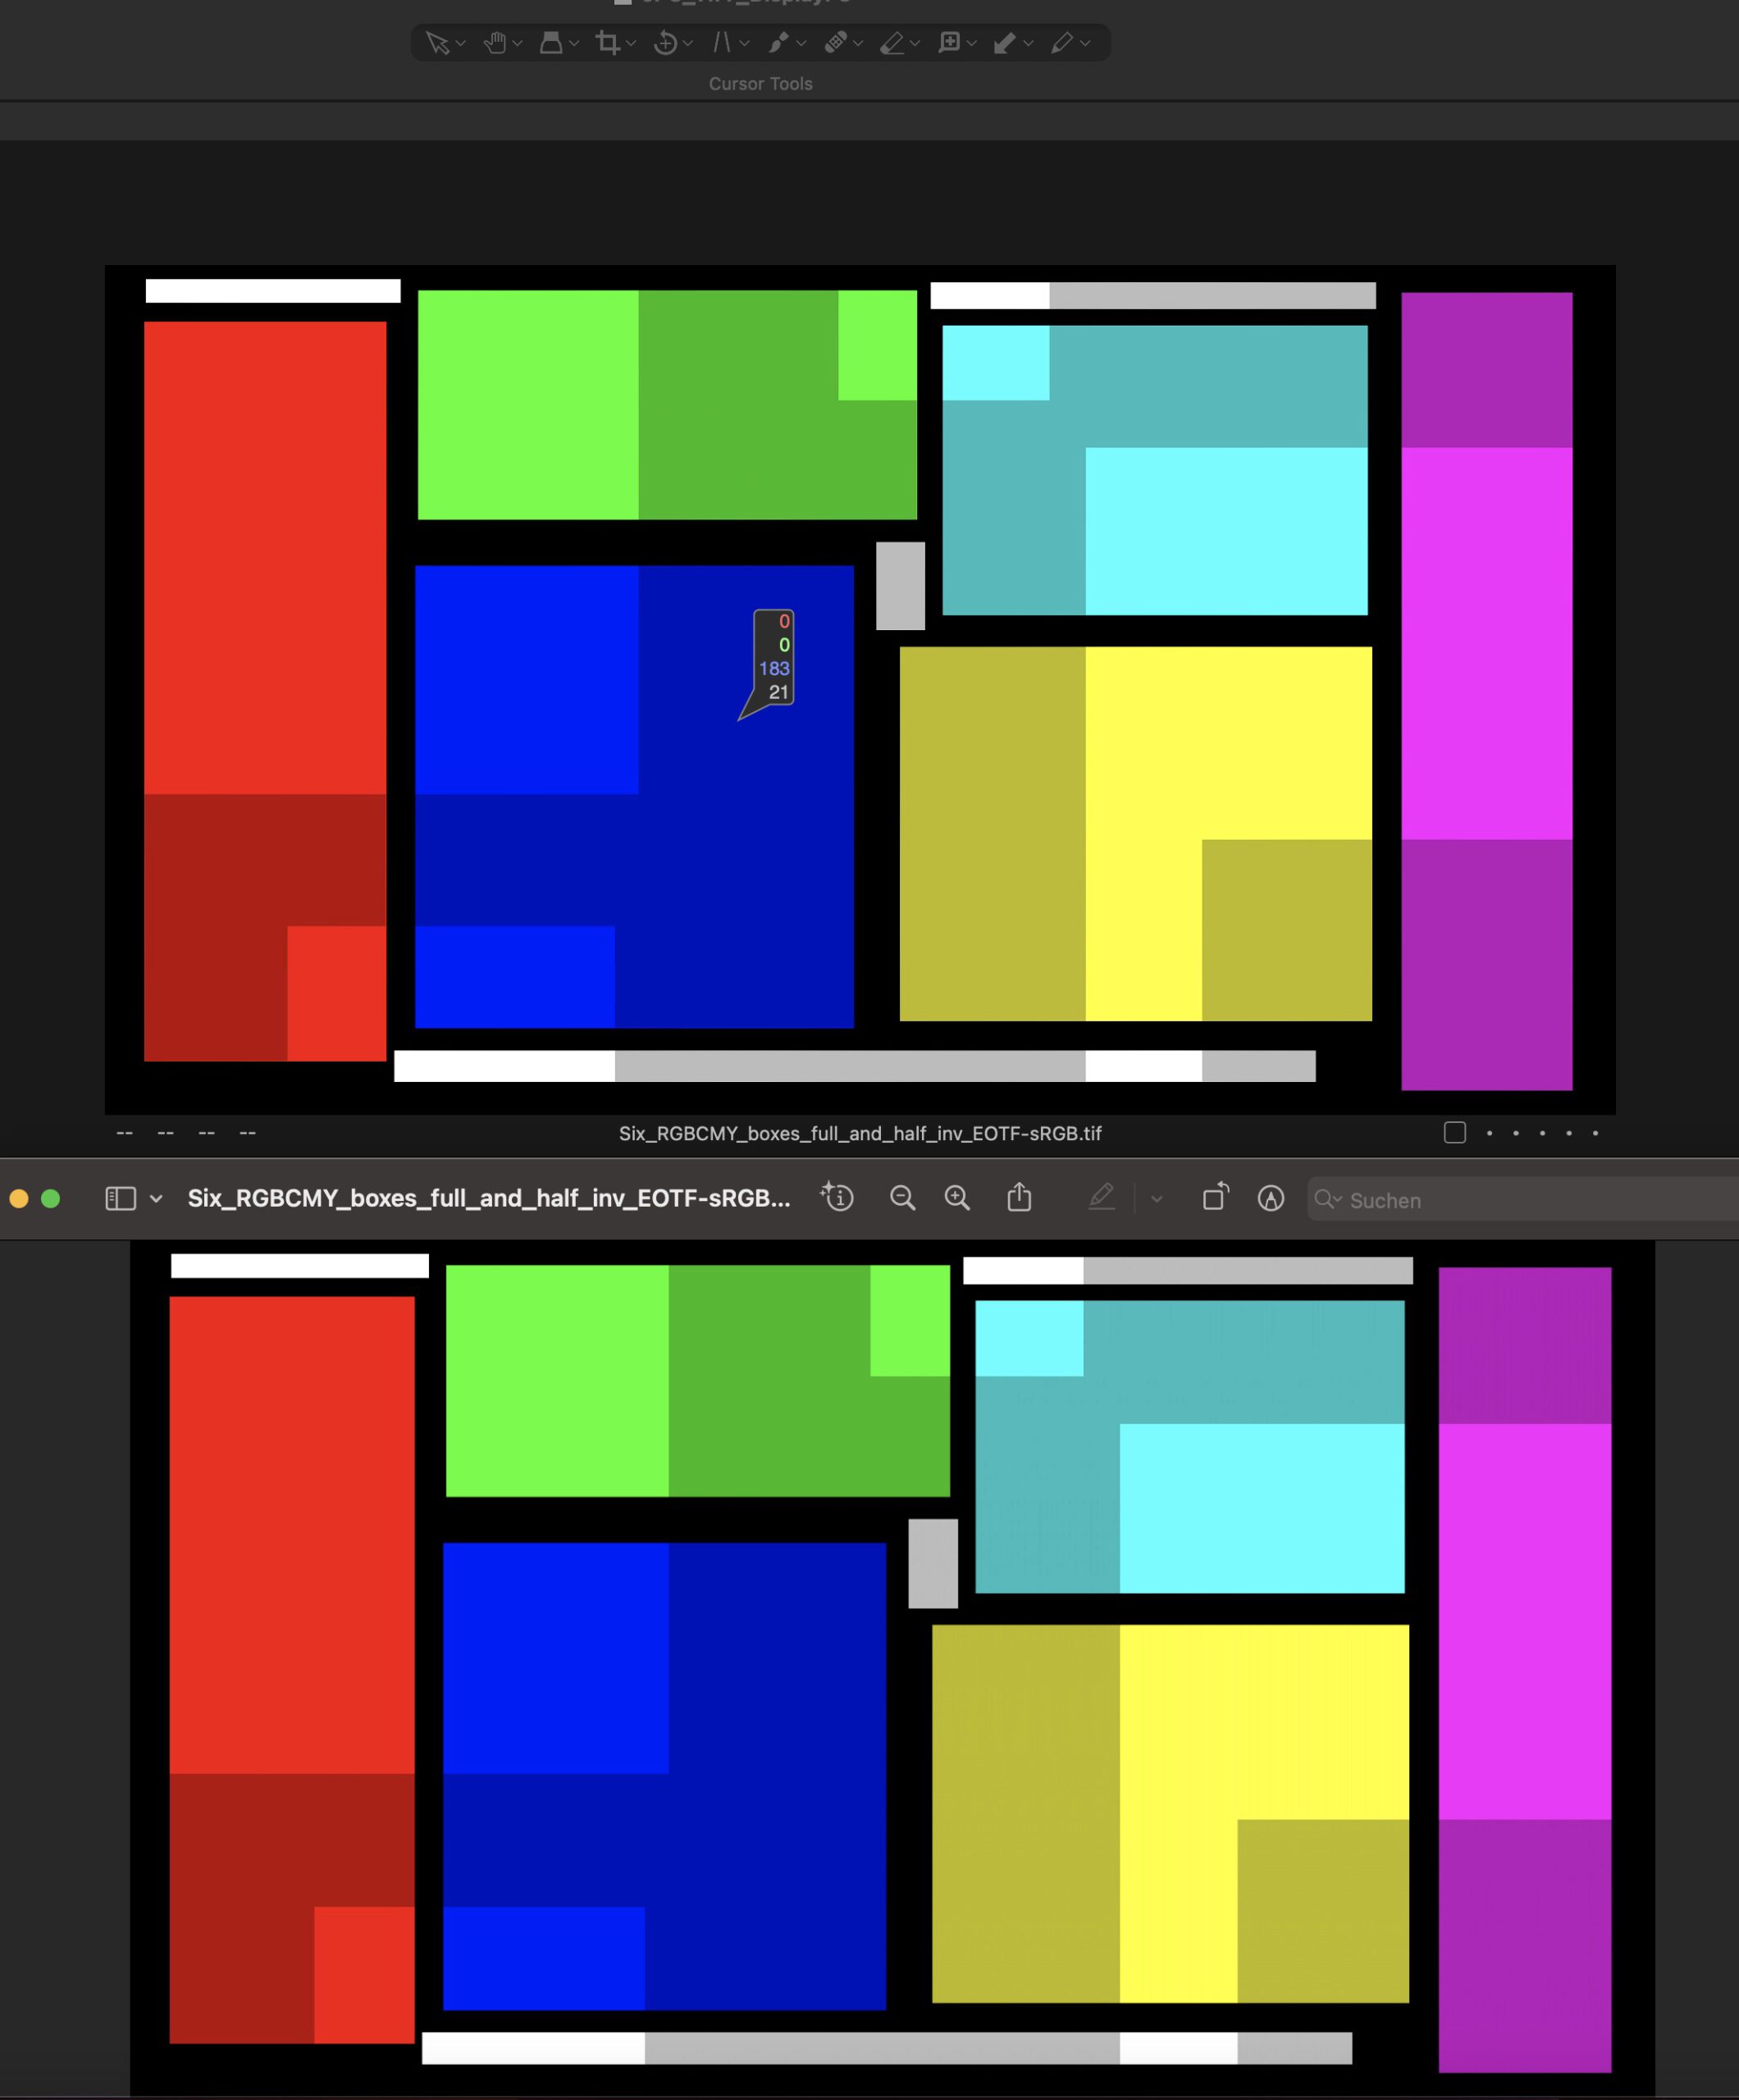
I made another screenshot while having Nuke open and seeing the Nuke sRGB viewer plus a JPG image from the nuke script in Preview at the same time. This screenshot reveals what it means that Nuke is not supporting Display P3 screens in the default configuration.
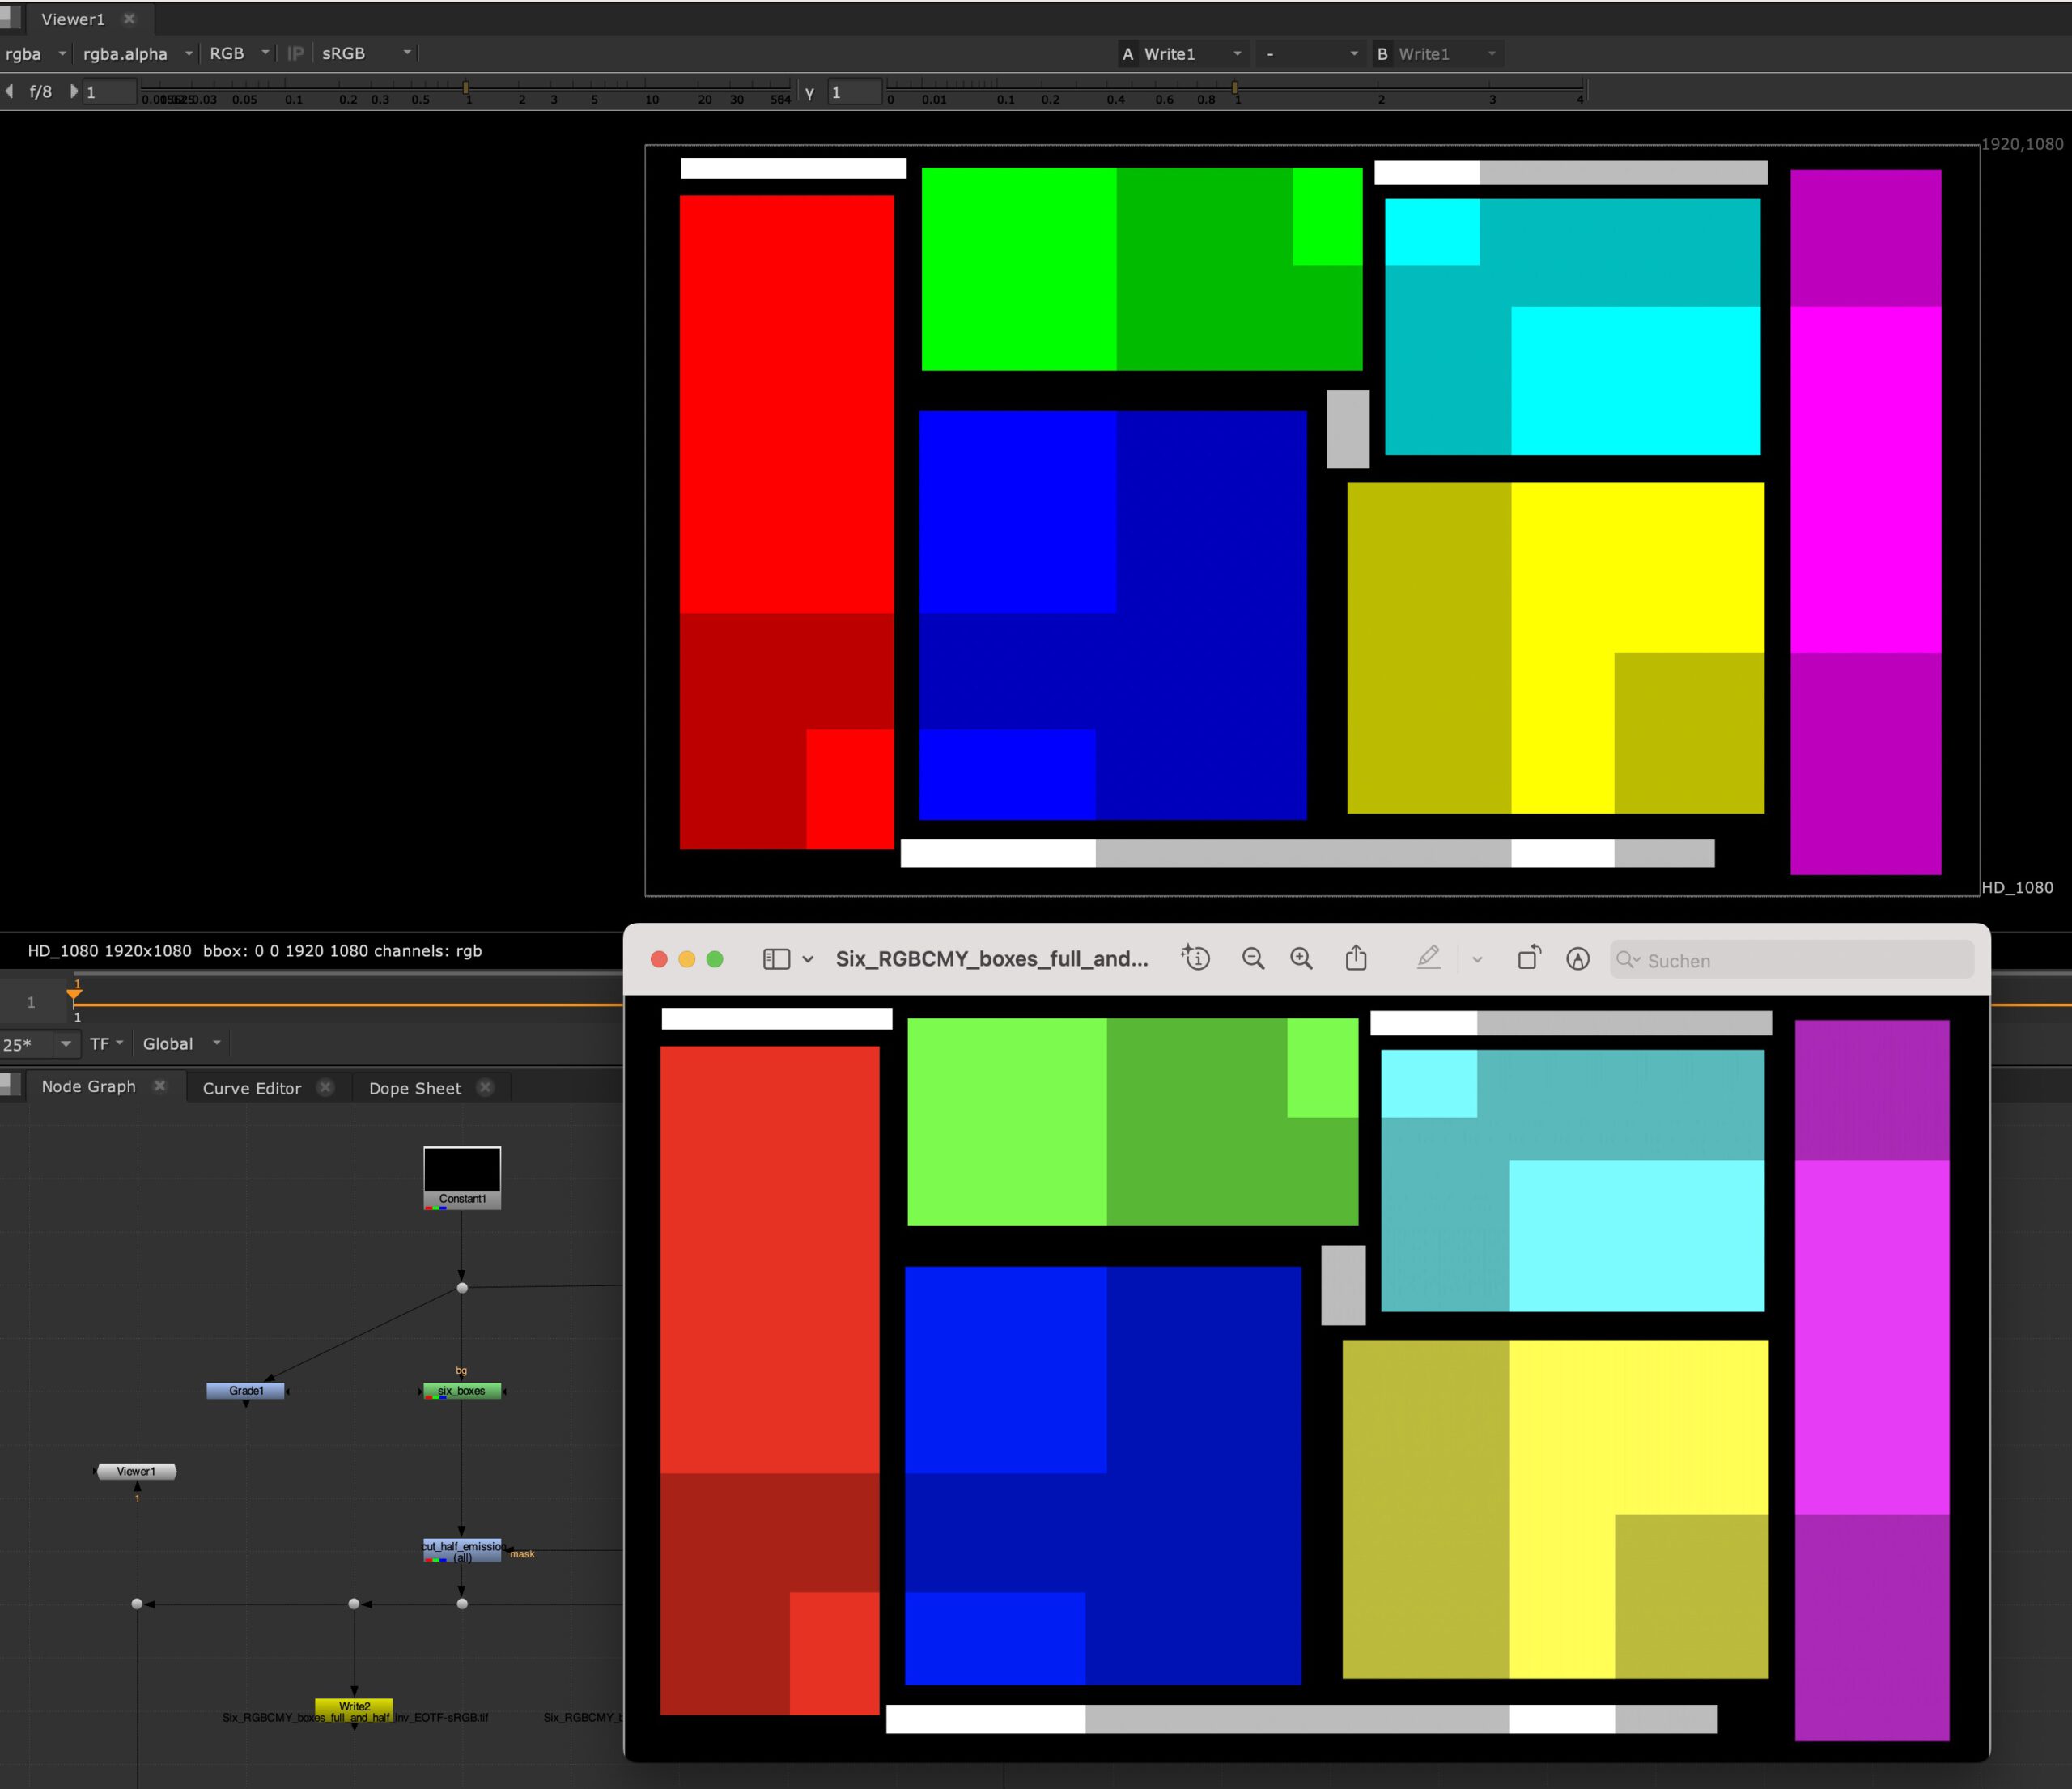
That is bad news! Inside of Nuke I see full display P3 emission values as the Nuke viewer is not managed, although I thought and wrote out an sRGB tagged JPG image result. The Nuke viewer shows me the wrong colours, the JPG shows the right colours. But there is something you can do.
Nuke’s endless beta feature
With Nuke 13 came a new checkbox in the nuke color management preferences. Nuke supports HDR (EDR) displays on MacOS:
“Enable macOS HDR Color Profile (Display P3)* (Beta)”
To make use of this feature you need to use a different OCIO config that supports P3 displays. I am aware of two OCIO configs support display P3:
- A special ACES 1.2 config from Alex Fry (OCIO v1)
- https://github.com/alexfry/OpenColorIO-Configs
- AgX from Troy Sobotka (OCIO v2)
- https://github.com/sobotka/AgX
- Sadly the Filmic Blender 1.1 (OCIO v1) config does not load anymore in Nuke 13.2v5
- https://github.com/sobotka/filmic-blender
This article is not about ACES nor about AgX and would create very different image results with this nuke script, so I am using the AgX config only to use the Display P3 support in Nuke with the two view transforms Display Native (sRGB and P3).
In Nuke I switch to the AgX OCIO.config, check the default roles so that they are all set correctly and set the Nuke viewer to Display Native (Display P3). Then I open the initial sRGB tagged and exported JPG in preview and make another screenshot on my iMac.
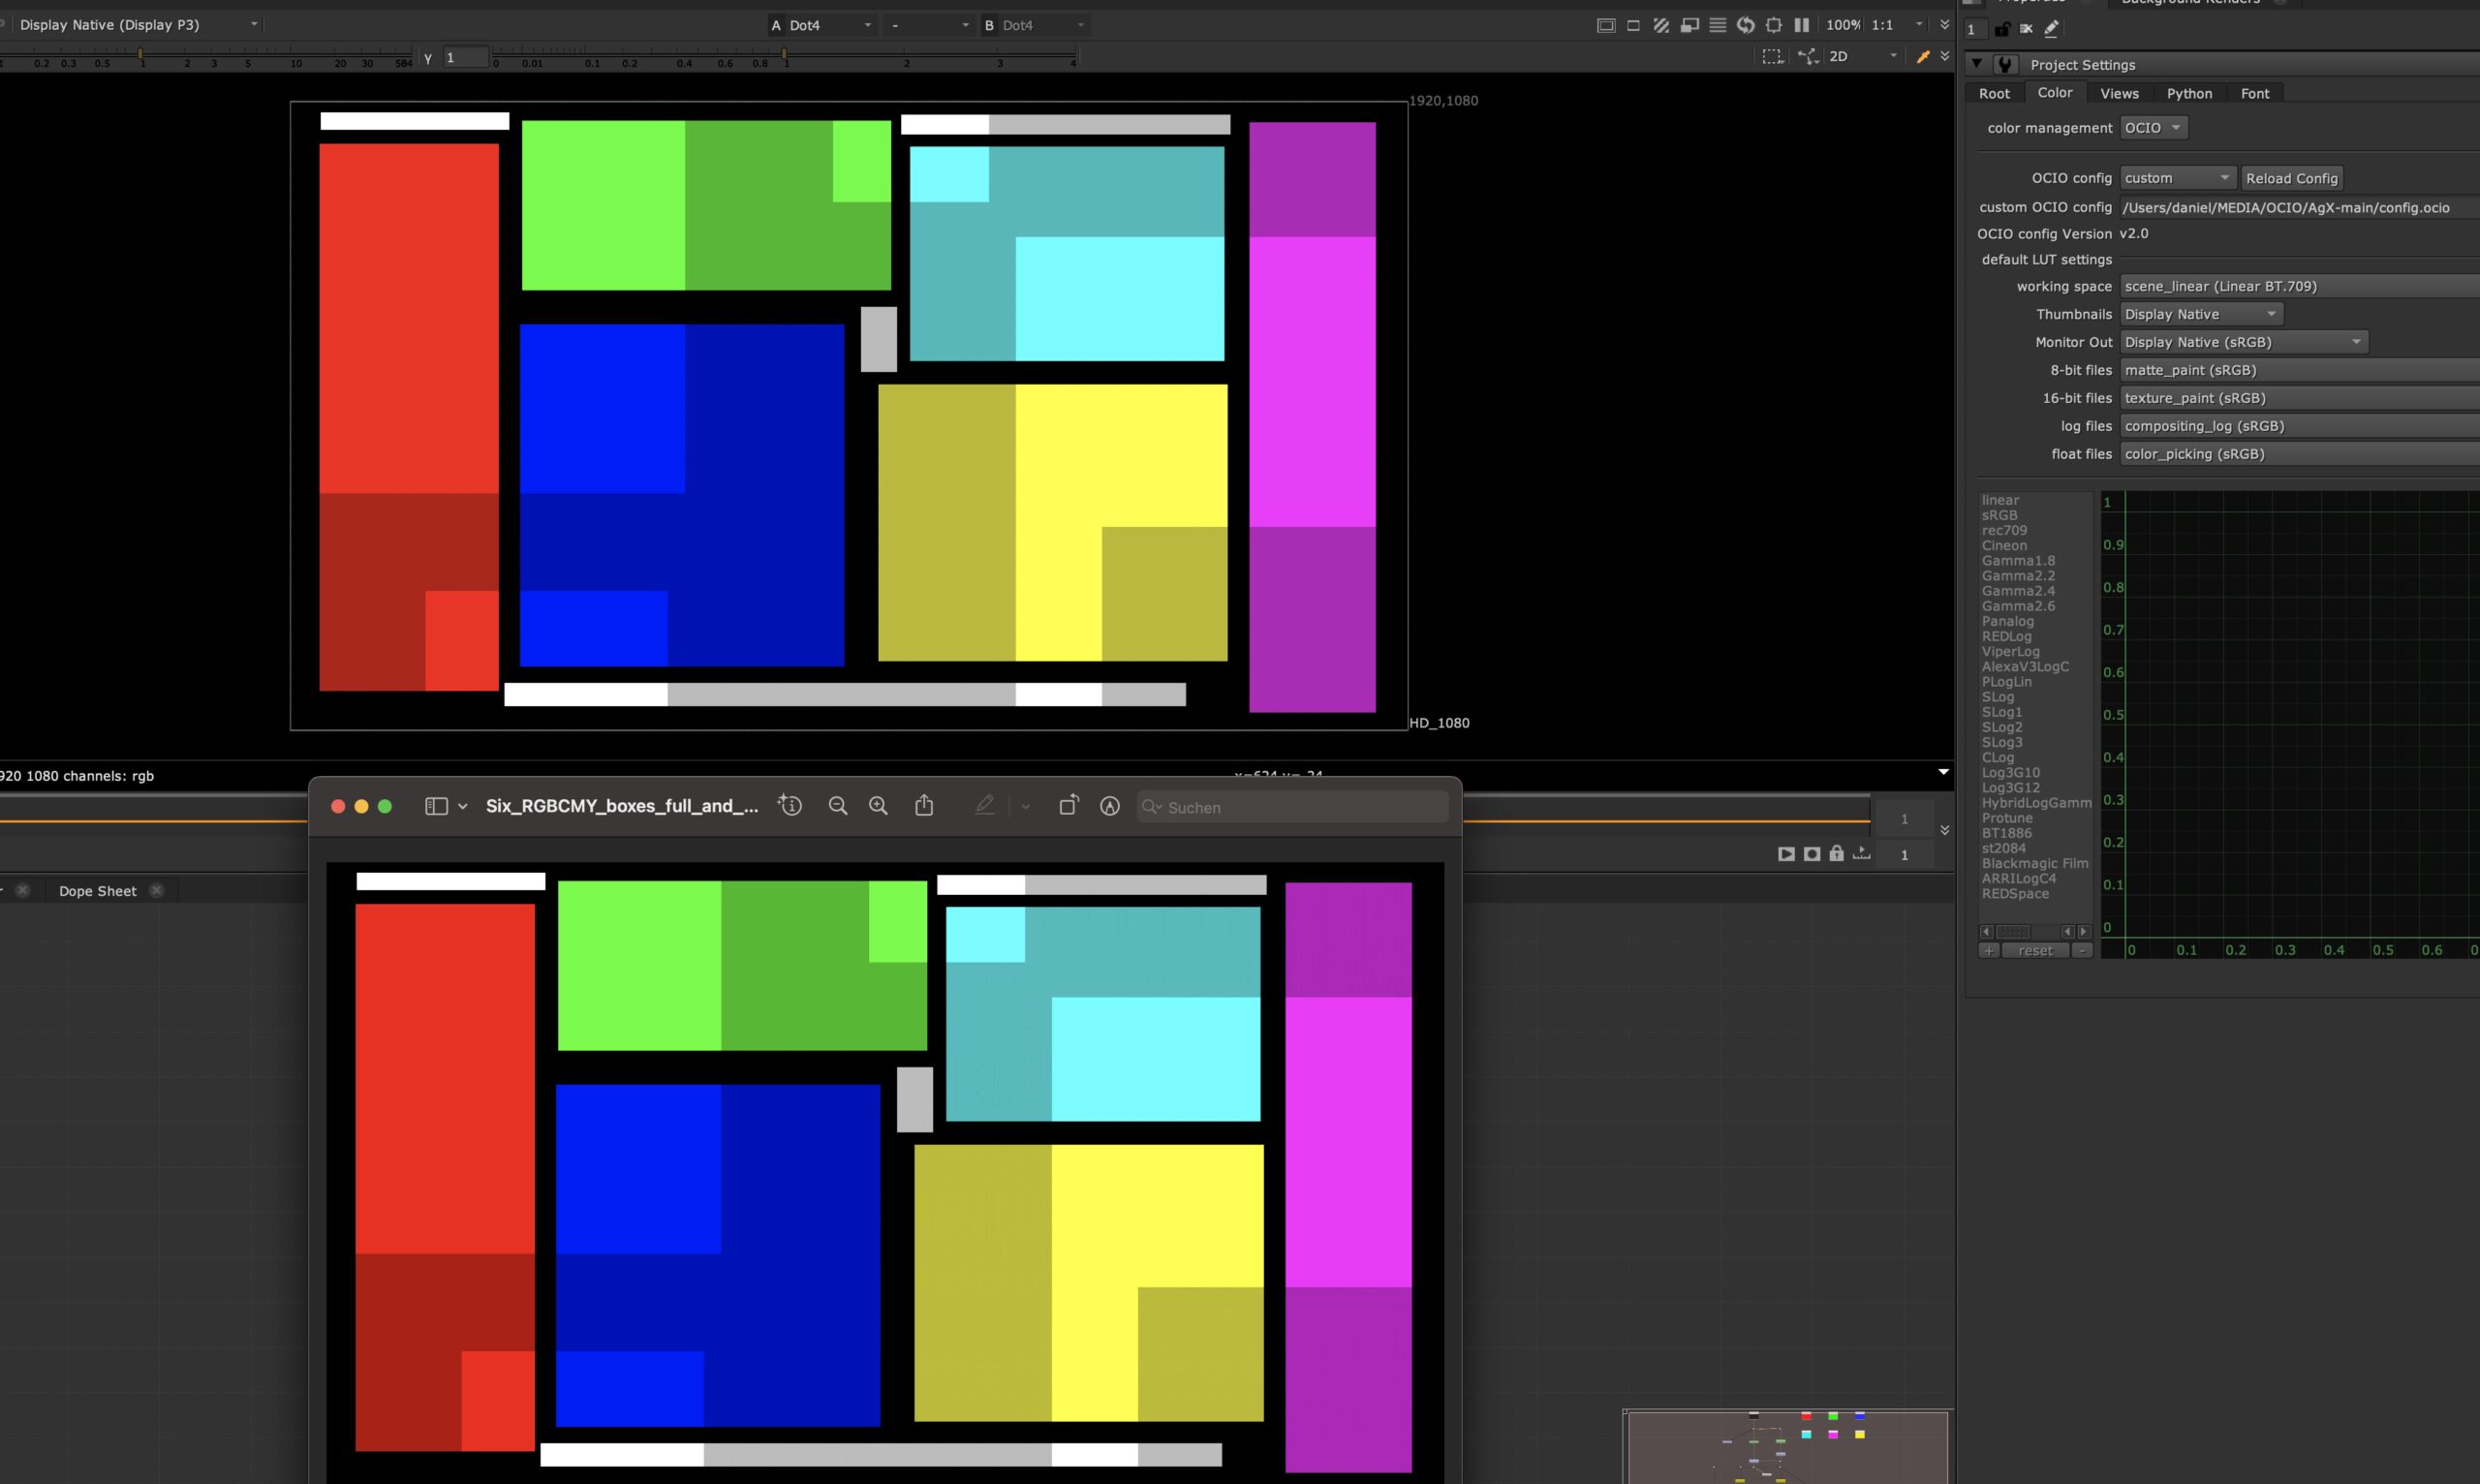
Nuke shows the right colours in the viewer now. The Nuke project settings are set for a sRGB display and the Nuke viewer shows maximum sRGB emissions on a iMac Display P3 screen.
What I learned from this “exercise” is that an OCIO config such as AgX or the special ACES 1.2 config for Display P3 is the minimum requirement to work with Nuke in MacOS and see proper colours in the nuke viewer.
Its time to blend, another app without Colorsync support
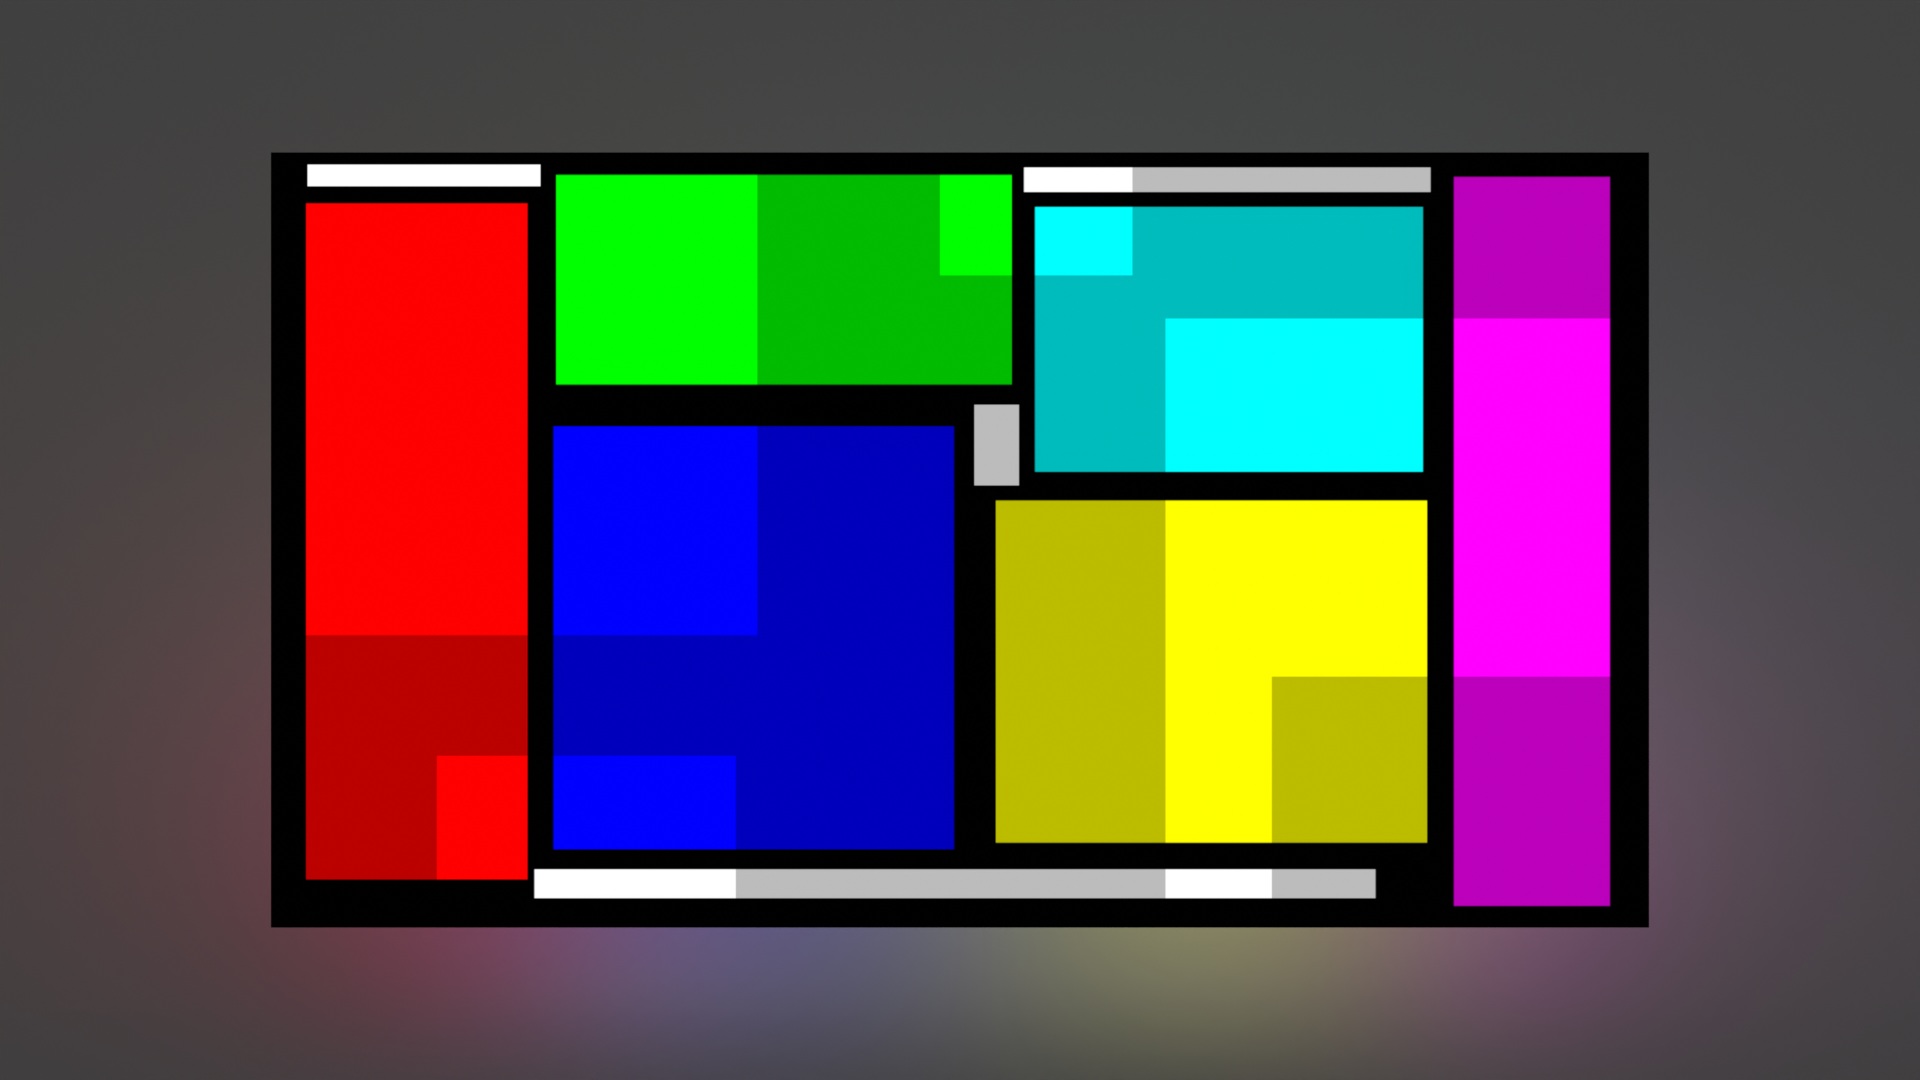
I fired up a fresh Blender 3.50 Alpha version. I set up a very basic scene with the only light being the EXR file with the coloured rectangles from Nuke. The EXR file is used as a light source with an emission shader. This “light” floats in front of a principled shader 90% achromatic reflective surface (base color). The rendered image is saved directly as a JPG that somehow gets automatically tagged with sRGB, this is the same behaviour as in Nuke.
The color values that I chose in Nuke lead to the maximum emission values for a display. But neither Nuke nor Blender support ColorSync on a MacOS. And although I am working for two years with Blender, Nuke, Affinity Photo etc. on this iMac I never realised this important issue. But I must admit, without seeing both images side by side, it’s hard to see and know that there is a difference.
I made a screenshot, this time with Blender and Preview open at the same time.
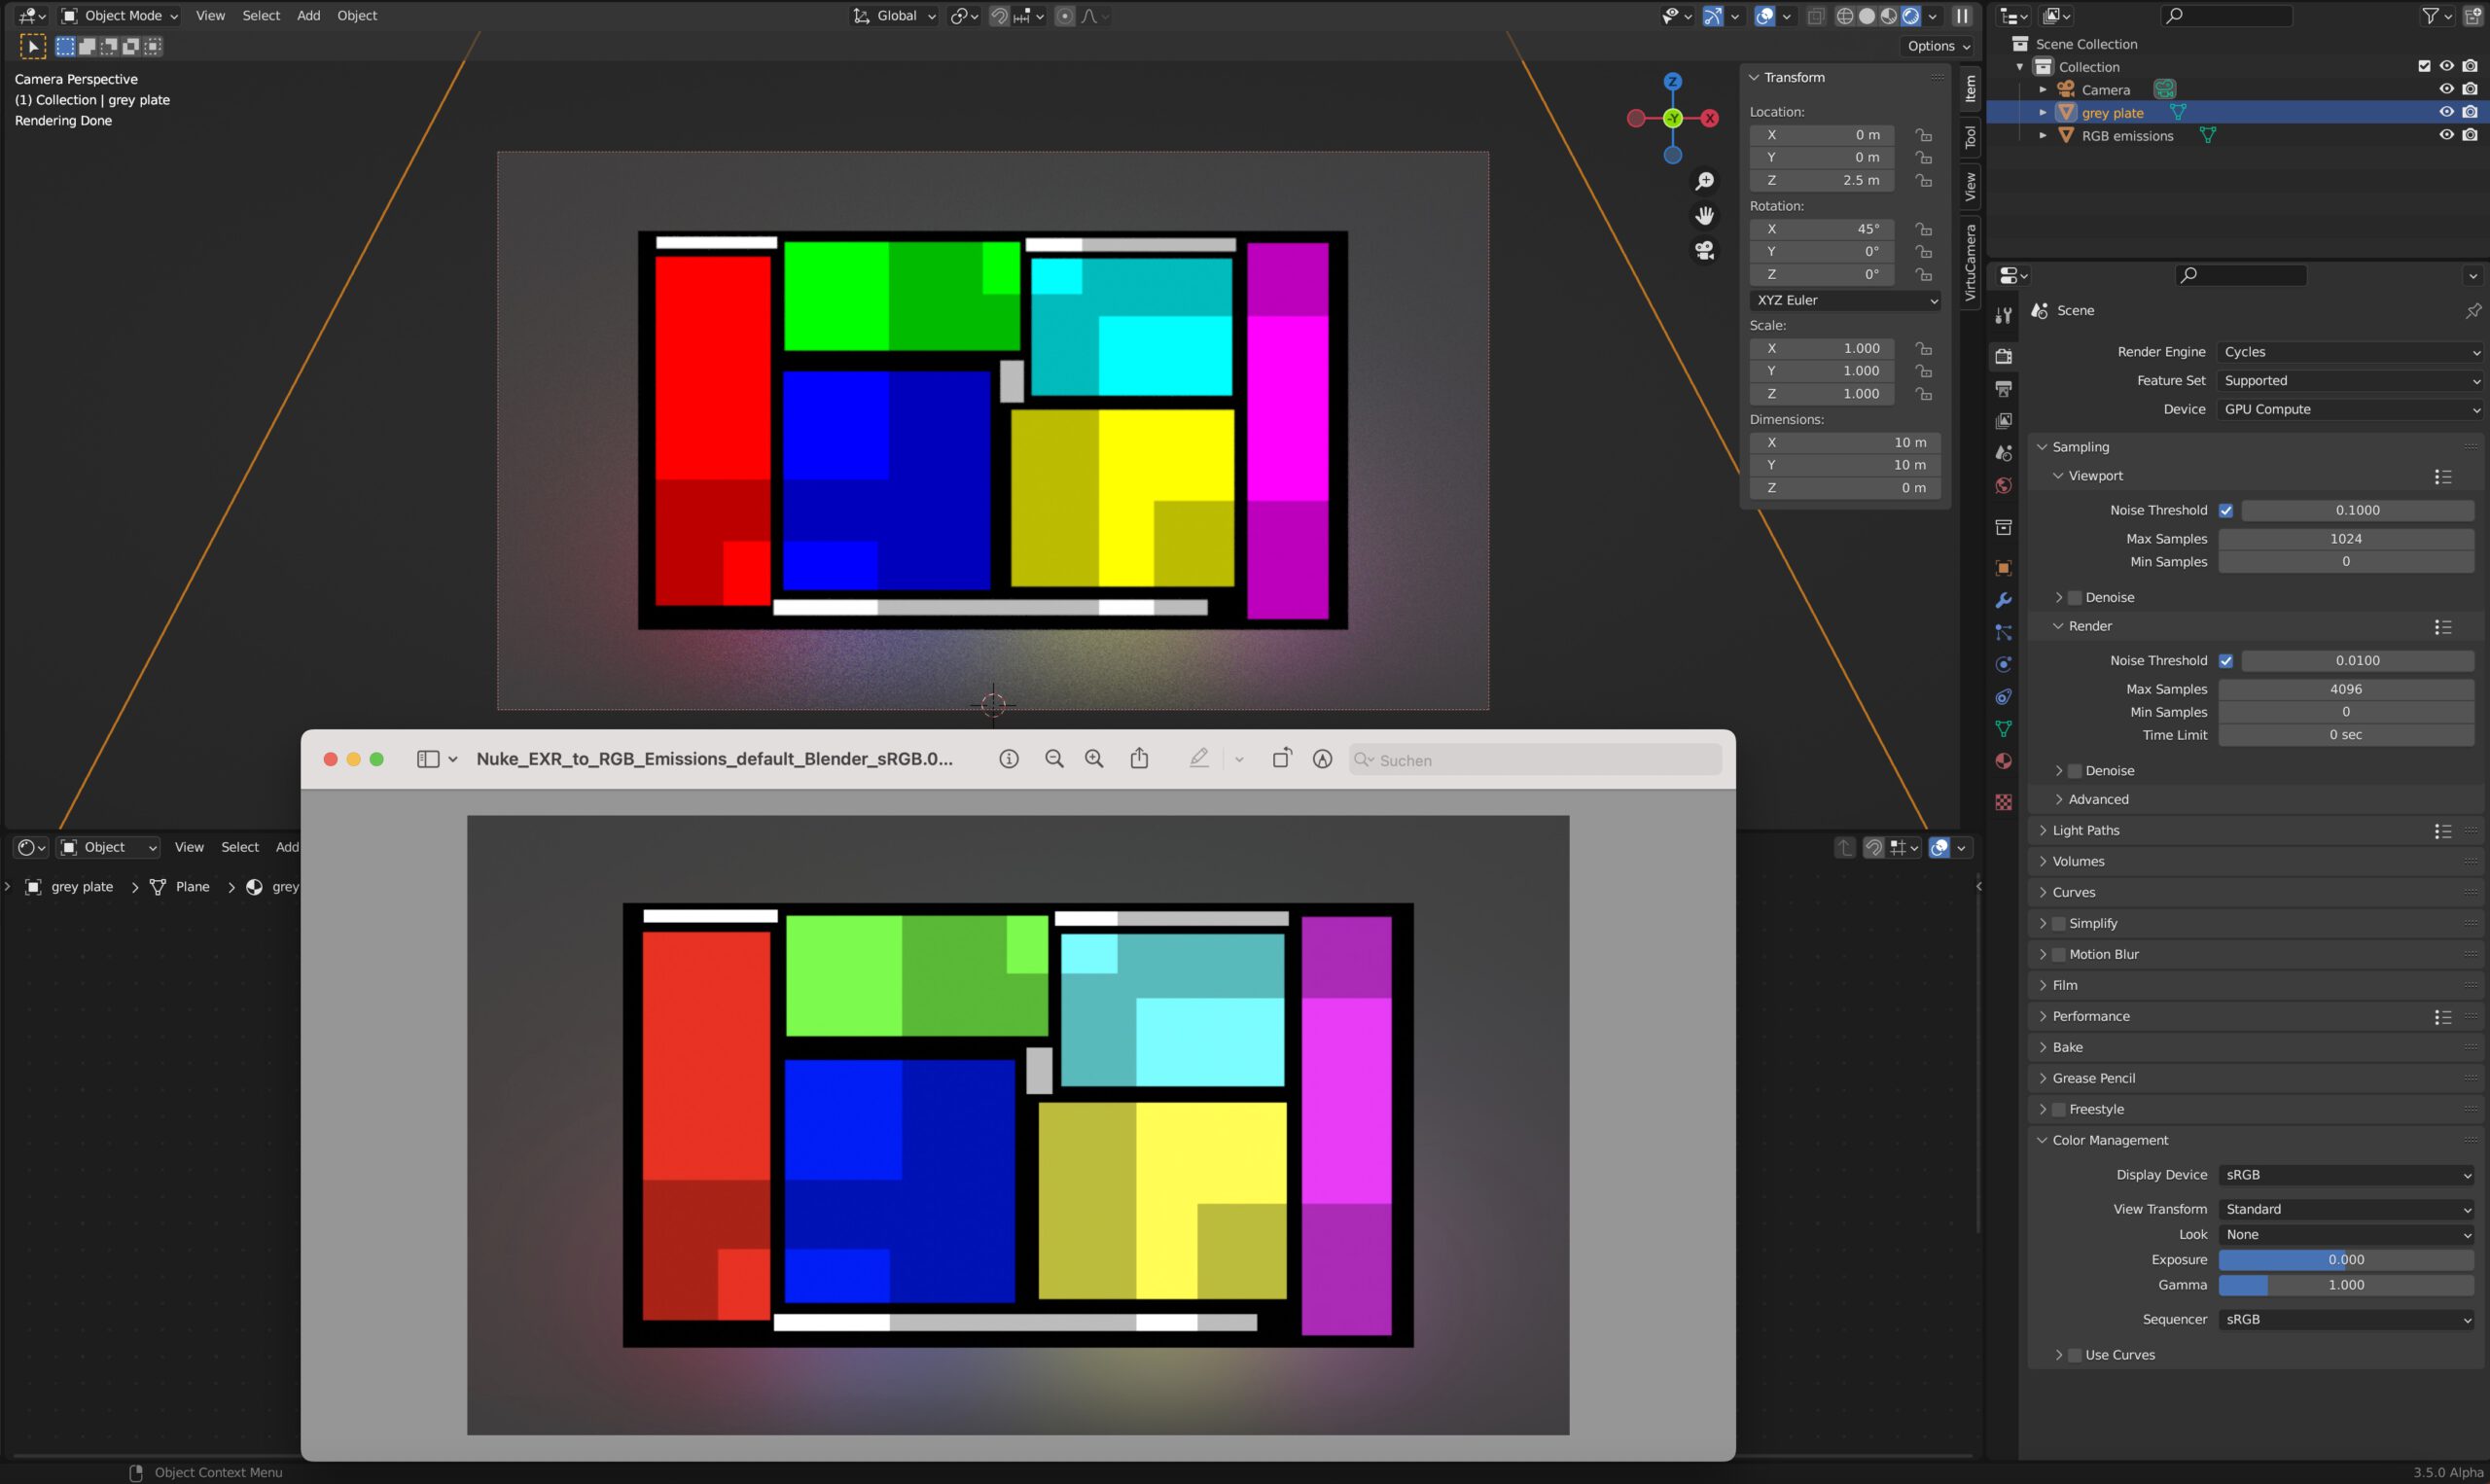
The difference between the Blender render view and the rendered JPG image viewed with Preview is the same as in Nuke with the nuke-default config. The Blender render view shows maximum P3 RGB emissions from the display, although I thought I should only see maximum sRGB display emissions like in the image in “Preview”.
looking for solutions in Blender
Blender supports OCIO and there are other OCIO configs that support Display P3. The first is Blender Filmic, but not the config that ships with Blender. You need to download and use a newer version of Blender Filmic that you can find on GitHub. The latest version is 1.1 from December of 2018. Once I start Blender with this OCIO config, a new Display Device called “Apple Display P3” is available.
Blender only fully supports sRGB as a working colourspace and for rendering, but at least I can see the right colours now. I do not use any of the FILMIC log encodings for this example, just the sRGB EOTF.
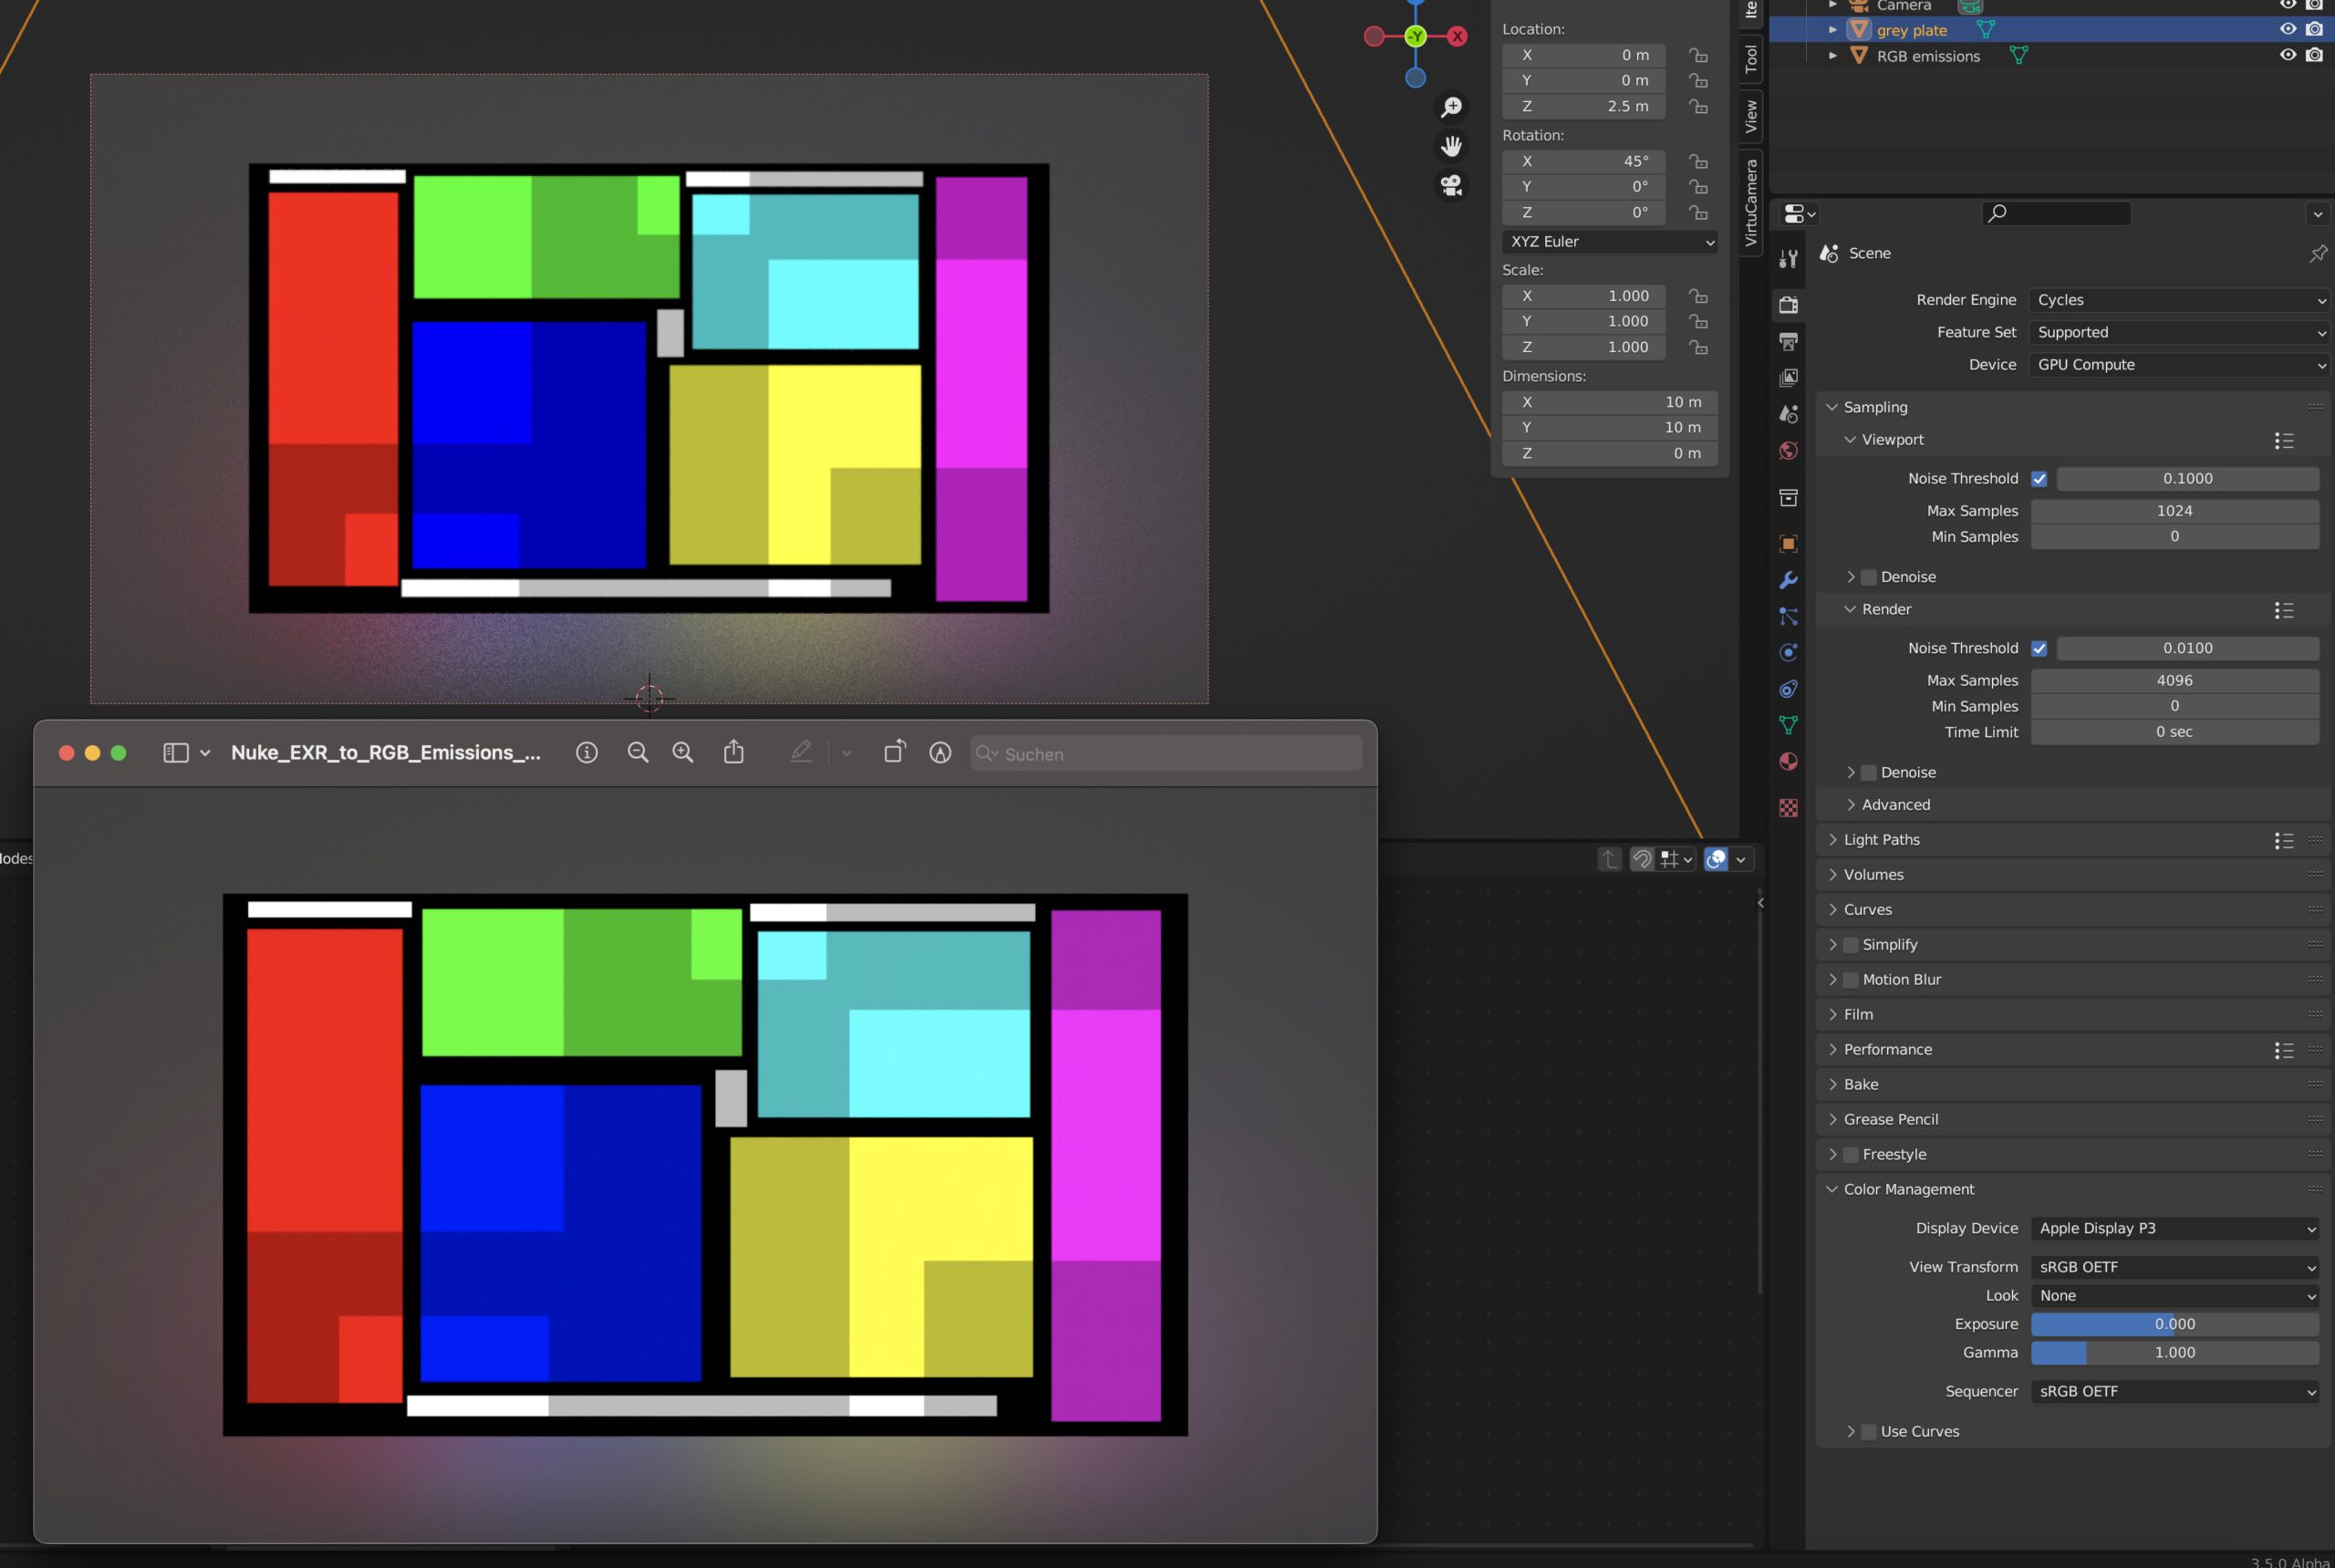
That looks better now, in Blender I see maximum sRGB values on a P3 display, the same as in Preview. But the next step, writing out a JPG from Blender, creates the next issue. The JPG is now desaturated.
Somehow it seems the conversion for the P3 display is now also written into the JPG image. Usually I don’t render JPG images from Blender, but still after being happy to see the right colours in Blender, I am writing out the wrong ones. The problem is the lack of a proper support of color management in MacOS for Blender.
A second more modern AgX OCIOv2 config that can be used in Blender is available here. The general setup on how I use AgX on the Mac I described here.
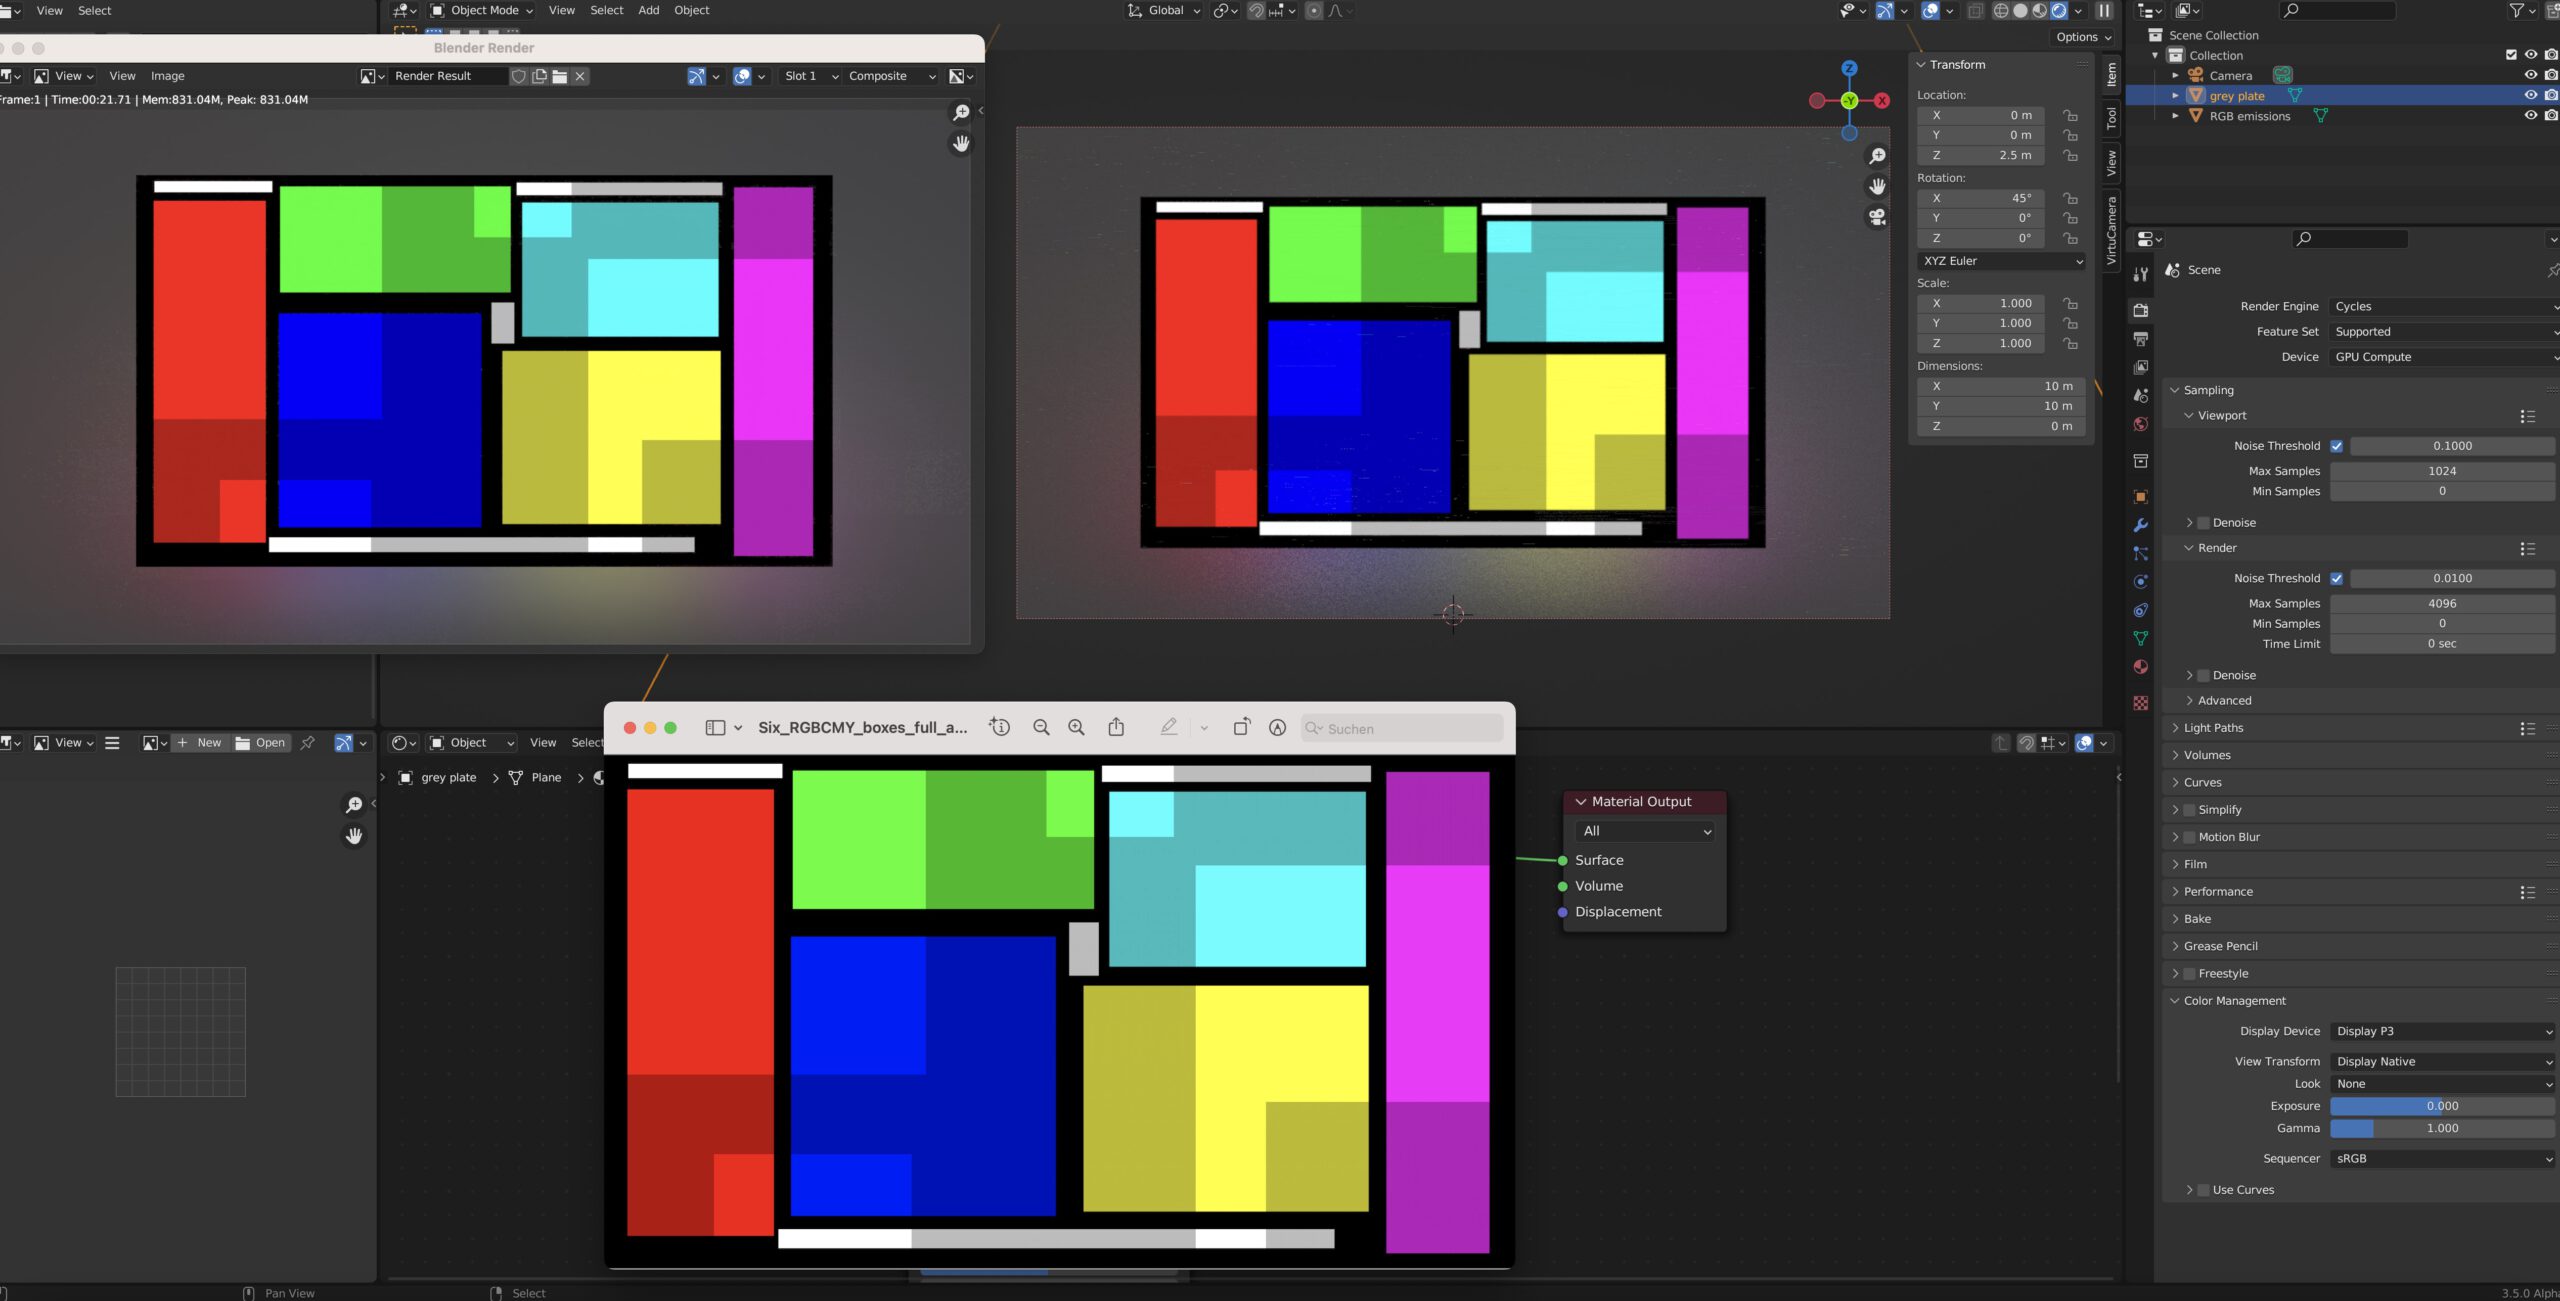
With alternative OCIO configs I am able to see proper sRGB colours on a P3 display in Blender too. It would be nice if the MAC installer of Blender would always come with a display P3 supporting OCIO config.
looking at more apps – resolve studio 18.1
Resolve has support for color managend viewers when two checkboxes are enabled in the general preferences.

Most colourists that I know work with Resolve unmanaged and do their own custom color management. Some tried to work in ACES, but not with the greatest success. I did not meet any colourist who is using the Resolve Color Management (RCM2). For this example I will use the simple setup of RCM2, setting the working colourspace to HDR (processing) and the output transform to SDR (Rec.709).
I load the EXR file from Nuke with the coloured rectangles and the the input colourspace to linear. Resolve doesn’t not specify and primaries when selecting linear, but I it seems Resolve assumes linear-sRGB/Rec.709.
Like with the tests in Nuke and Blender, I opened the JPG sRGB image in the Preview App and made a screenshot to see the Resolve viewer and the JPG at the same time.
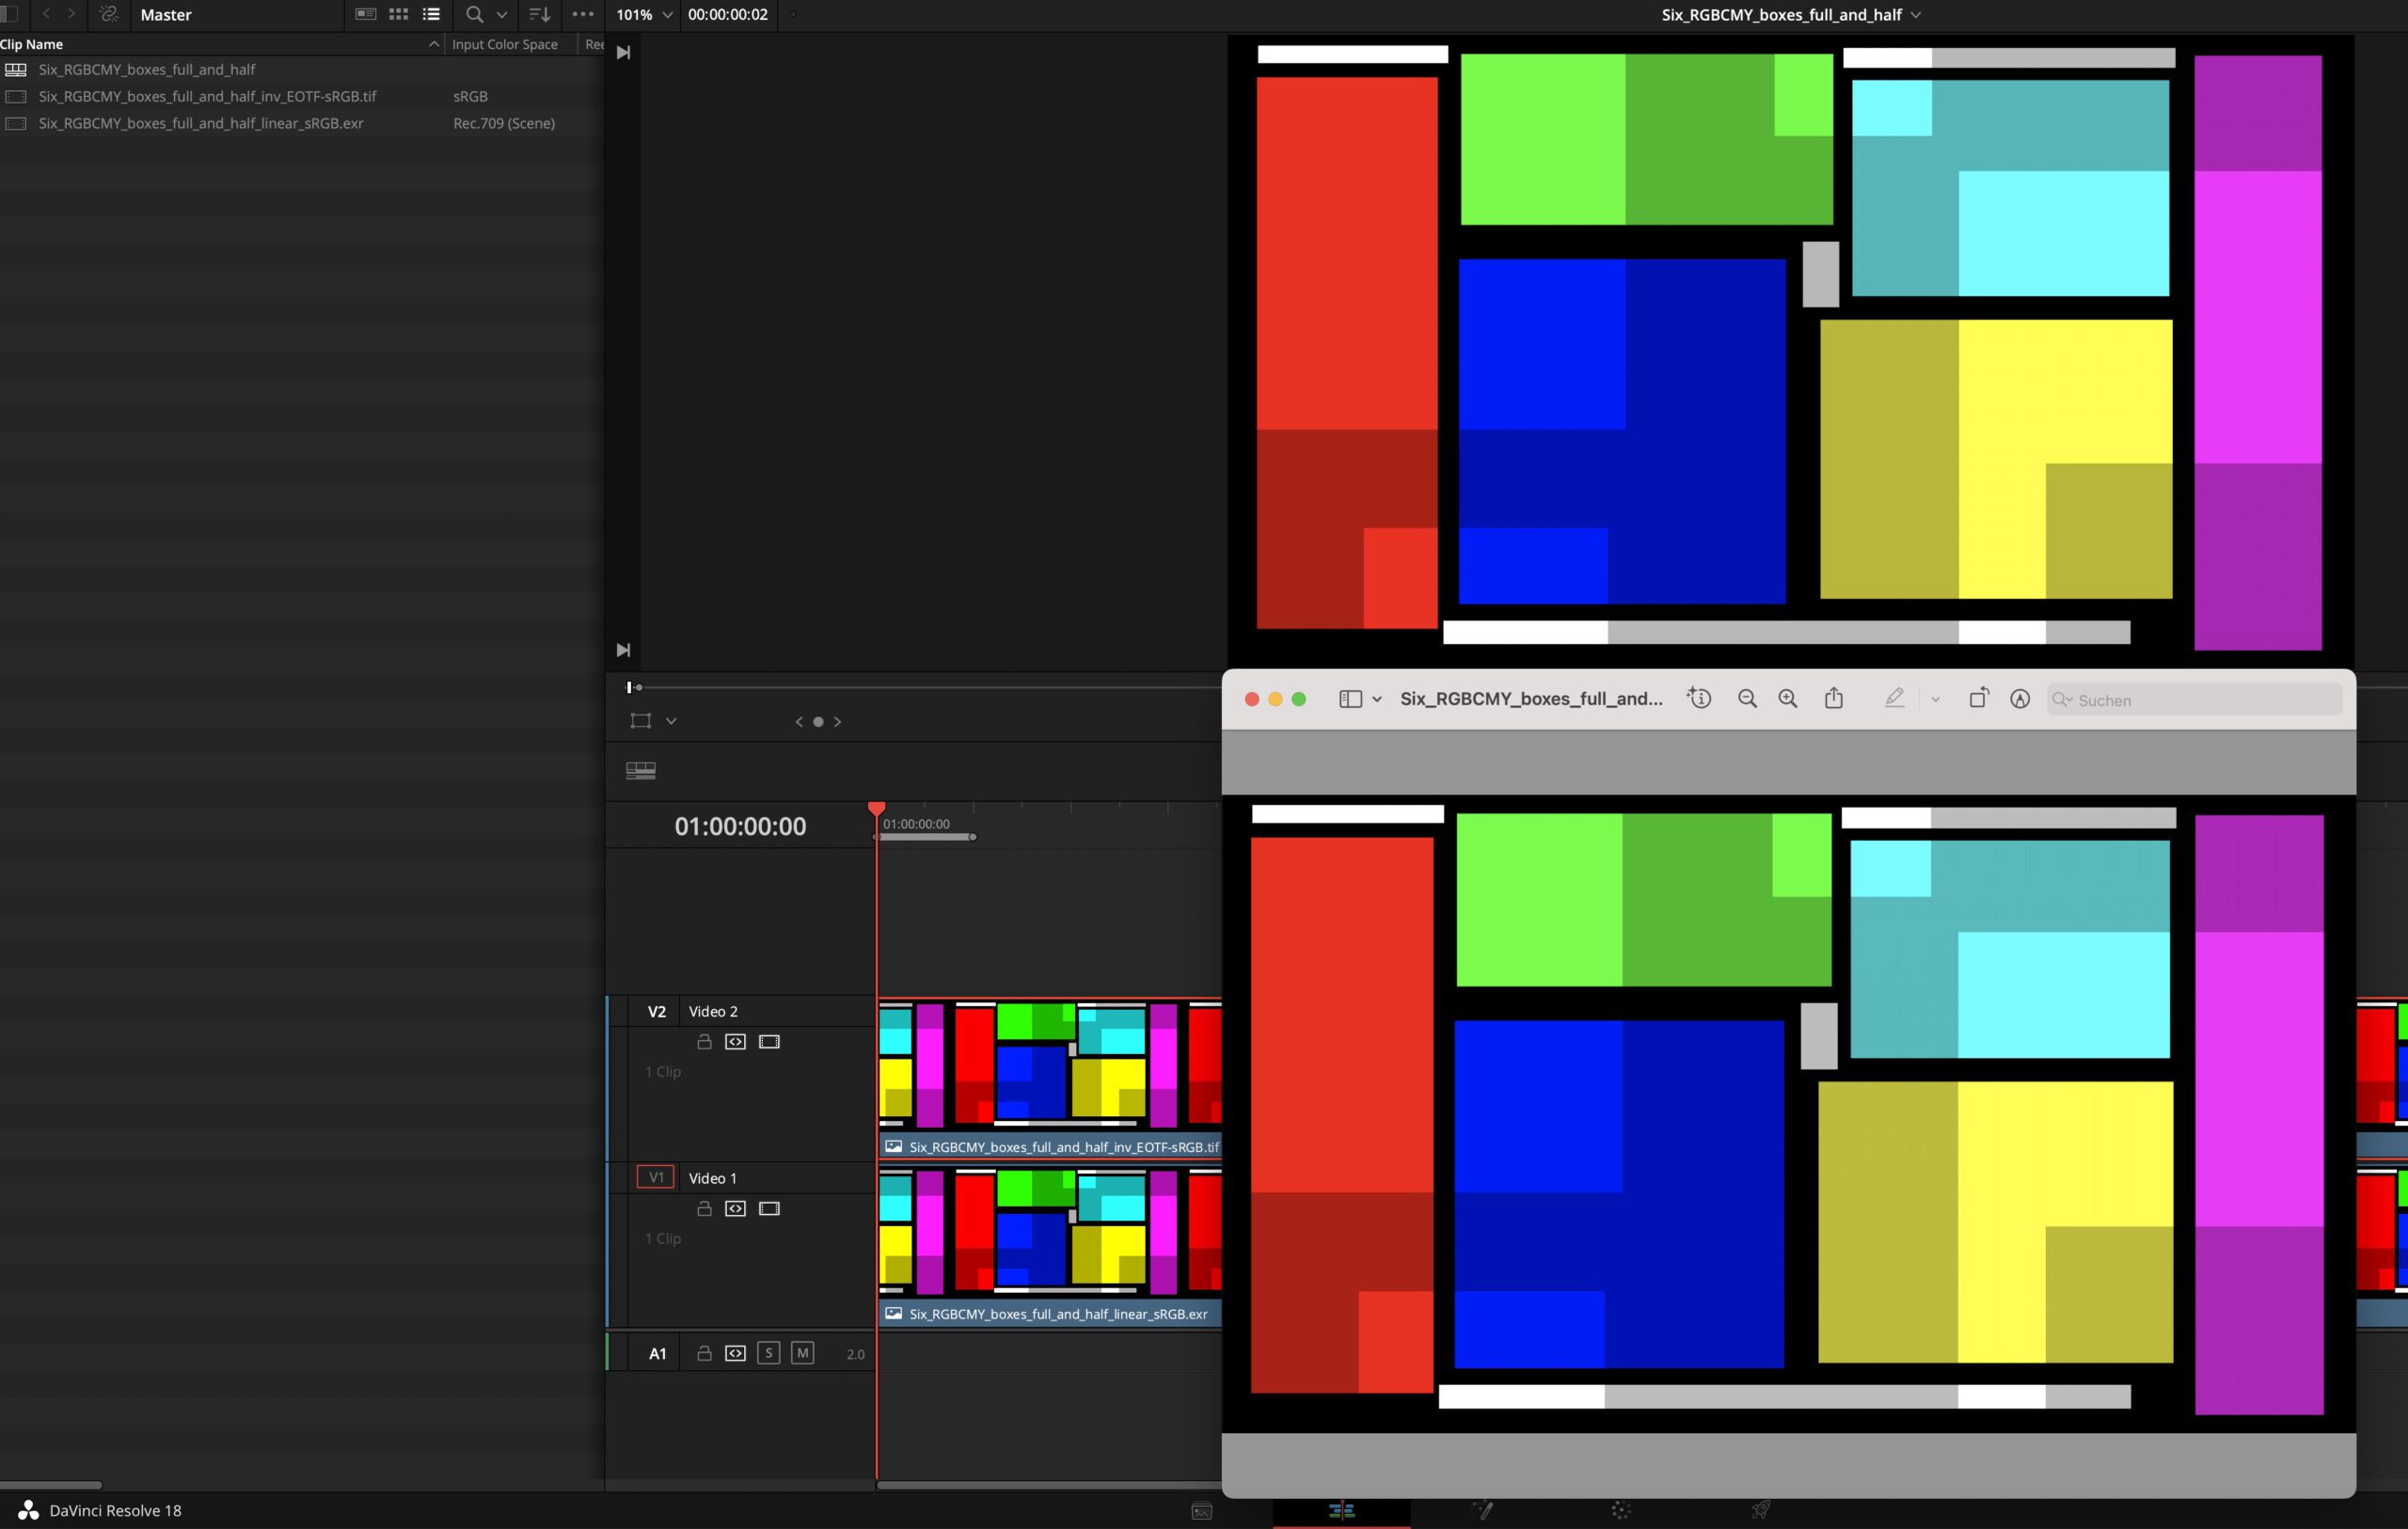
The Resolve project is set to SDR (Rec.709), so I kind of expected that the viewers don’t match in the screenshot. The full coloured parts of the rectangles match, but the darker parts in the rectangles are sightly different than in the sRGB image. I don’t know how the RCM2 pipeline handles and renders this image. But overall it is a visual match.
Also it is obvious that the timeline thumbnails are not color managed, they show way more intense colours than the Resolve viewer. Maybe there is a setting to manage the timeline thumbnails as well, but up to now I did not find it.
full Colorsync support – FCPX 10.6.5
As FCPX is from Apple it can be expected that the color management works flawlessly with the help of ColorSync on a P3 display. And it does, but something else interesting is happening. More on this later. To test the image, I created a new library with the “Wide Gamut HDR” setting. As far as I understand the “Standard” setting is now legacy.
The project is set to Standard Rec.709 and I imported the TIF image from Nuke and compared the viewer with the JPG image in Preview in a screenshot.
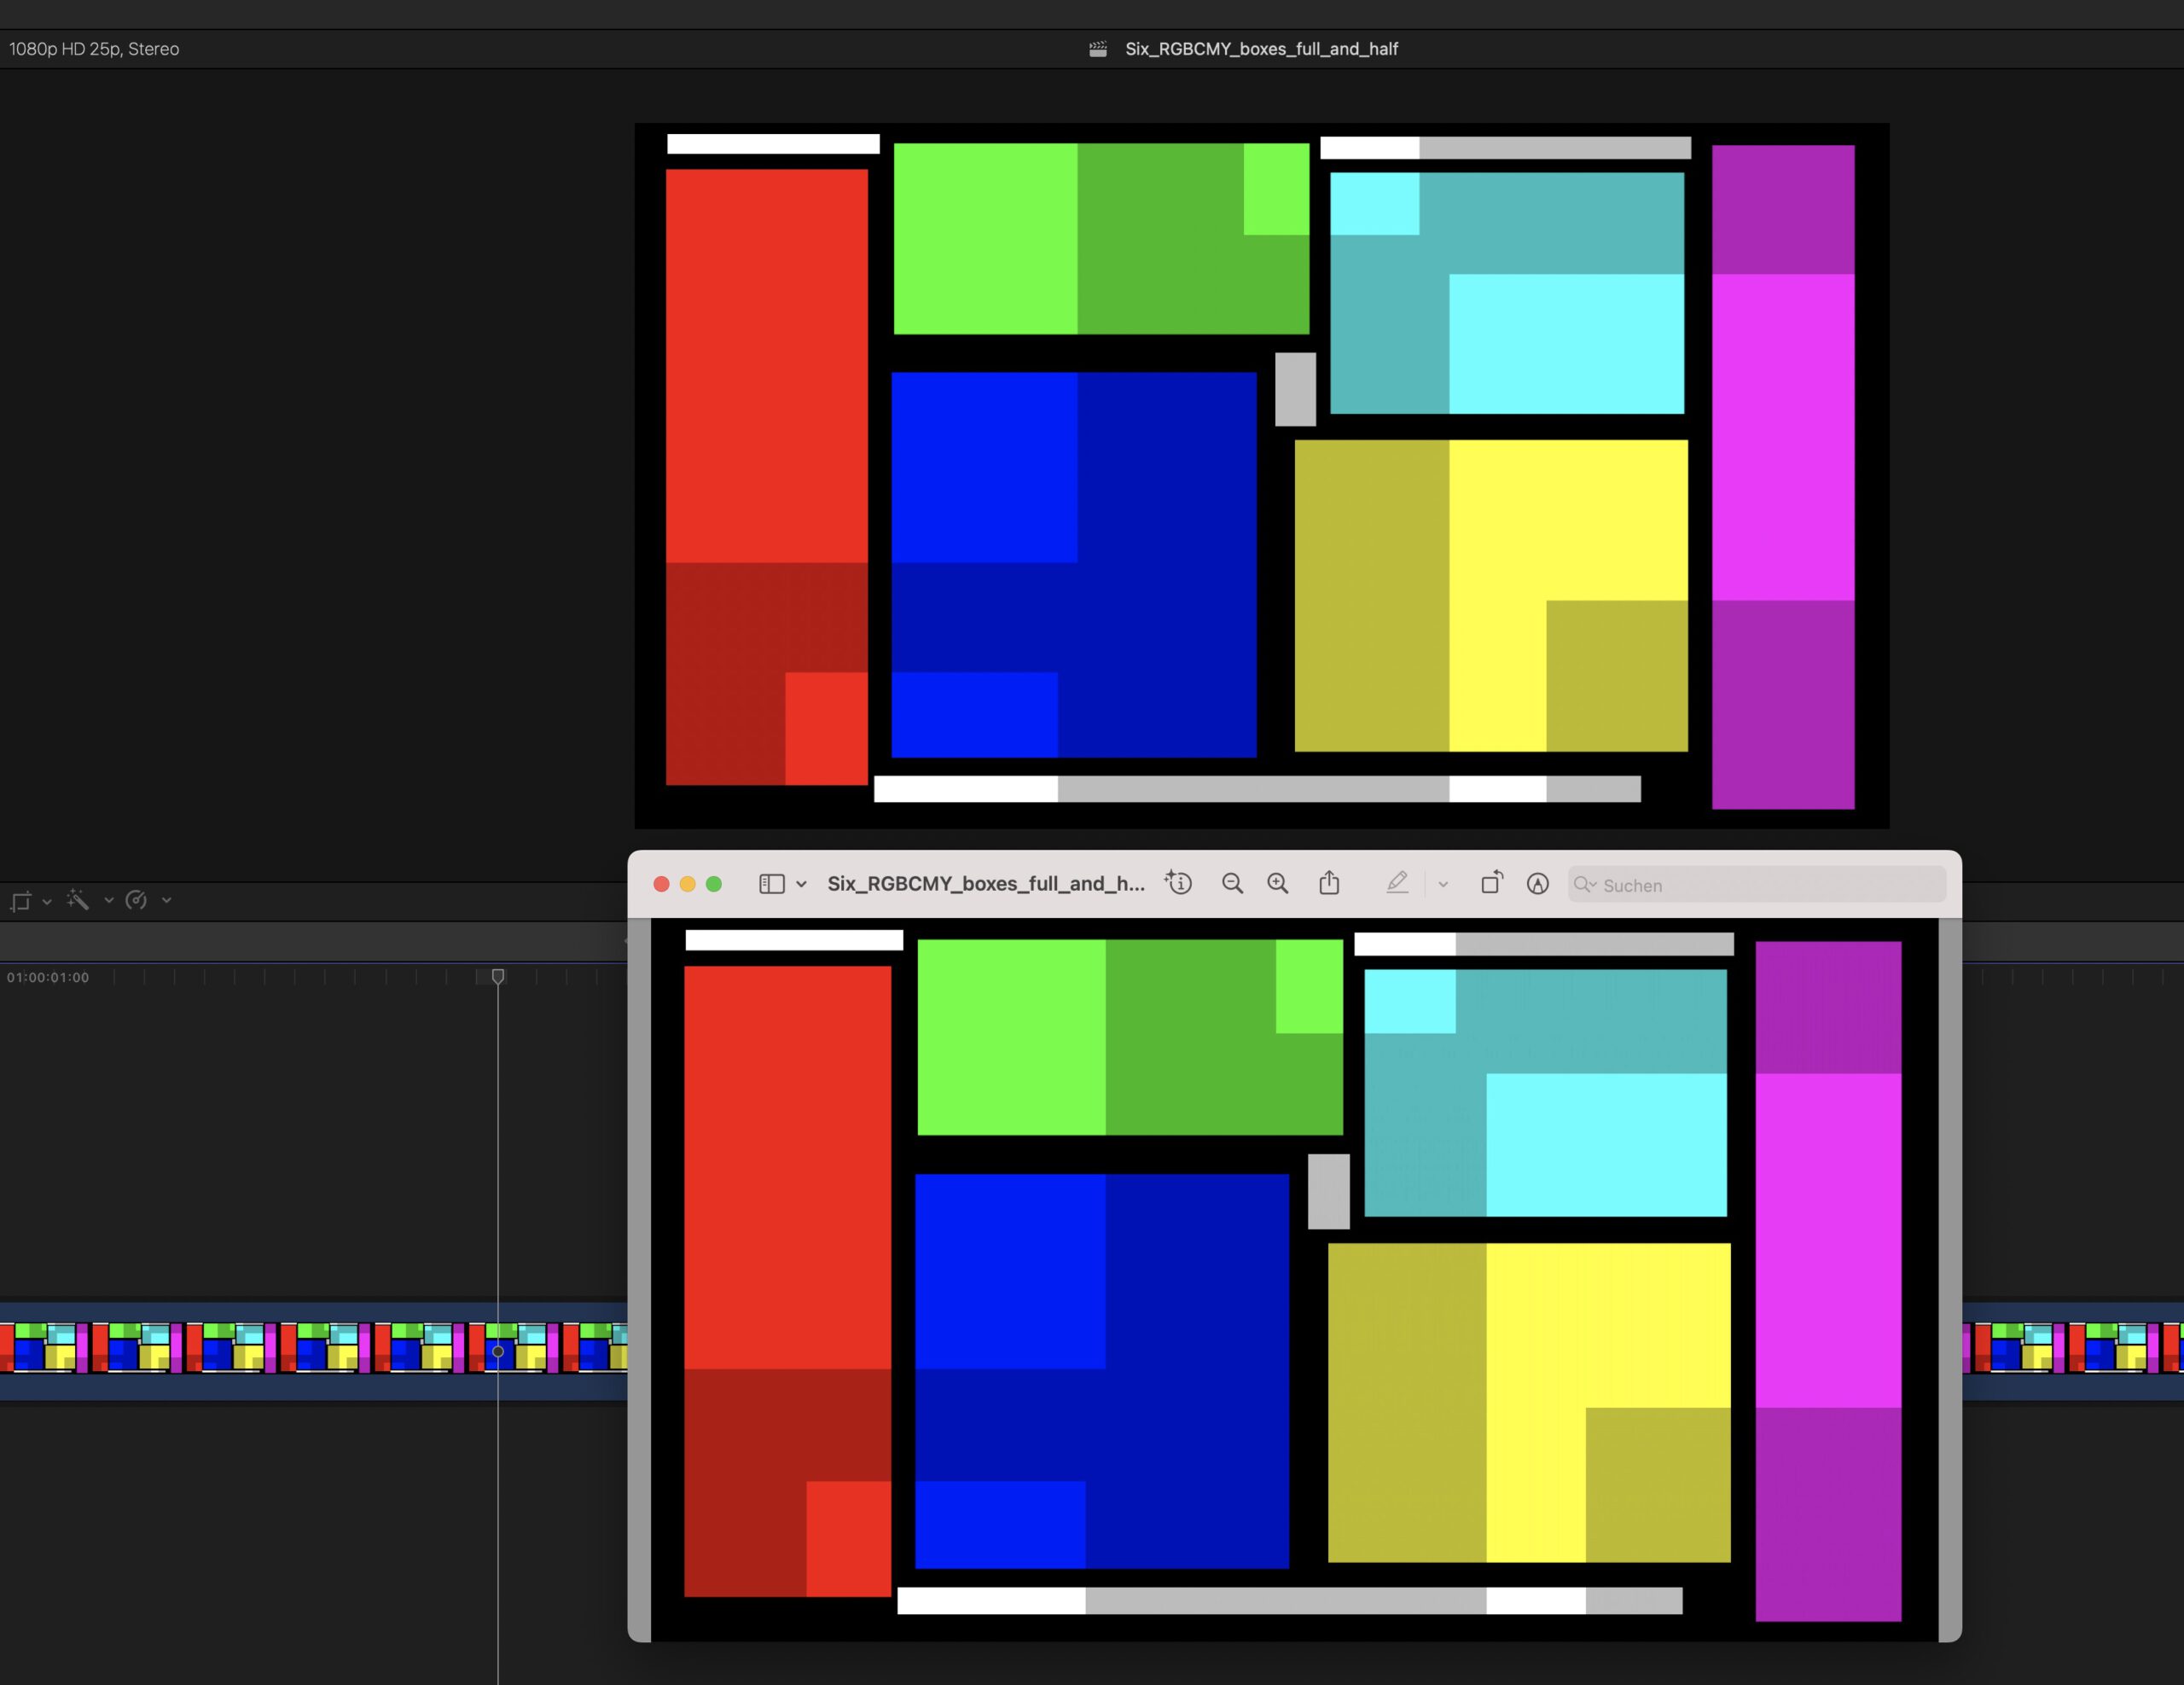
The FCPX viewer and the JPG are identical. Also the thumbnails in the timeline look the same.
FCX has an export function for the current frame in the timeline. So I exported a JPG image and compared this with the JPG from Nuke. Both images look identical in Preview, but they aren’t.
I think and hope this is the magic of color management. I can open both JPGs in Affinity Photo, they look the same, but the headline of each document show me the different tags.
I mean when the look the same in Preview they have to be the same? The RGB emissions of out my display are identical, because the images look the same, but the JPG from Nuke is tagged as sRGB whereas the JPG from FCPX is tagged as Rec.709. This makes sense, because the FCPX project is set to Rec.709 so I am mastering the a Rec.709 display.
In a different article I will investigate the image processing of FCPX, Motion and Compressor. This would exceed the scope of this article.
image development – CApture one Pro 23
As a last test for this article I read the JPG and TIF image from Nuke into Capture One. They look identical, Capture One claims that it reads the sRGB tag from both files, although Preview only shows a profile on the JPG image.
Then again I opened the JPG in Preview and made a screenshot. The Capture One viewer and the JPG in Preview look identical.
Conclusion
Color management is tricky but necessary, especially with non sRGB displays. With some apps like Affinity Photo Capture One and FCPX everything is handled automatically, whereas tools like Resolve or Nuke you need to set actively the preferences to see the right image. And for Nuke and Blender there are 3rd party OCIO configs to help you see the right colours on your viewer inside the app.