and why does my texture not look right in ACES or does it? It does.
In the last years since I learned and use ACES in a variety of projects, one topic comes up again and again each time a new comp or 3D artist is introduced to the ACES workflow – why does some footage does not look the same viewed through the ACES RRT&ODT vs. Photoshop/AE or a media player?
The temptation to use the ODT as IDT and cancel out any change in the look of the image is there, but this locks you into one ODT and is not really the idea behind ACES. The look would change again as soon as a different display type and ODT is chosen.
Also be aware that this creates massive problems with logos, titles with transparency and antialiased edges and can lead to strange color values or artifacts when trying to work this way.
The right IDT for textures coming from display referred sources is sRGB-Texture. Textures can be a texture in 3D, but also a title or a logo from a client. I looked at some of the issues in the page Flame&ACES.
In this article I am looking at the implications what can happen by choosing the wrong IDT for a texture.
Actually ACES has a pretty straightforward image pipeline from the user perspective but is very versatile and it adds the handling of different color gamuts by processing image data in the second biggest gamut possible called AP-1 (ACEScg). The biggest gamut is AP-0, the transport and long term storage format, that should be written only in uncompressed half-float EXR files to match the ACES specs. Nuke uses by default a zip lossless compression, which works just fine of course.
The processing pipeline in programs using ACES/OCIO:
- Footage: use the right or fitting IDT
- work on and store files in ACES
- output and view files over RRT&ODT
So visualize what it means to bring smaller gamut images into a bigger one, check the article “Moving into a bigger gamut“.
Convert a photo to a texture
Let’s take a processed RAW photo that I developed and exported as a JPG (sRGB) file. “Read” in the file in to Nuke (ACES 1.1), by default the file is going to be handled as a 8 or 16-bit texture and the IDT “sRGB-Texture” is used.
The IDT removes the sRGB gamma curve and places the sRGB gamut in the ACES (AP-0) gamut, followed by another transform to the working color spaces ACEScg (AP-1). The conversions to and from the working space is not visible to the user. A maximum color value 1.0 (or 255, 1024 or 16384 in 8, 10 or 16 bit) in the photo is mapped to 1.0 in scene linear.


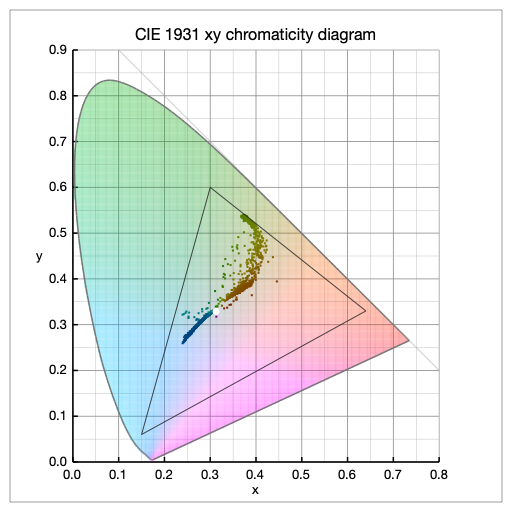

ColorSpatioplotter: left (1.) photo colors inside the sRGB gamut – right (2.) viewed as a texture in ACEScg.
Nuke’s view transform is set by default in sRGB(ACES) when using the ACES 1.1 OCIO config.I could “read” in the photo also with the ODT Output-SRGB as my IDT. This would cancel out any visible change in the viewer, but this makes only sense to compare a reference image to your comp for example. The right IDT for a texture is sRGB-Texture.
As the name of the IDT Input-sRGB-Texture suggests, a texture is now inside the scene – a texture that you wrap on a model or surface in 3D can’t have more than 100% diffuse reflection, everything over 100% would mean a light ray that hits the surface reflects more light energy that it receives.
Adjust the look, but be careful
Of course you can color correct or automatically color match the texture so that it looks similar to the initial photo like I did here in Nuke, but then the linearized data becomes de-linearized which is a grading step that should not happen when calculations in scene-linear should be predictable. Especially when a texture should react to light in a 3D scene in a physical correct way.


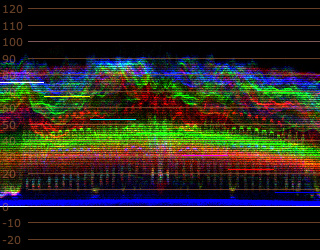
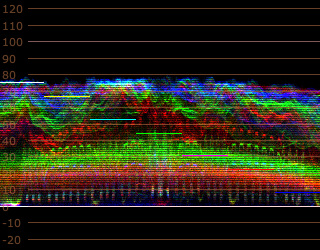
Reading in an image with an inverse ODT leads to arbitrary high scene linear light values, which might have nothing to do with the actual scene values when converting a camera raw file with the proper IDT. (All values are measured with the CurveTool in Nuke.)
- Load with inverse ODT = max. luma value is around 14.0
- IDT sRGB Texture = max. luma value is around 0.97
- IDT sRGB Texture/Nuke CC = max. luma value is around 2.0
- IDT sRGB Texture/Nuke MatchGrade = max. luma value is around 2.30
As I have the original canon raw photo, I can convert the file to ACEScg with Affinity photo and match the capture one grade more or less in Nuke only with Gain and Saturation. The result lacks contrast, but the max. luma value is also around 2.40. But even with adjusted contrast (I avoided it to stay scene-linear) the max. luma value is also only around 5.0 which is still far away from the value of 14.0 with the inverse ODT.

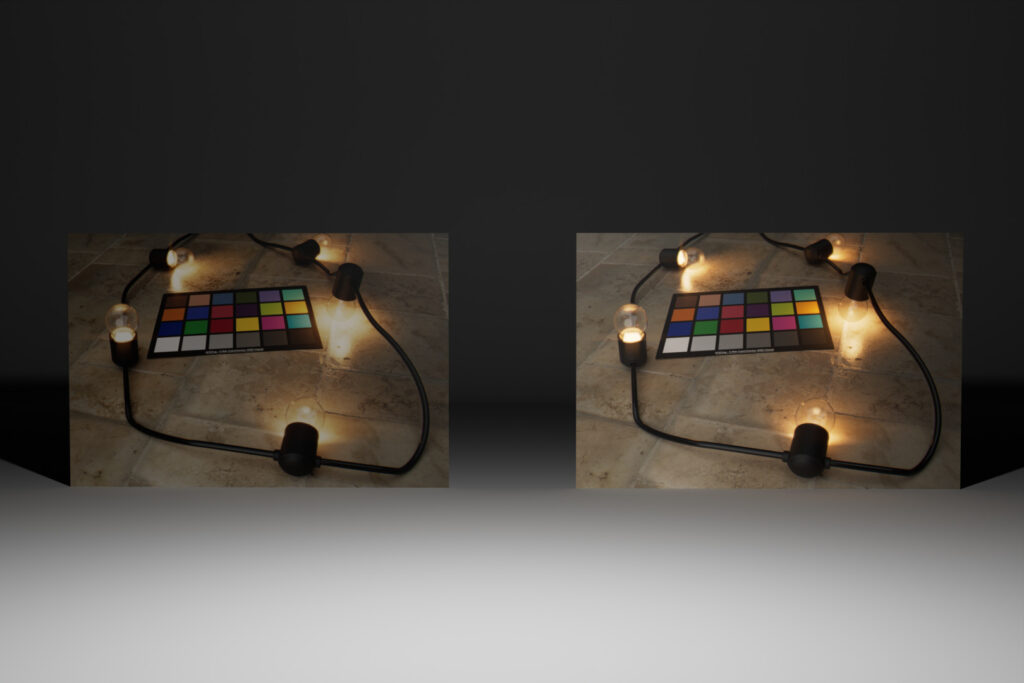
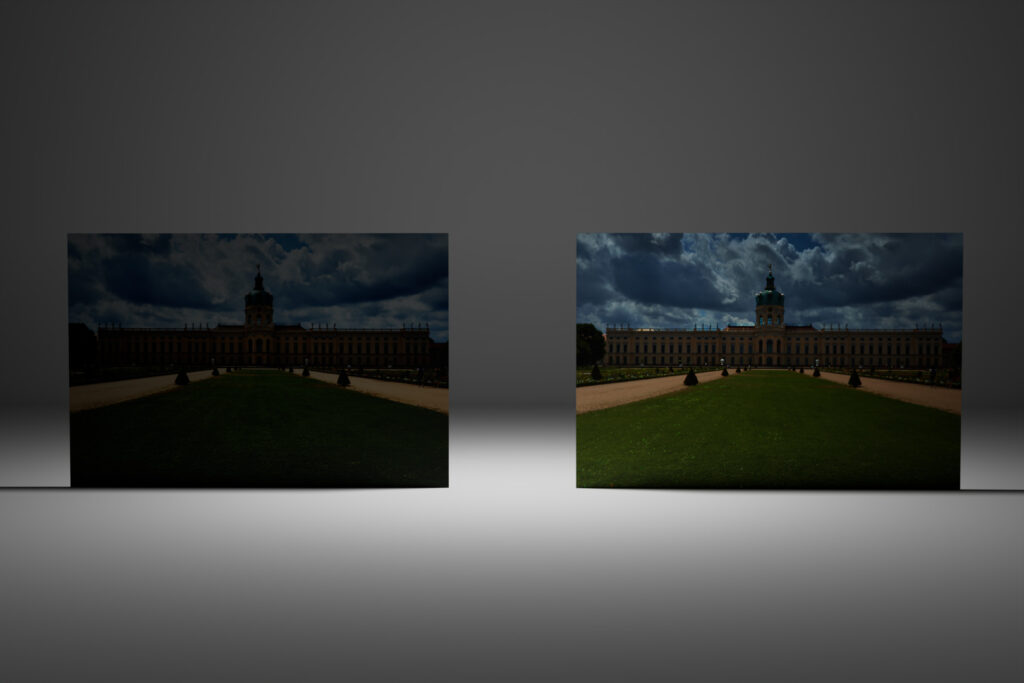
Use A PHOTO as A TEXTURE
In the following renderings I use for the left surface the IDT sRGB-Texture and for comparison on the right surface the ODT sRGB. Especially when the surfaces receive little scene light from a point light the right one seems already to “glow” in the dark.
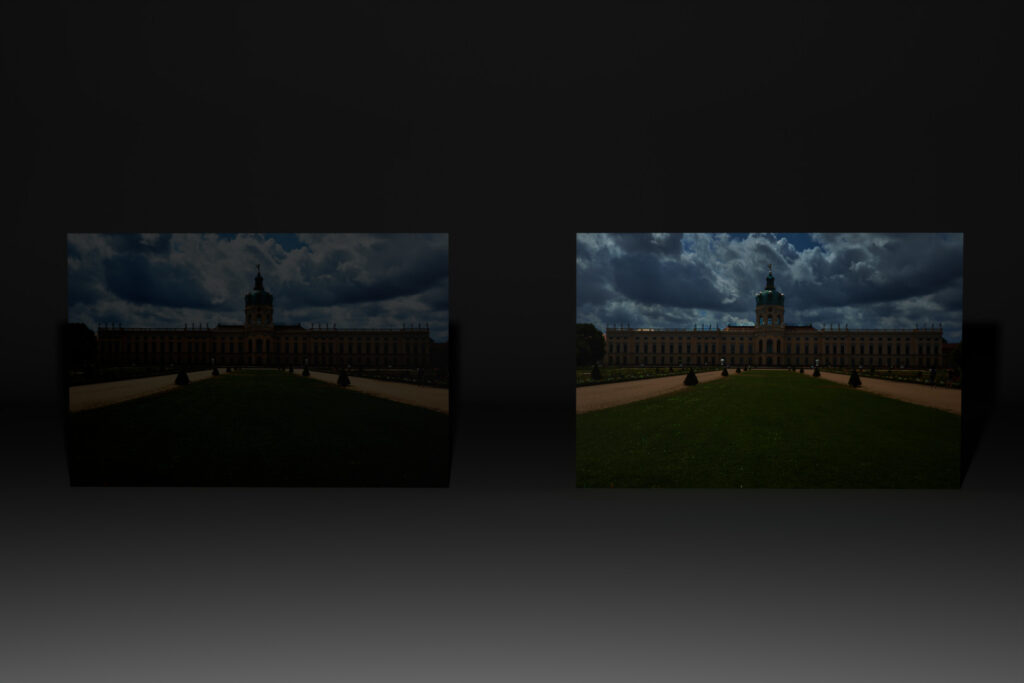
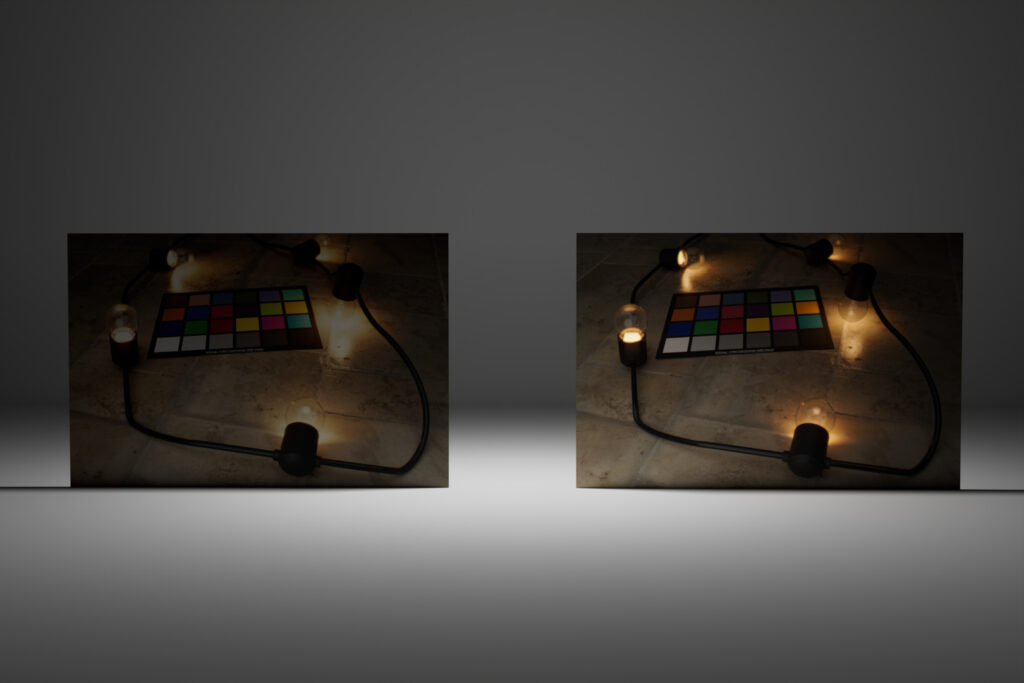
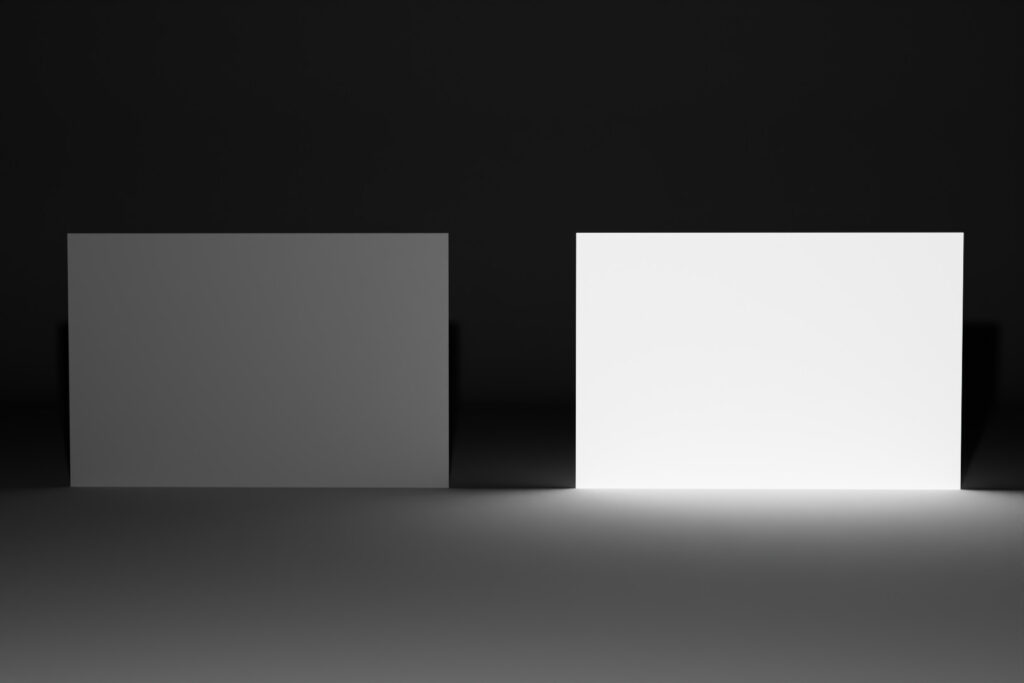
More than diffuse reflection
A white pixel display referred seen through a sRGB/Rec.709 ODT will become 16.292 scene referred, means rendering a full white texture with this value will actually become some kind of light source which is not physical plausible I think. (but at least it looks cool 🙂
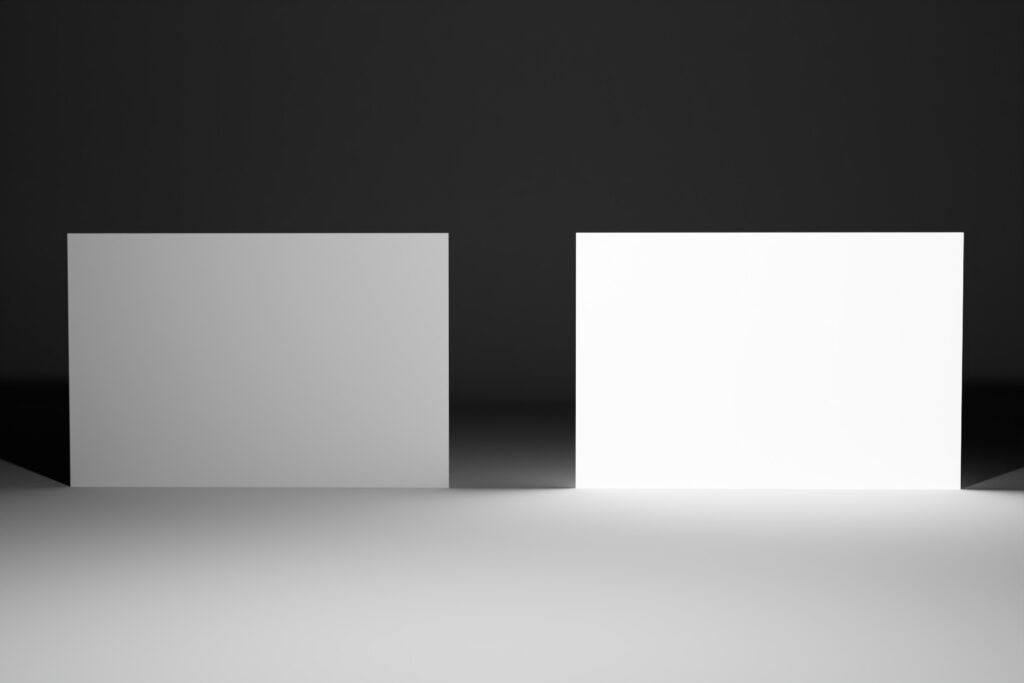


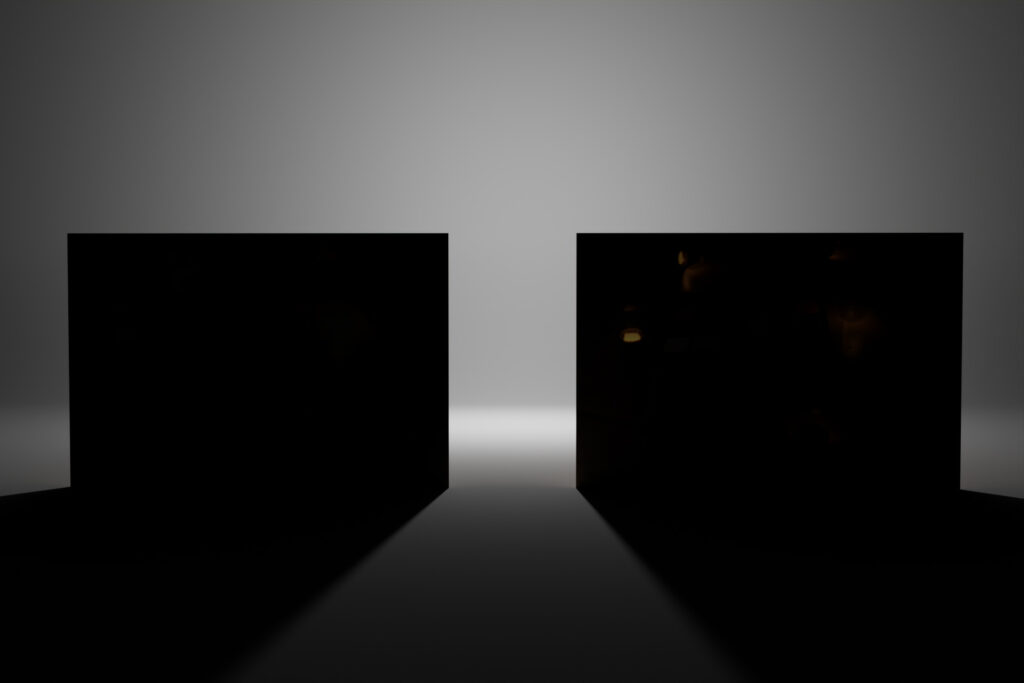
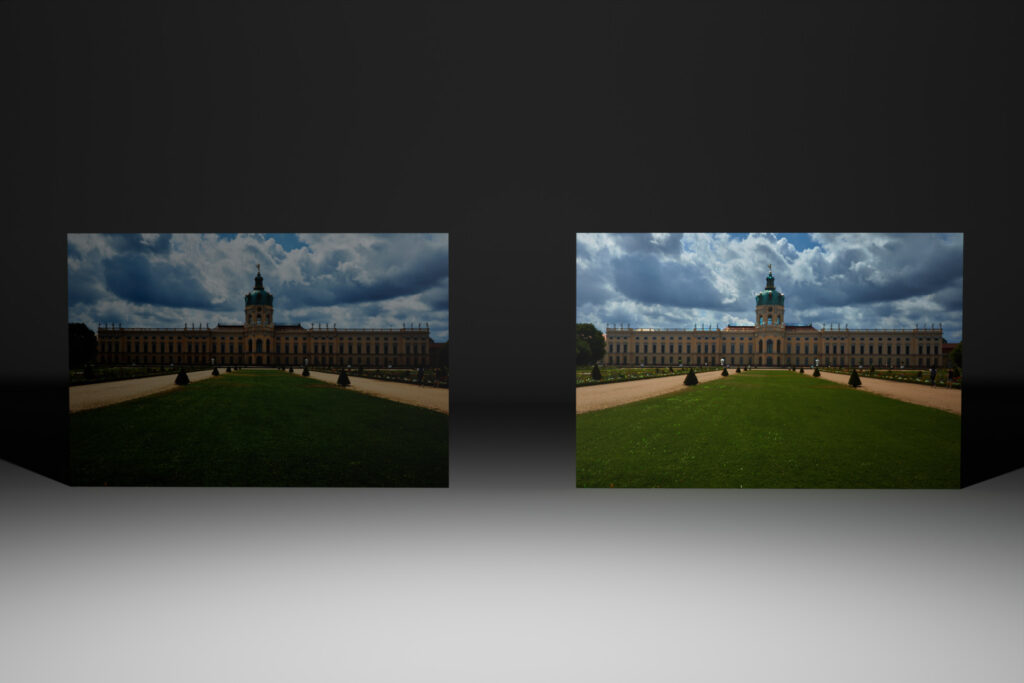
A scene within a scene seen on a screen
As a last example I chose a 3D rendering of IKEA summer outdoor lamps shining on a floor. In this way I actually know how bright the lights in the scene are. This Blender scene was rendered in ACES, comped in Nuke, exported as a sRGB (JPG) and reused in Blender as a texture again. Now it’s even more obvious that the right surface looks like it emits light instead of only receiving and reflecting it.