with version 2.83 LTS and up to 2.93 beta
Recently I had more time to try things out in Blender and I got new contacts via Email asking me questions about Blender & ACES. I am happy to help but I am actually not a 3D Artist so my ability to help is limited. As a result I present some notes of pitfalls that I fell into when trying out Blender & ACES. I found some problems and limitations that occur in the release mentioned above.
Here is the quick list of the limitations I ran into:
- NEW with version 2.9.x
- I tested the new “Nishita” sky-shader in standard Blender/FILMIC vs. Blender/ACES and get vastly different results. Check out some samples at the end of this page.
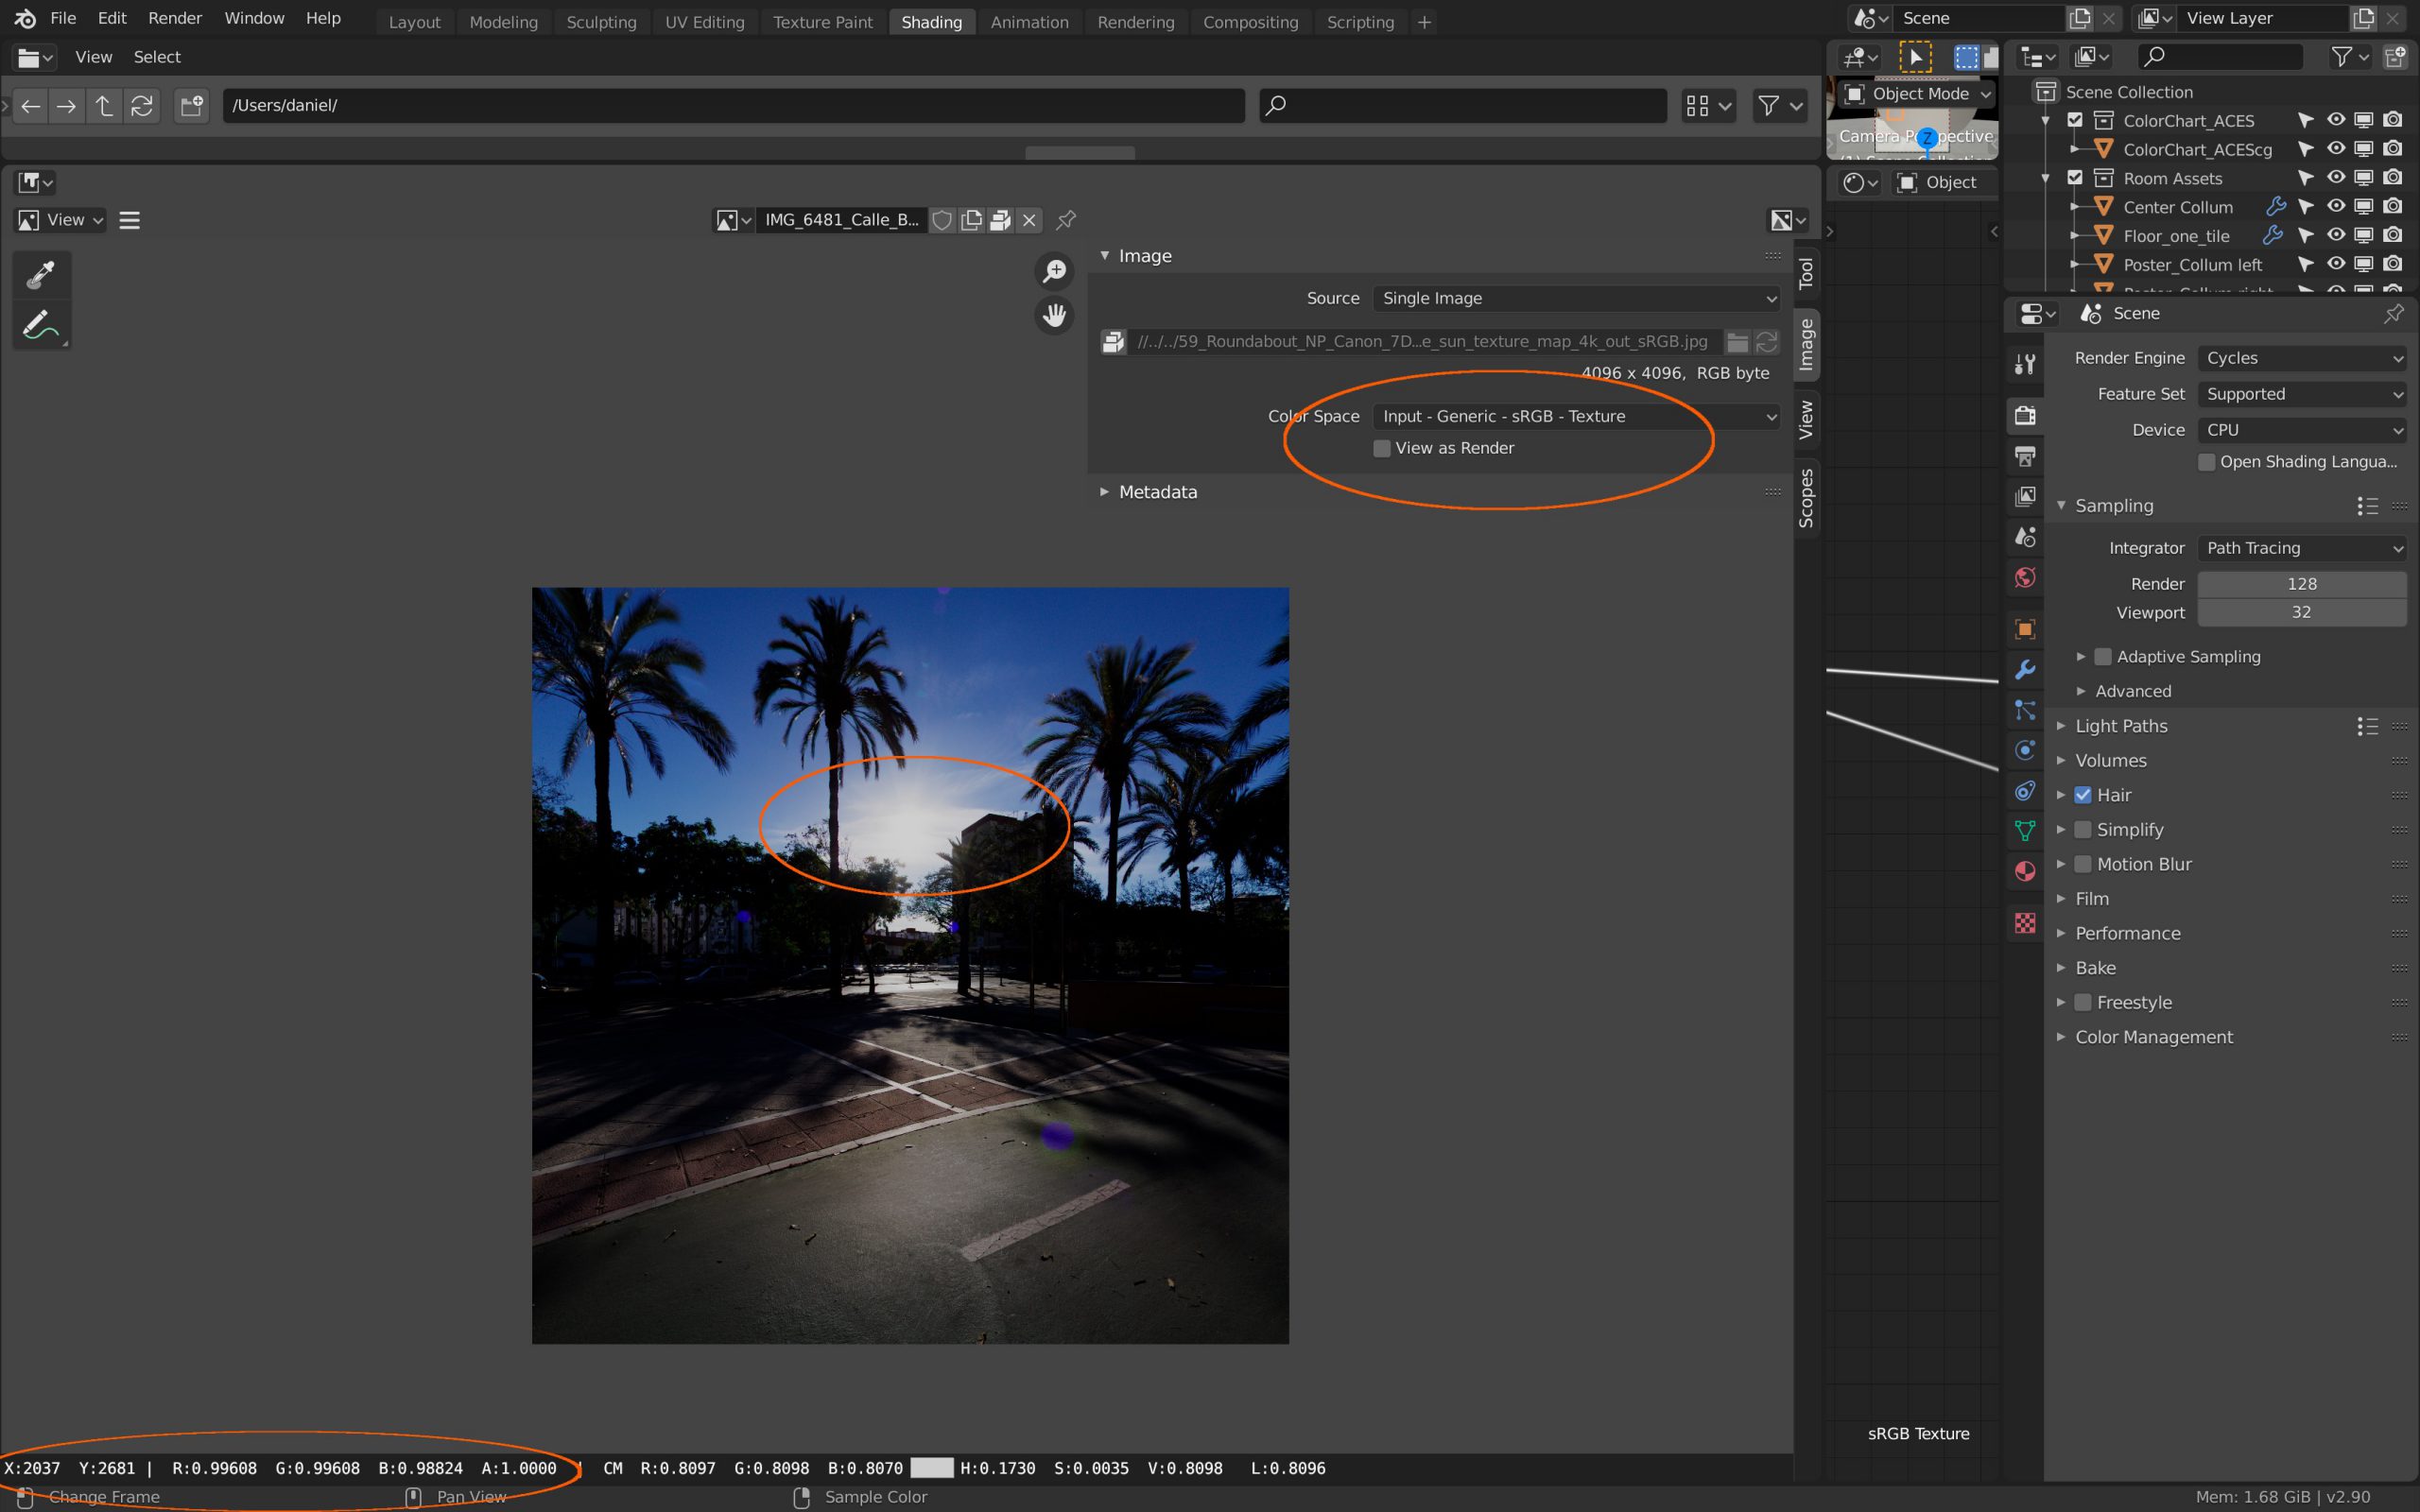
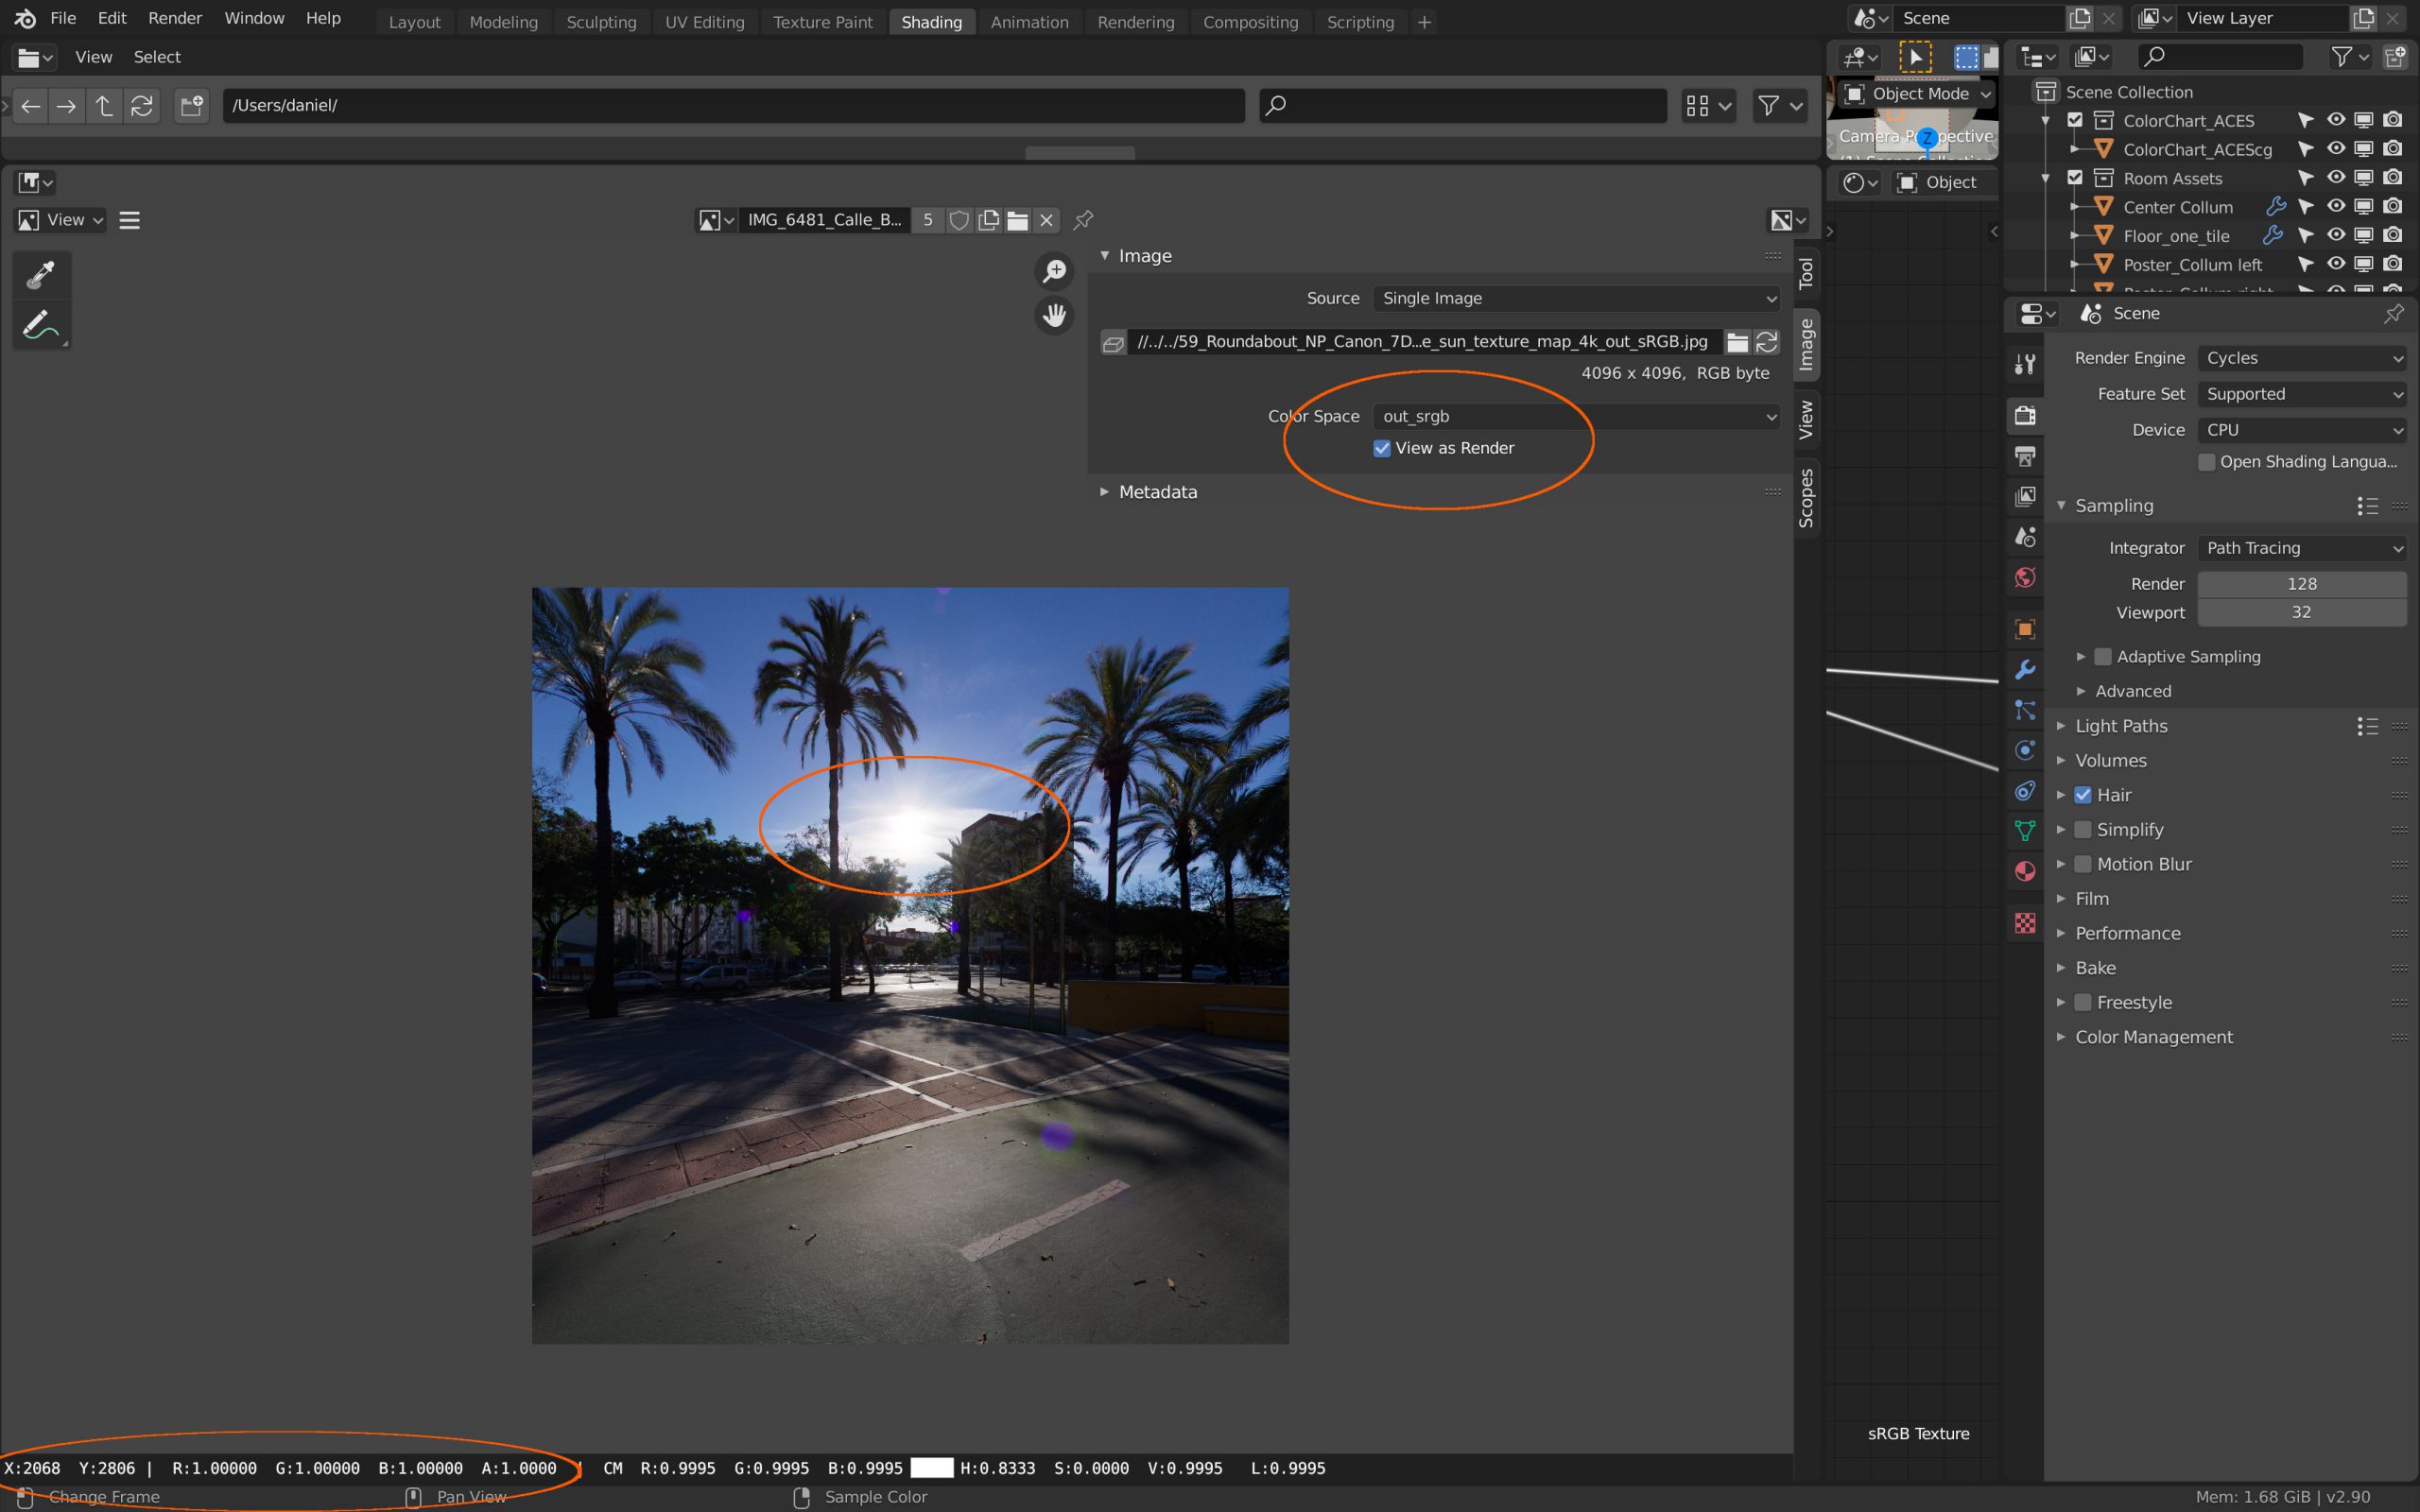
- Colorspace transforms in Textures (Input – Generic – sRGB Texture) will result in imprecise or sometimes wrong results when the image texture is a 8-Bit file! (colorspace transforms must happen in floating point precision)
- Therefore I try to convert all textures to ACEScg first and use only EXR files – in this way they don’t need any more colorspace transform inside Blender. At least for my test scenes.
- Non-Color image texture files e.g. bump or normal maps need to have the color space set to “utility – raw” (no gamut or gamma mapping) – then there is not problem when using JPG/PNG files
- Blender misses an option to select the OCIO file in the preferences – at the moment you must set the OCIO environment variable before starting Blender. You can also replace the OCIO folder in the Blender installation folders, but then you can’t switch back easily to Blender FILMIC.
- The list of colorspaces are not sorted in categories like it is done in Nuke for example. The list is so large and long you need a giant screen to see them all and be able to select one with is at the end of the list – a workaround is to zoom out of the shader tree windows, this scales down also the giant list of entries. .
- The color wheels behave strange at times, for me especially in HSV. If I need to pick a specific color, I save a little constant color patch as a file from Nuke with the right color values, load it in the image editor and use the color picker to precisely pick these colors without entering numbers.
- Be aware that you are working in a far bigger gamut of ACEScg – I wrote an article called Understanding Gamut with ACES and Blender about this topic.
- Thanks to @ssh4net (Vlad Kuzmin) on Twitter for pointing out this list on developer.blender.org to me.
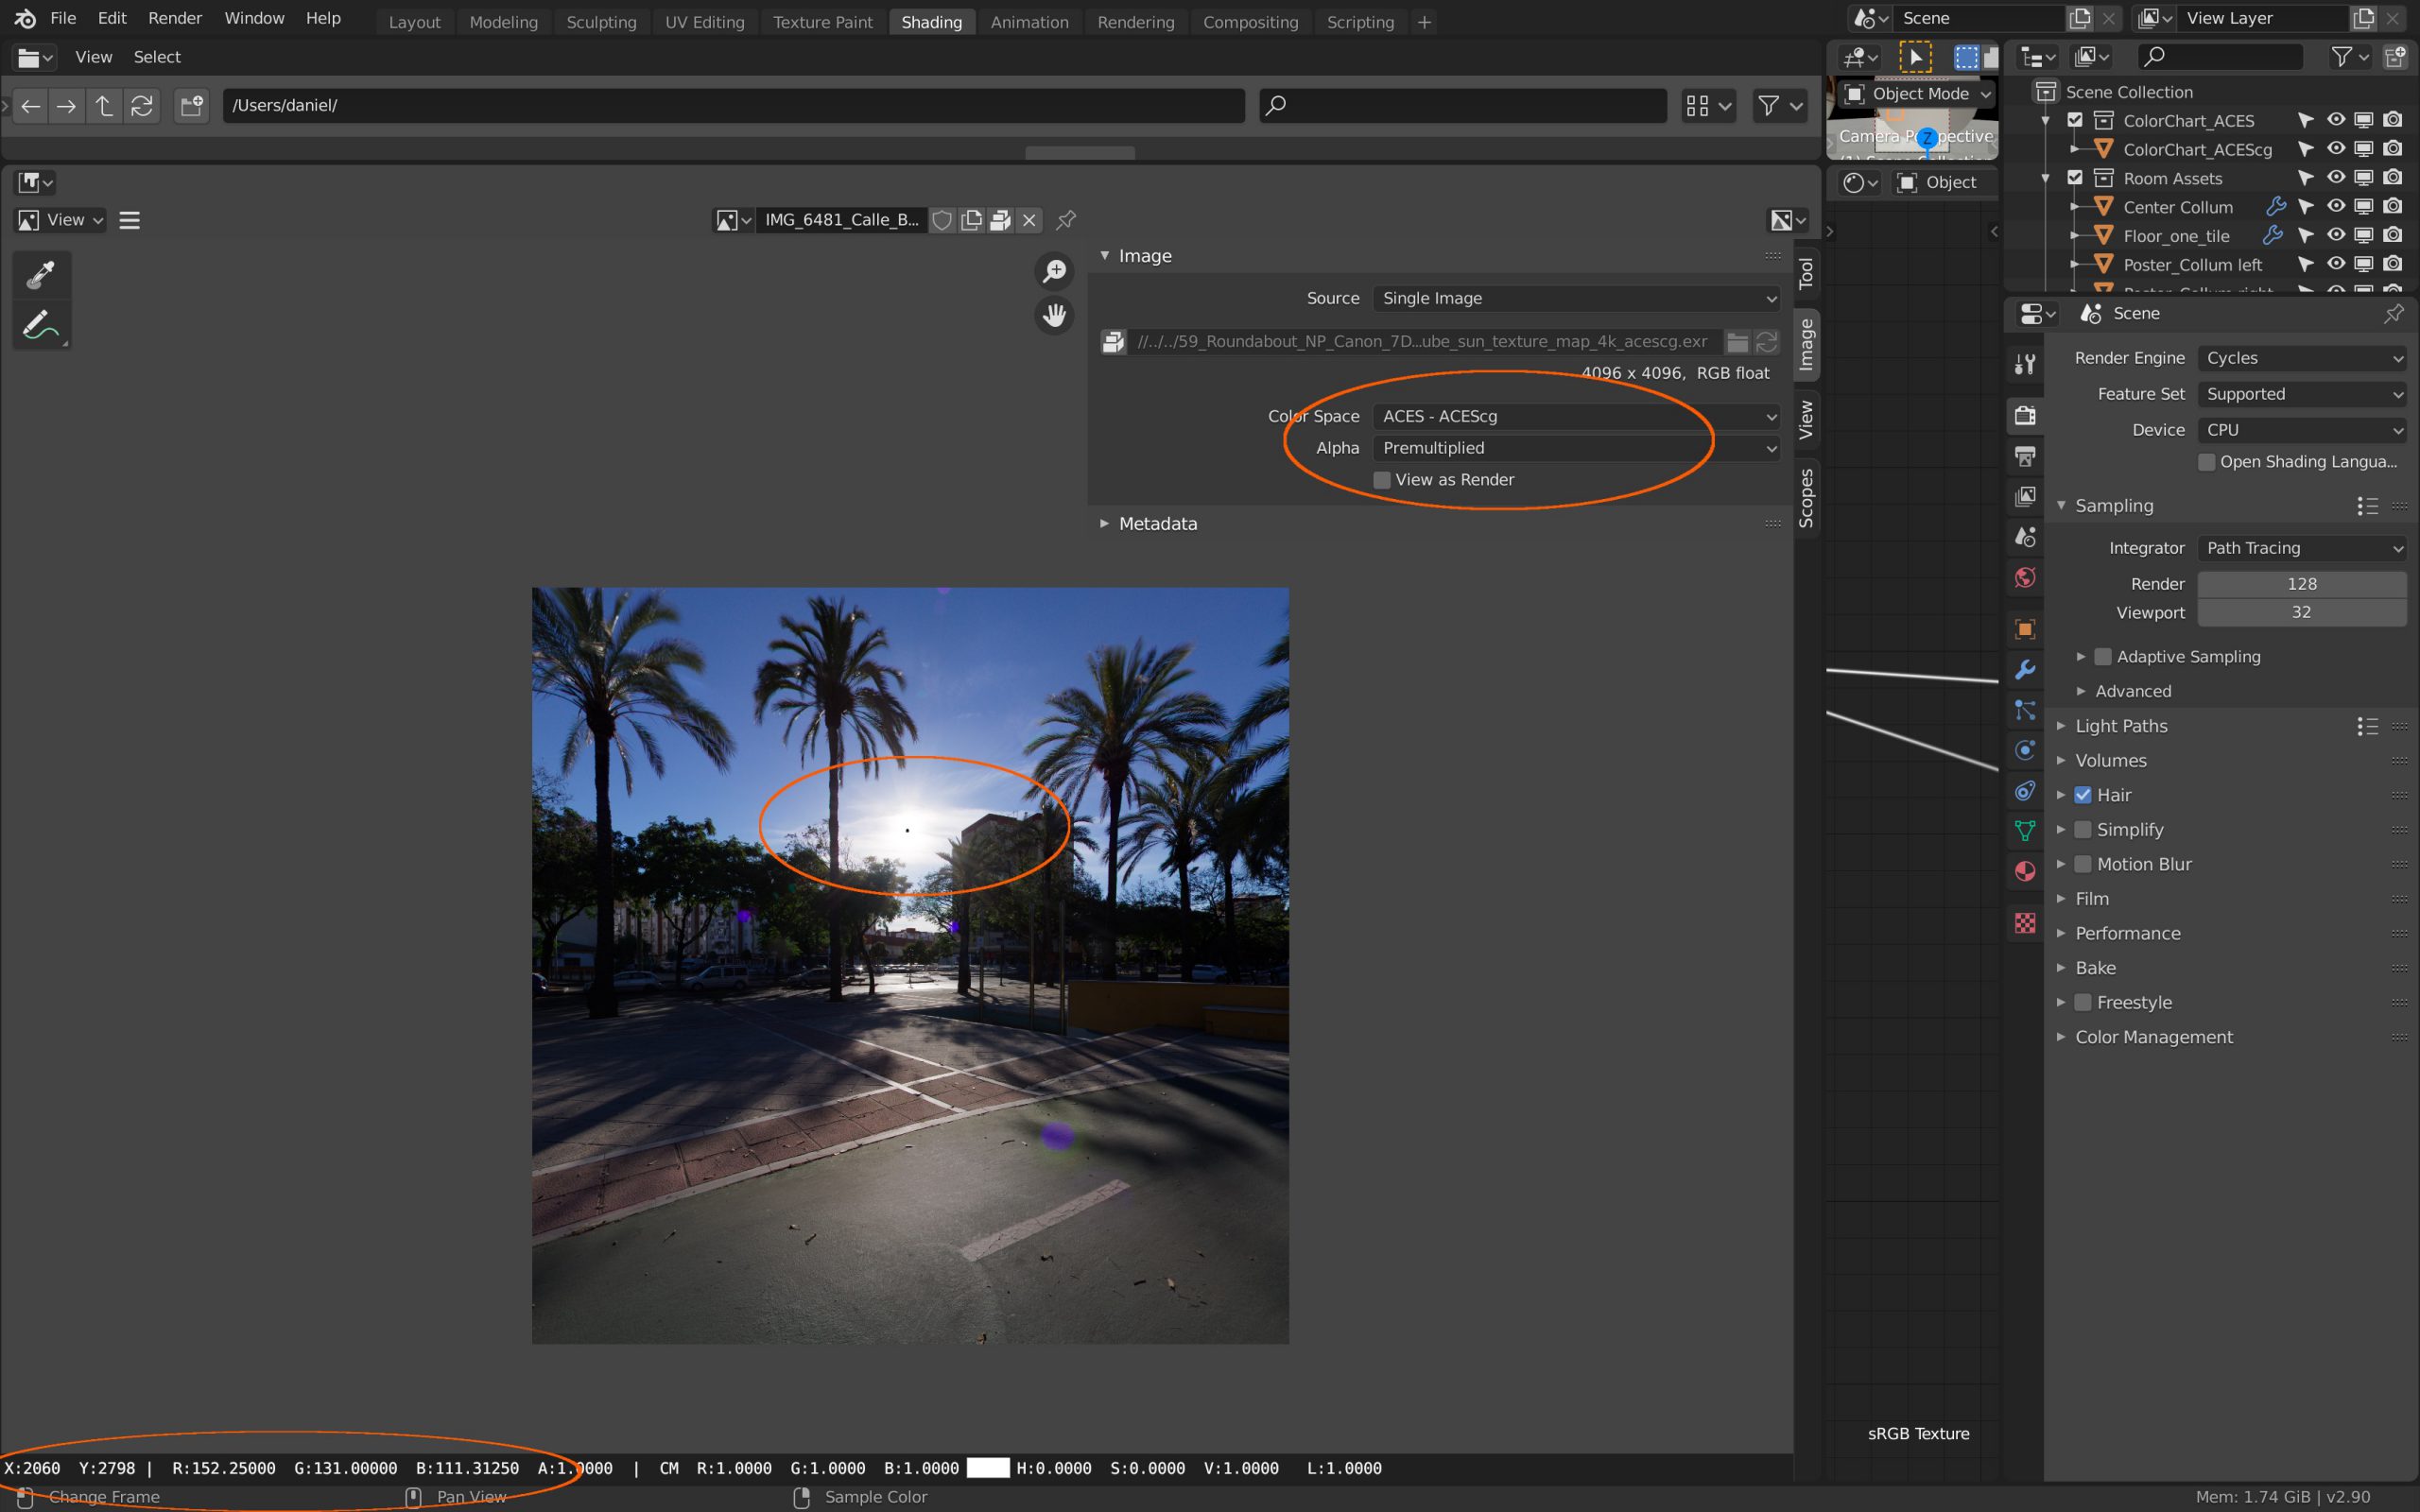
At the time when I started to explore Blender & ACES there was no color transform available for any images inside Blender. That’s why all the examples that I worked on this website have one thing in common – every HDRI and image texture I converted with Affinity Photo or Nuke to the ACEScg colorspace before I load them into Blender as EXR files.
This way of working removes the need to care and think about color space conversions in Blender. Everything is already in the working space ACEScg and with floating point precision.
There is a general limitation in Blender with 8-Bit images. To keep the memory footprint small they are kept in 8-Bit. I filed a bug report and this is a known issue and will be addressed hopefully in the future.
Imagine you solved a camera from a photo with fspy that you exported as a JPG with the view transform “Output sRGB”. The imported backplate will look wrong an no matter what colorspace as the IDT you set for the backplate in Blender in the camera options. You should select Out_sRGB when your RRT&ODT is sRGB. A value of 1.0 in the backplate would raise to a scene linear light value of 16.xxx. As the buffer is kept at 8-Bit all values are clamped at a value of 1.0. (Sadly even the usage of a EXR backplate in ACEScg is not supported at the moment.)
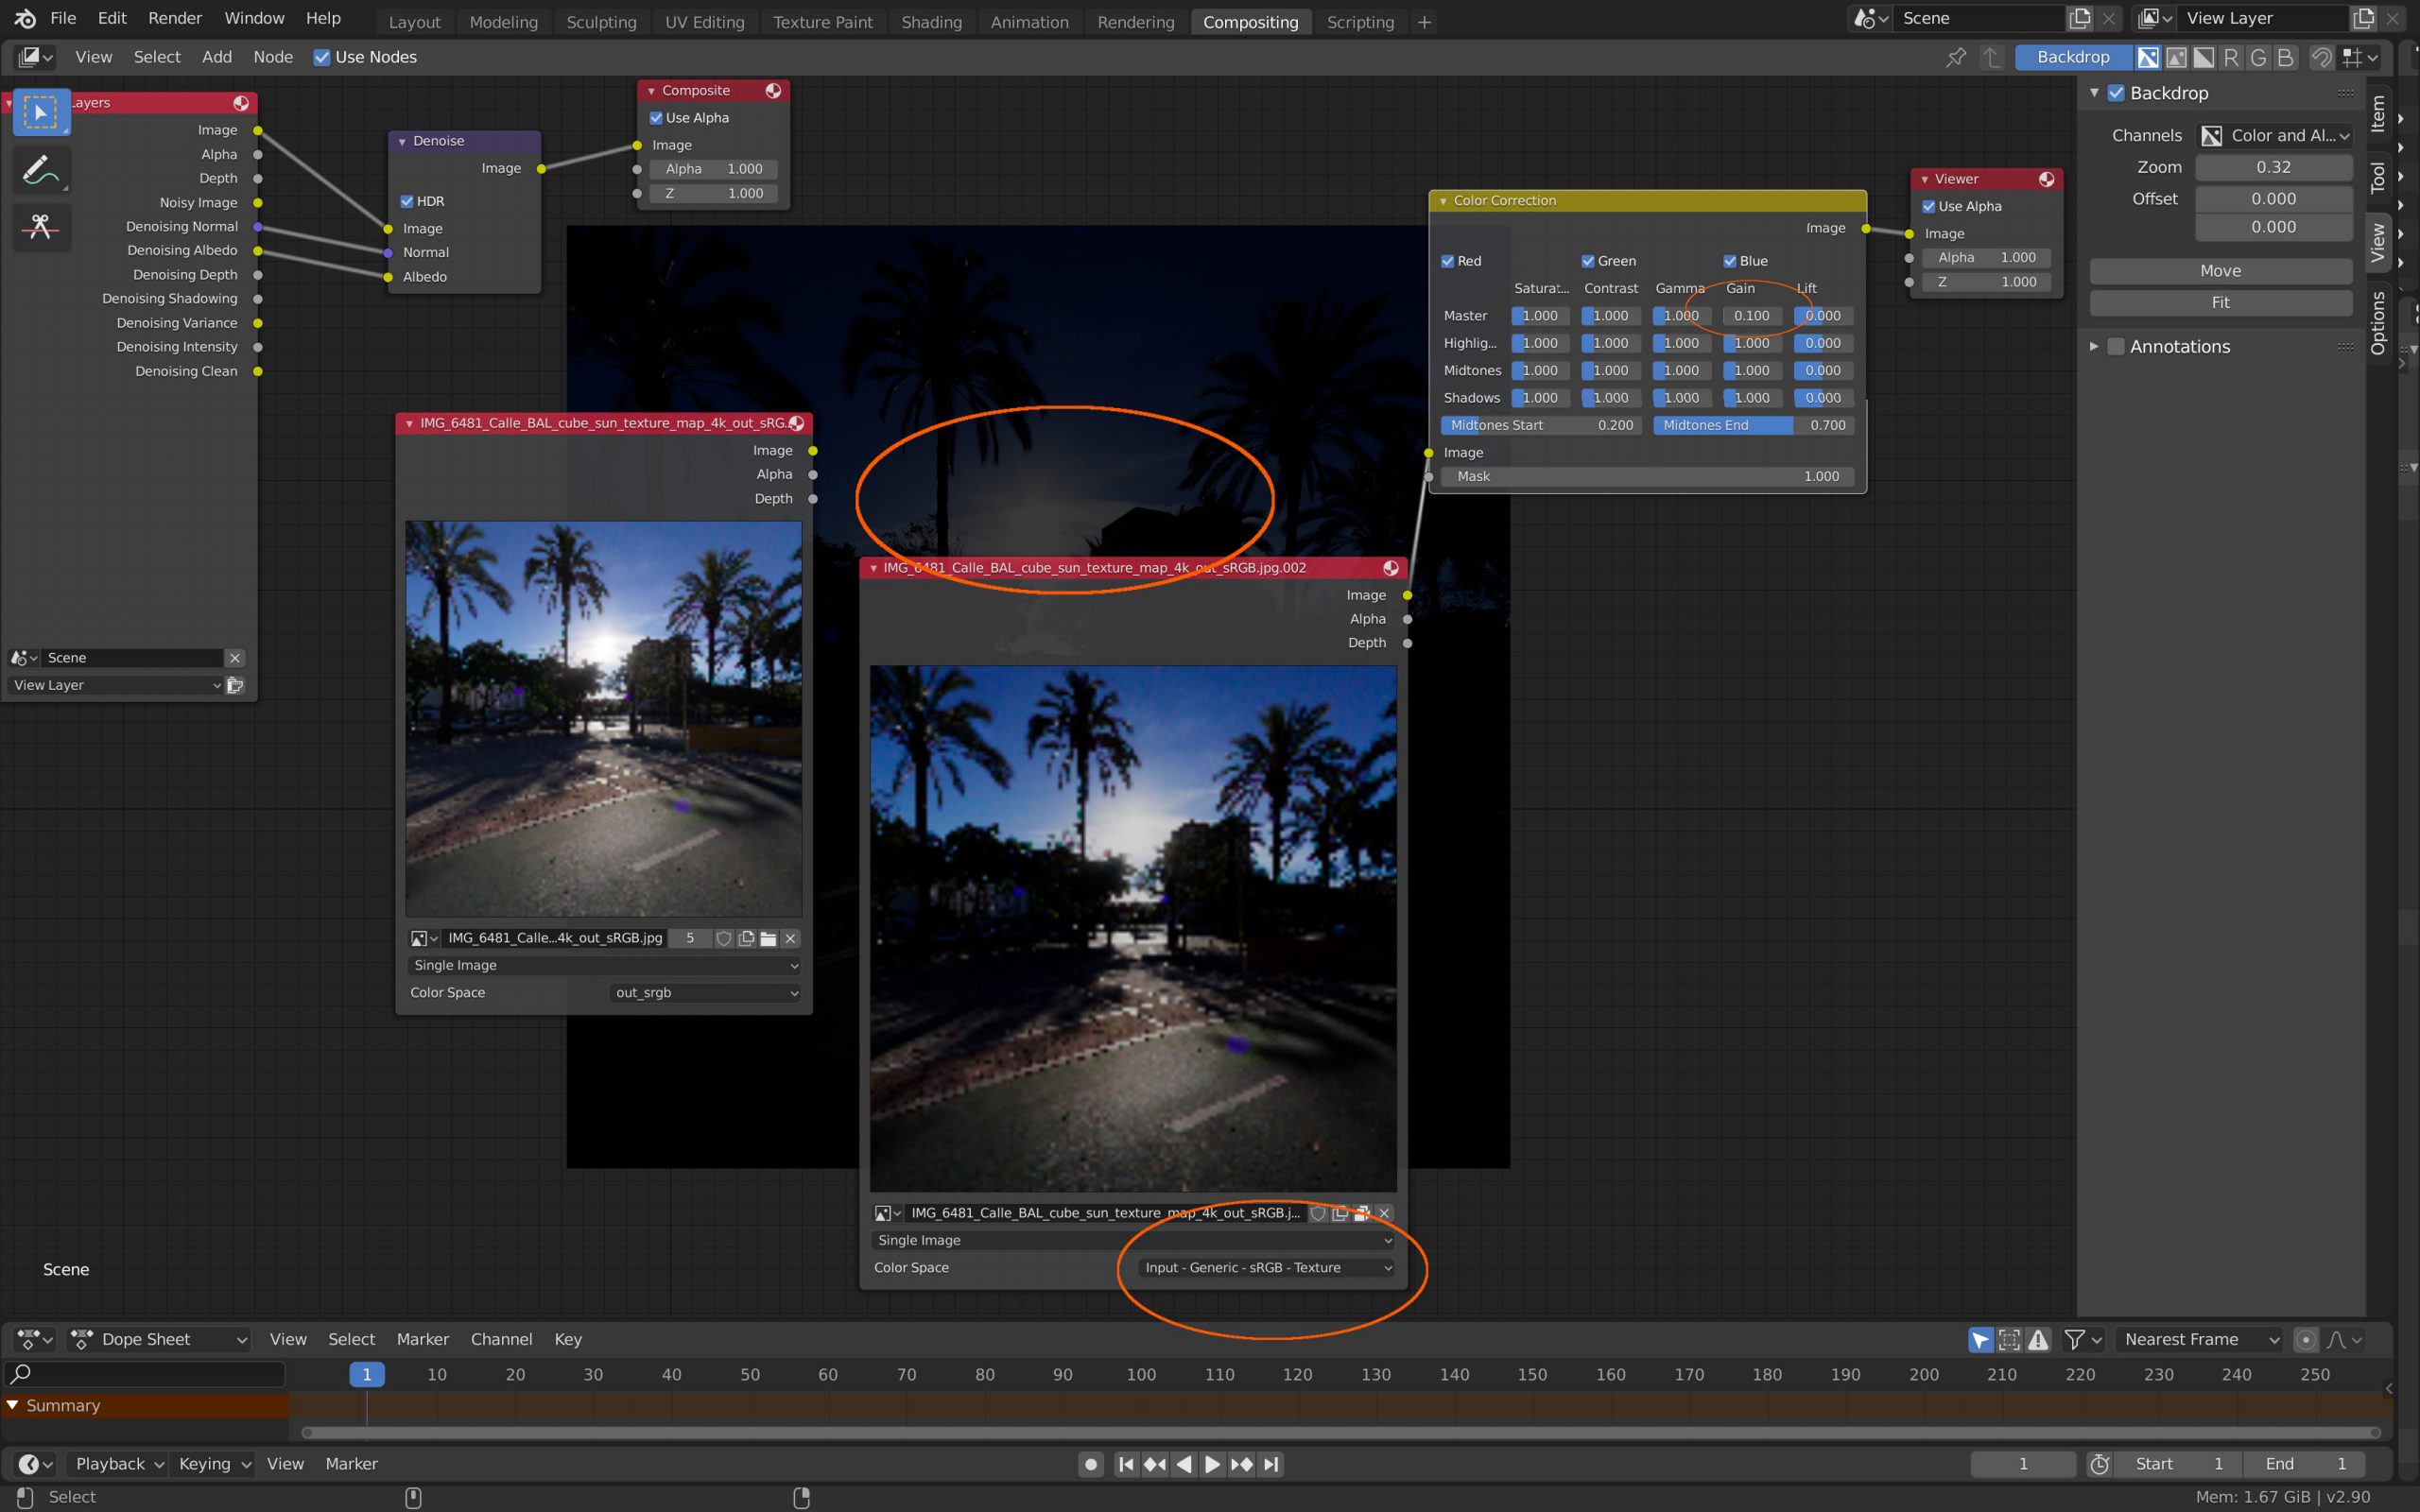
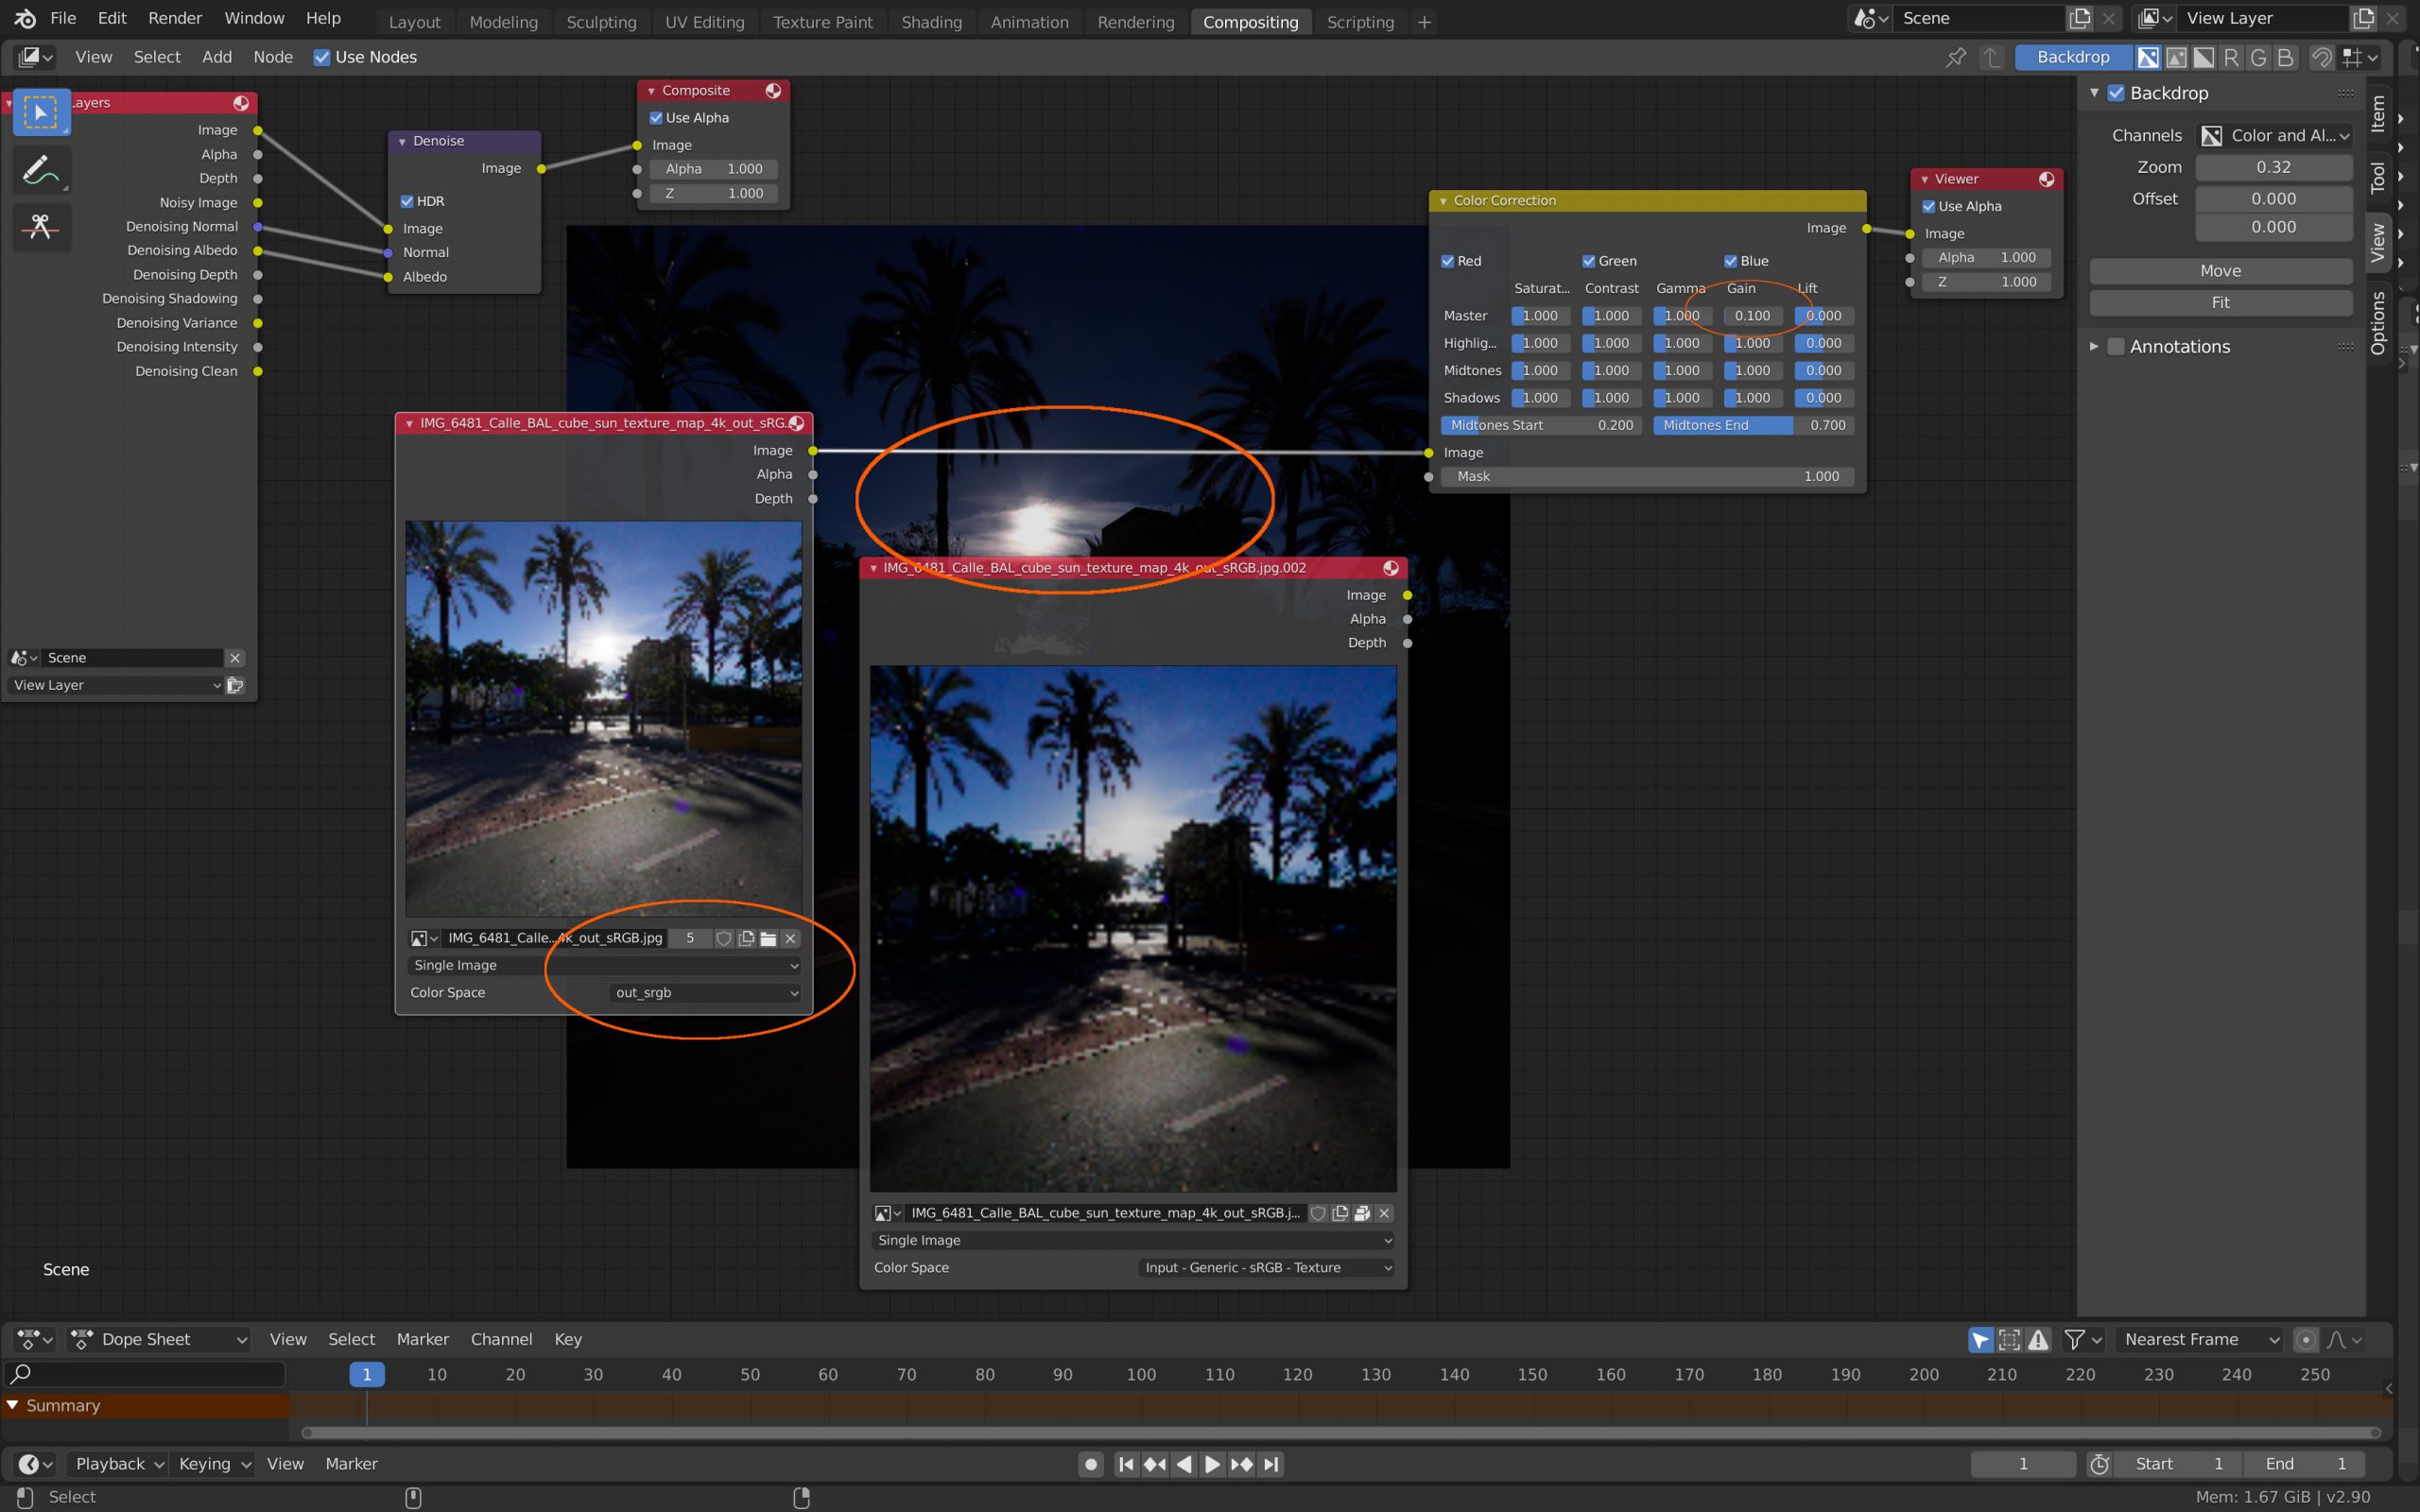
The 8-Bit limit is also true for textures! Image data after a colorspace transform can’t be stored in 8-Bit. So you should avoid any other textures than EXR files when working in Blender & ACES until this is solved. Check the following images – the Compositor module handles this well – the Texture module not.
Blackbody Shader is limited to sRGB primaries – and workaround for ACES
- ACES-1.2 Colourimetric Displays Edition by Troy James Sobotka (I was pointed to this link that lists limitations when Blender is set to ACES. Among other problems I read about the problem with the Blackbody Shader when using ACES and I tried that out below.
For an upcoming article I was testing out the blackbody shader in Blender 2.90 alpha with standard sRGB, Filmic and ACES.
I setup a small Blender scene with a simple model of three “LED” lightbulbs with a blackbody shader of 2700K plugged into an Emission shader that multiplies the color value by 100.


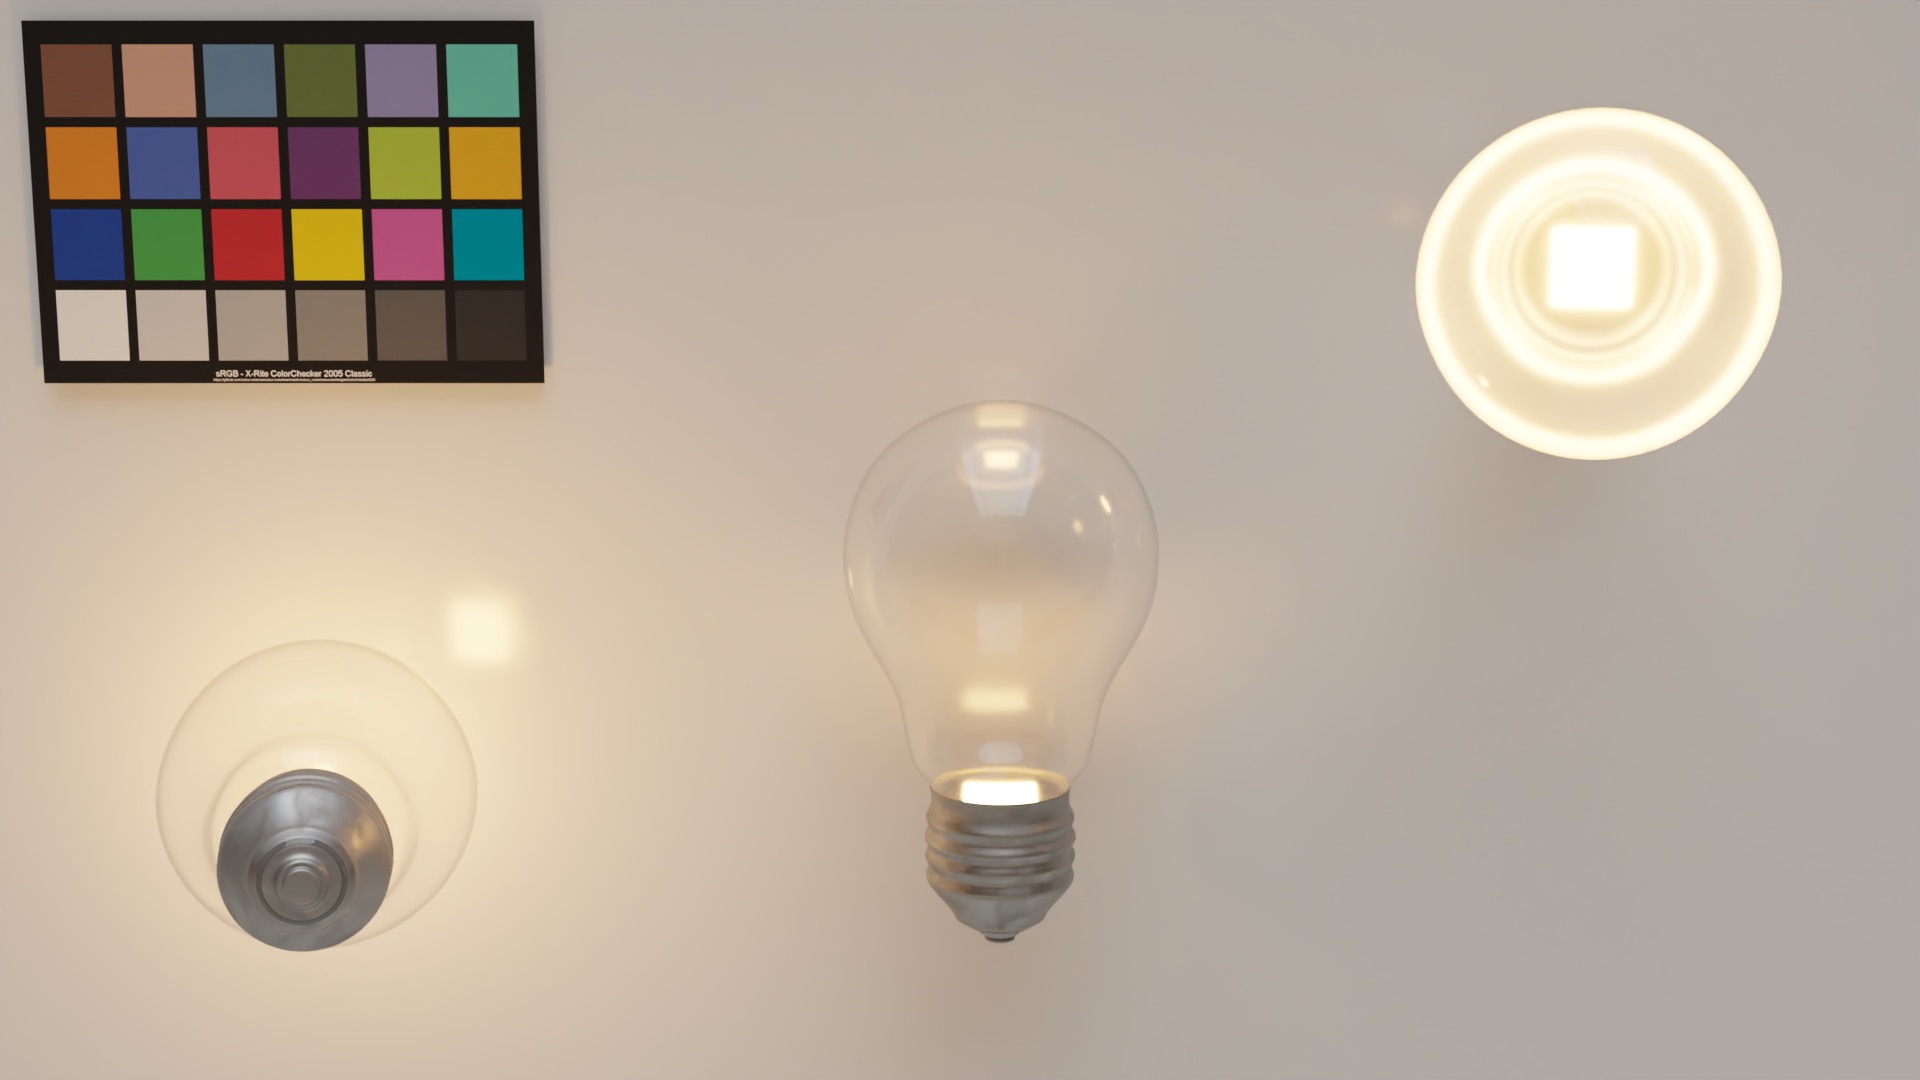
The HDRI I used was one of the Ricoh Theta-S “good ones” that I tested here (far down on the page) before.
Then I loaded the Blender scene again but this time into an ACES environment and adjusted only the color space of the color checker texture and the pre converted HDRI (ACEScg). The blackbody shader I didn’t touch.

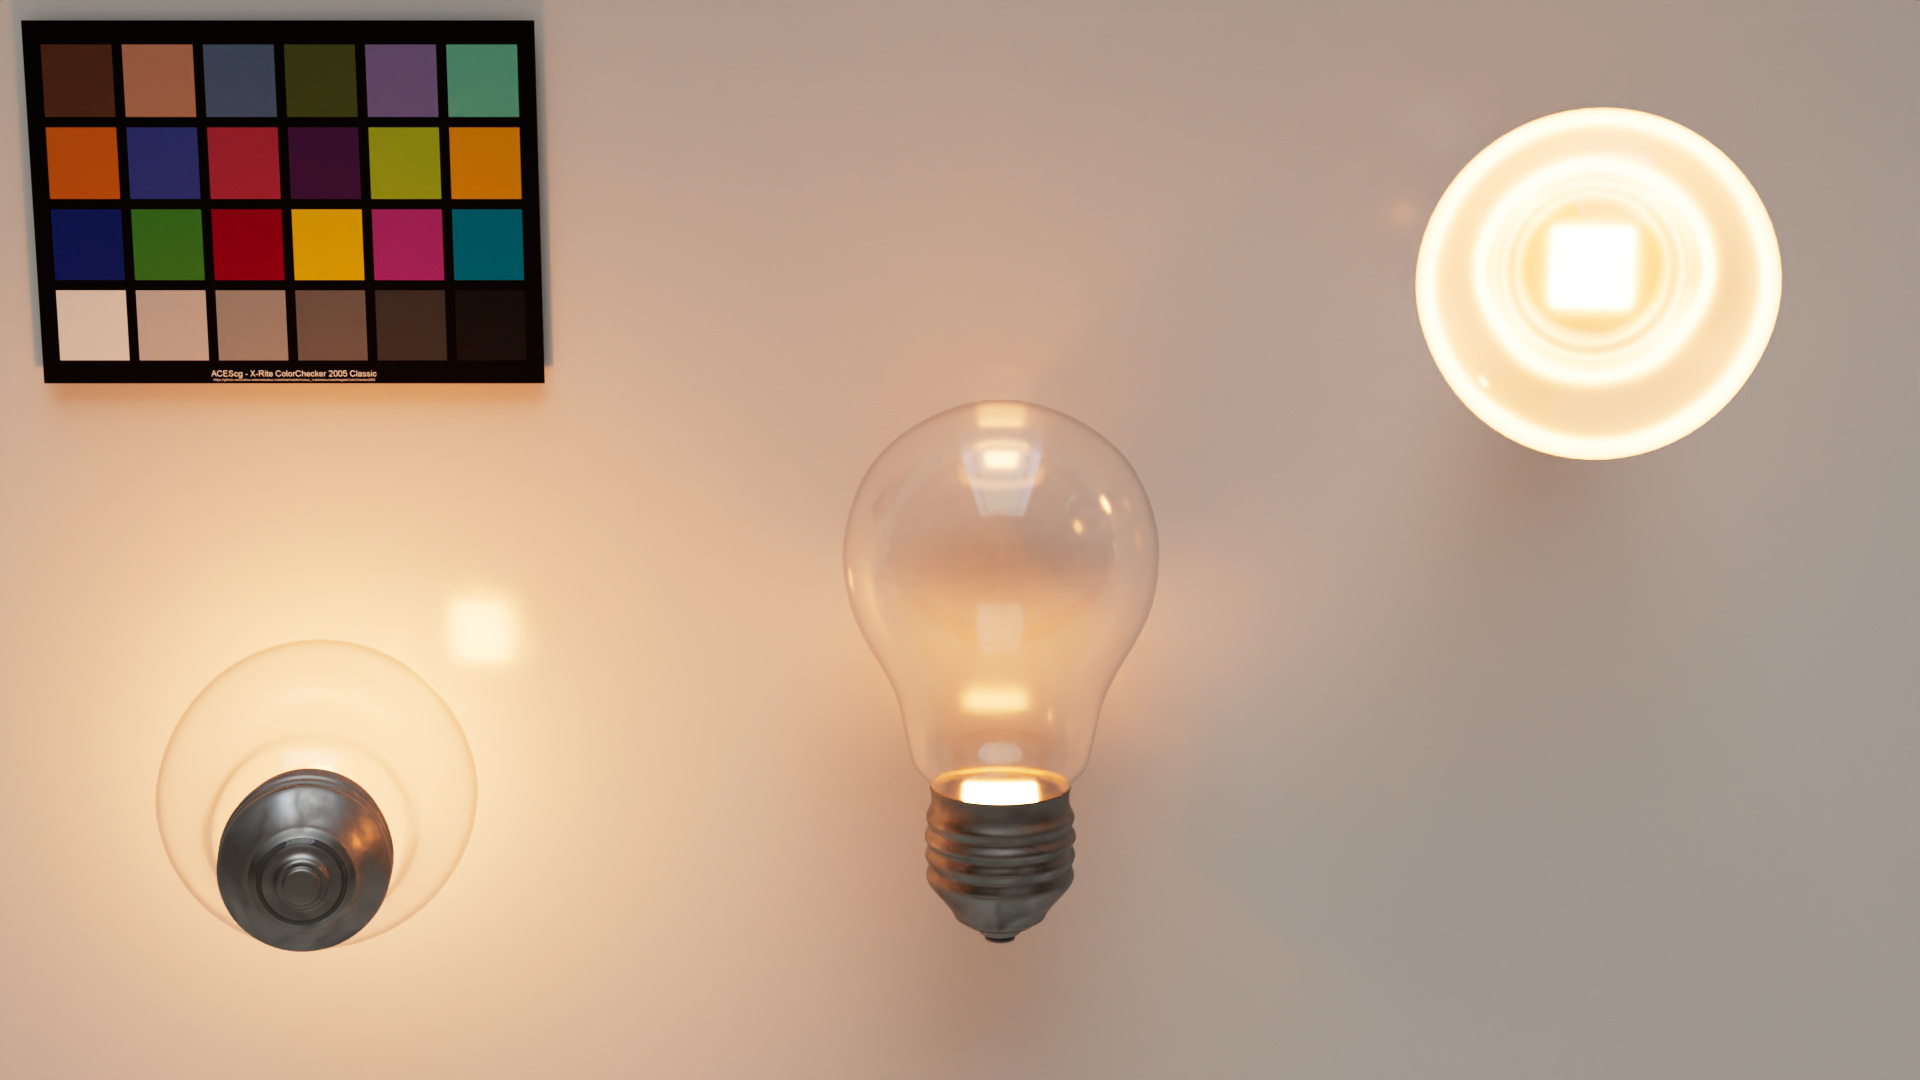
As a workaround I rendered in the Blender standard sRGB scene the 2700K blackbody shader on a cube with an emission shader only. In Nuke I converted the render to ACEScg and exported a constant texture with the converted 2700K color value in ACEScg. Now apart from the different tone mapping between Filmic and the ACES RRT&ODT the results are identical. Hopefully in a future version of Blender the Blackbody shader will be colorspace aware. This workaround is tedious.


Blender 2.9.x new features tests
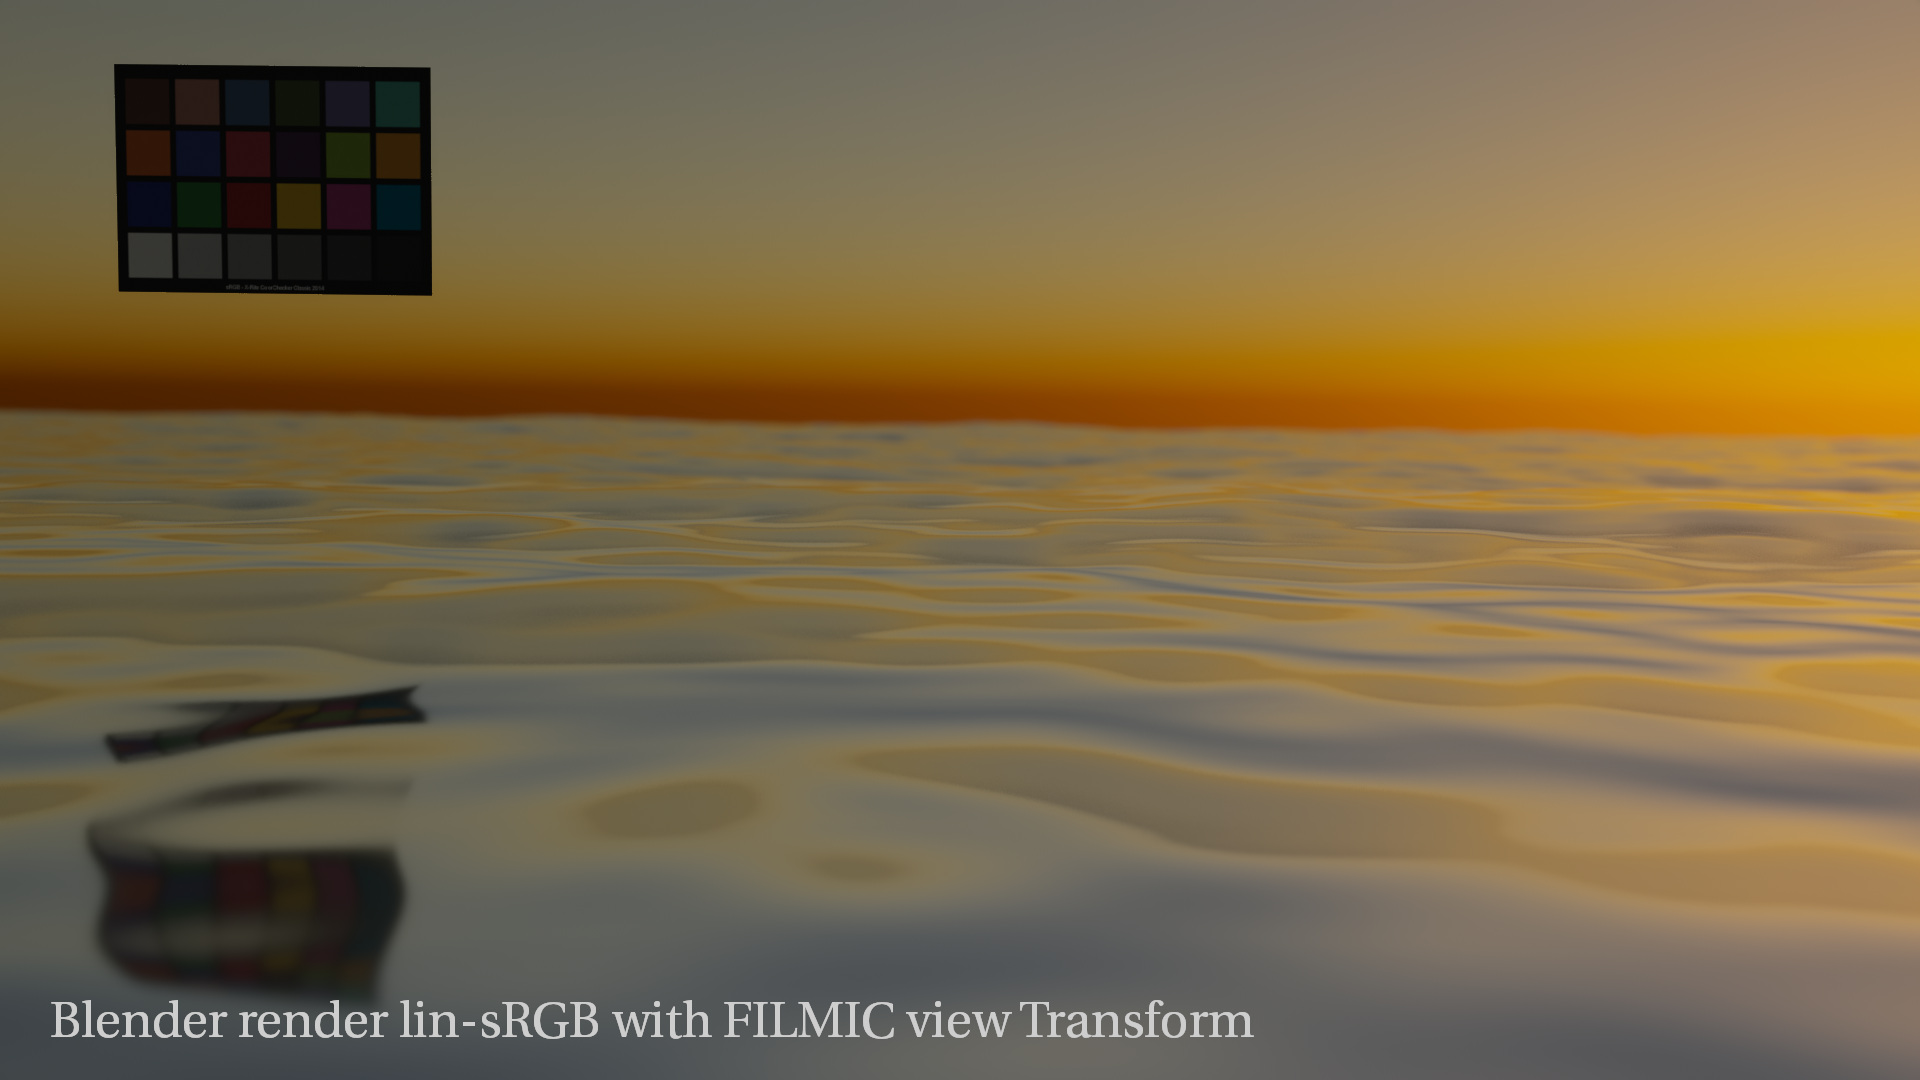
Blender 2.9 features a new world sky-shader called Nishita. I created a little test scene for an upcoming job and rendered out the same frames two times. First with the Blender default linear sRGB/FILMIC color management (1.). Then I loaded the same EXR files in an ACES Nuke with the IDT util-linear-sRGB (2.). And finally I rendered the same frame in Blender/ACES. The last two results are compared in Nuke using ACES/sRGB view transform.
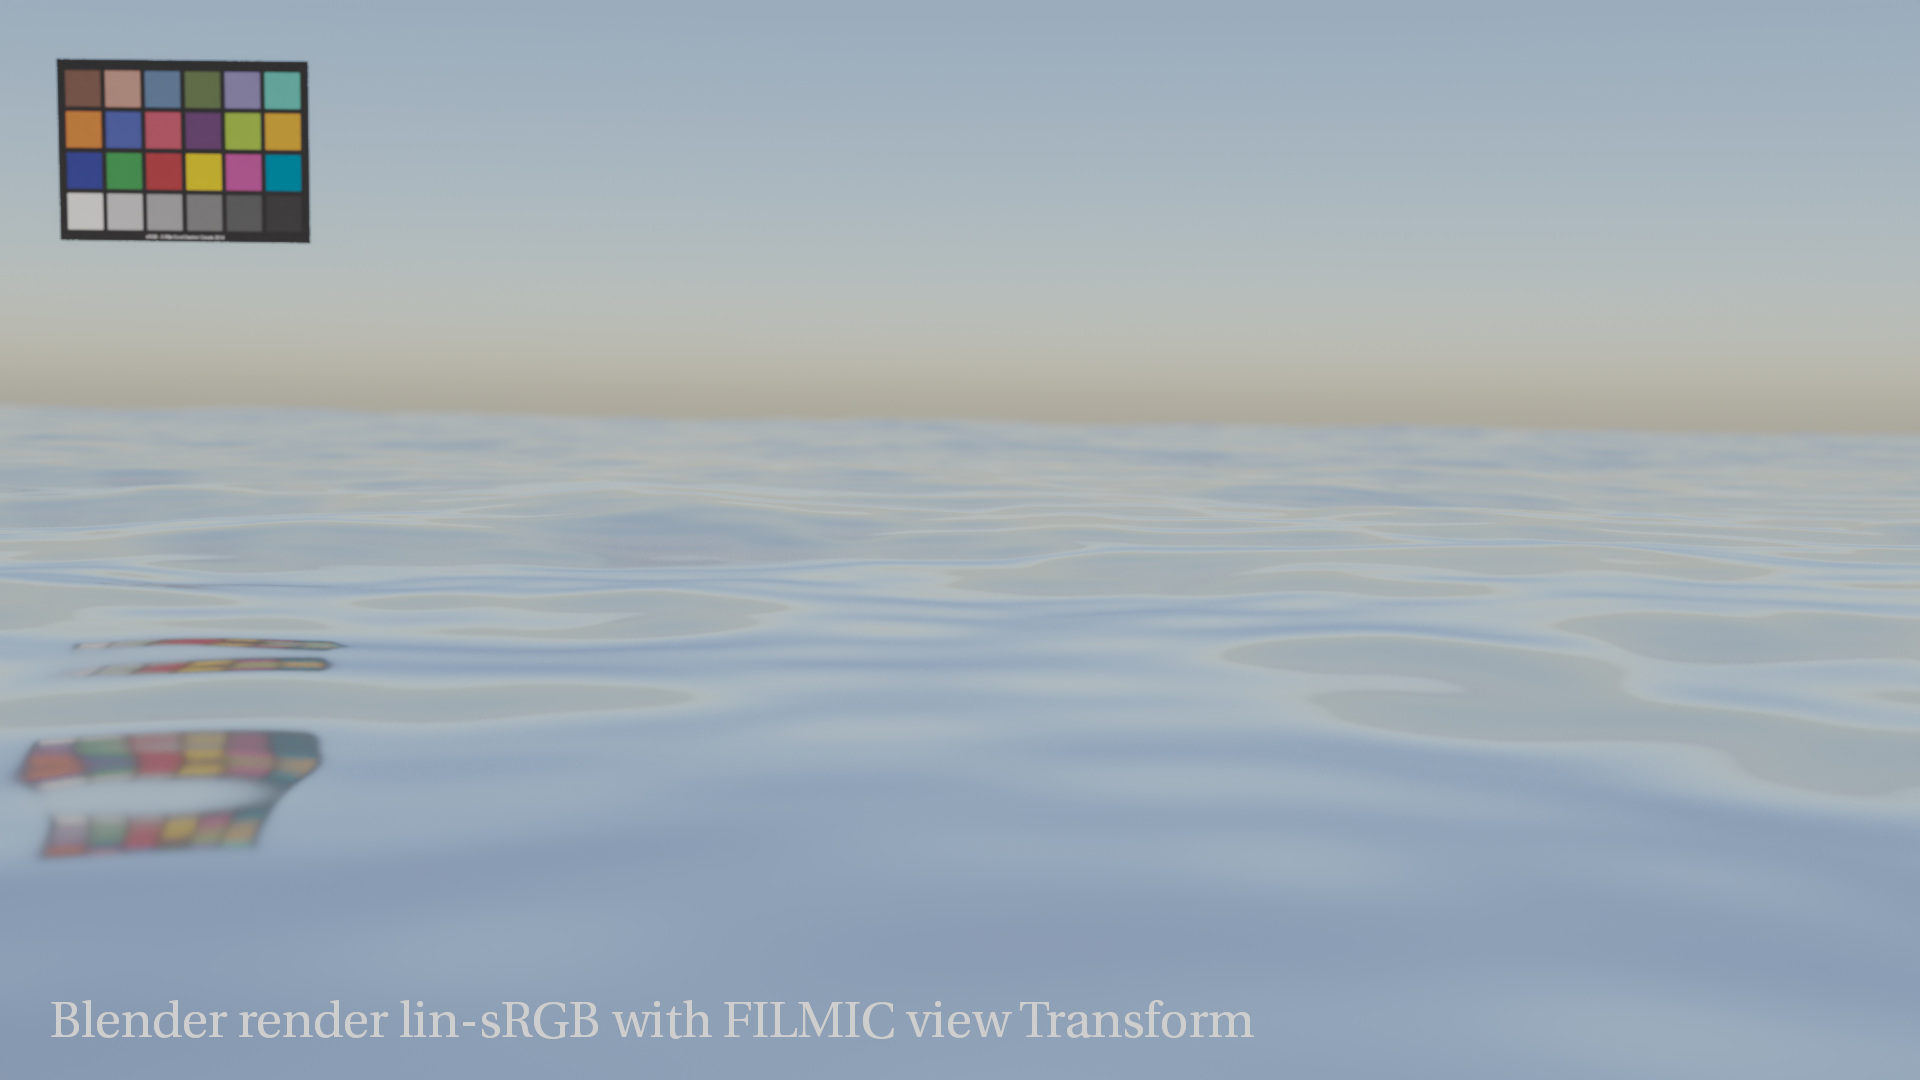
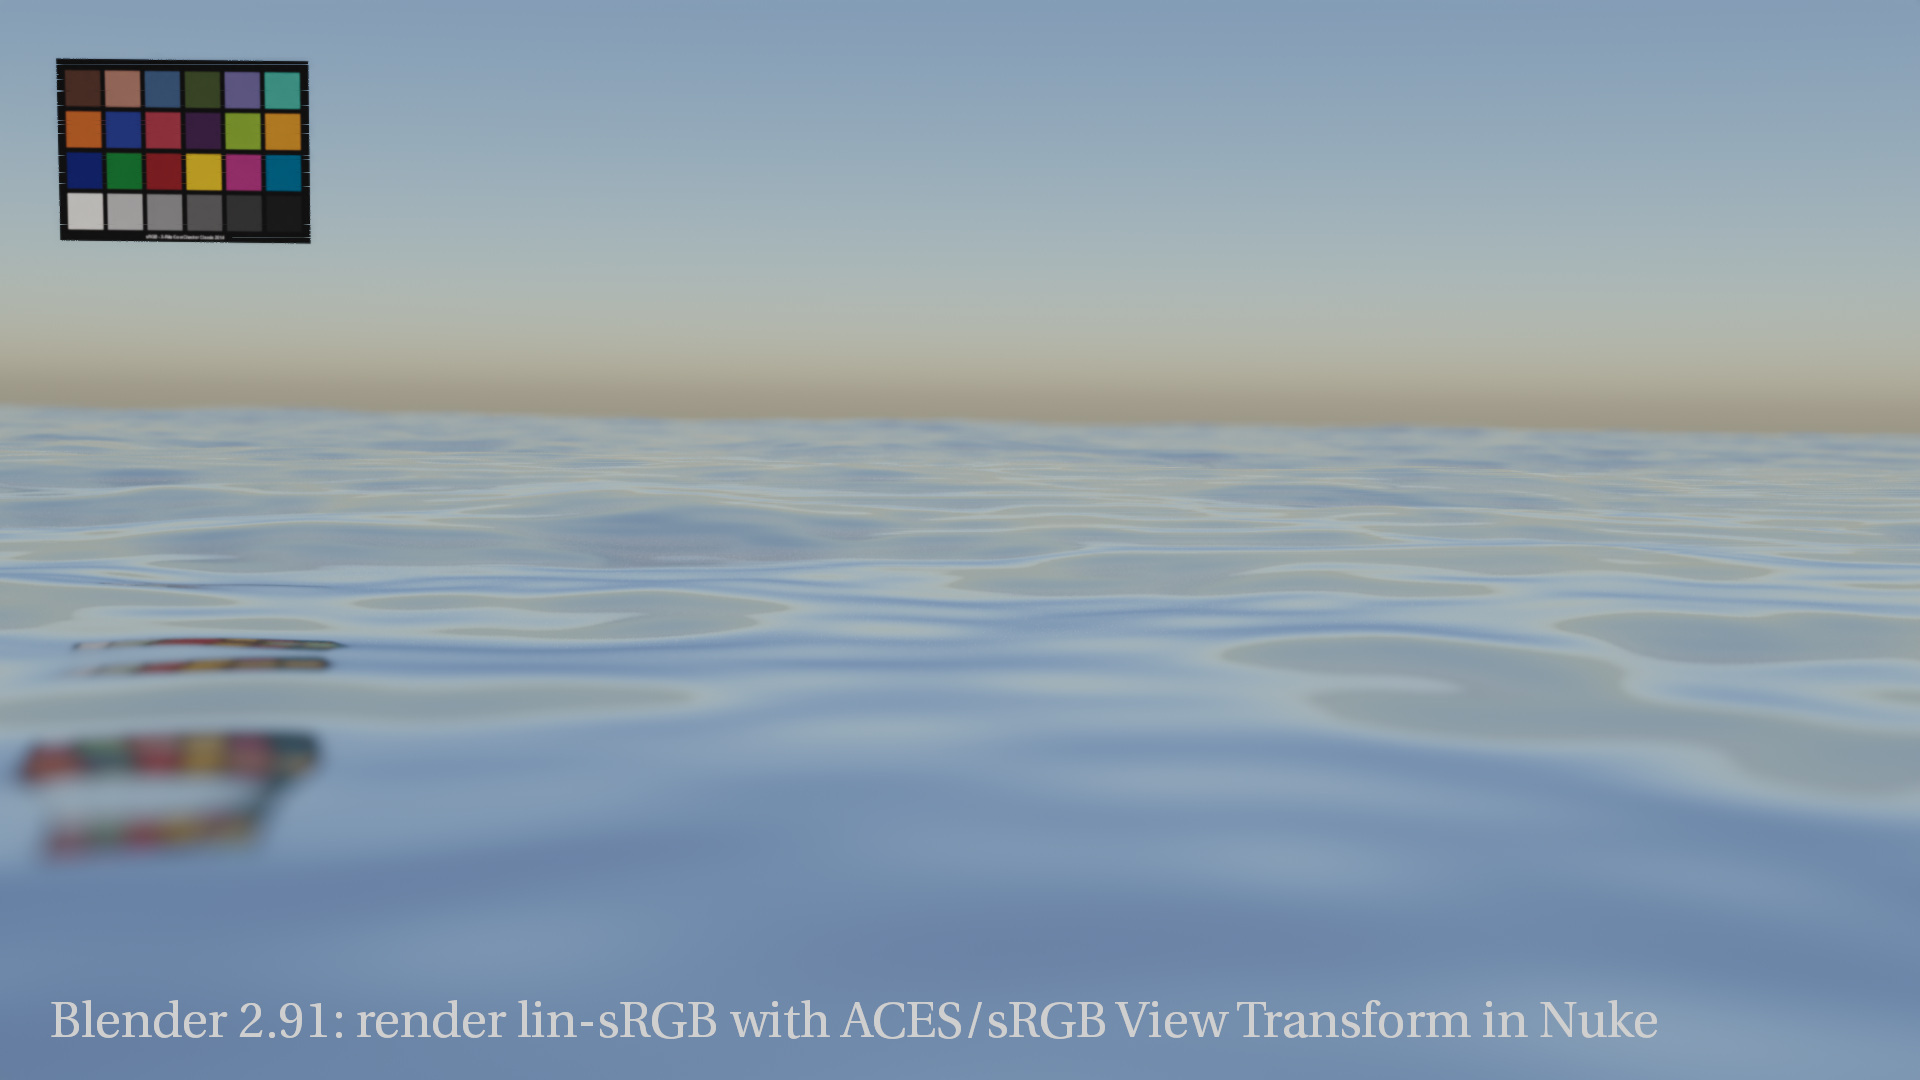
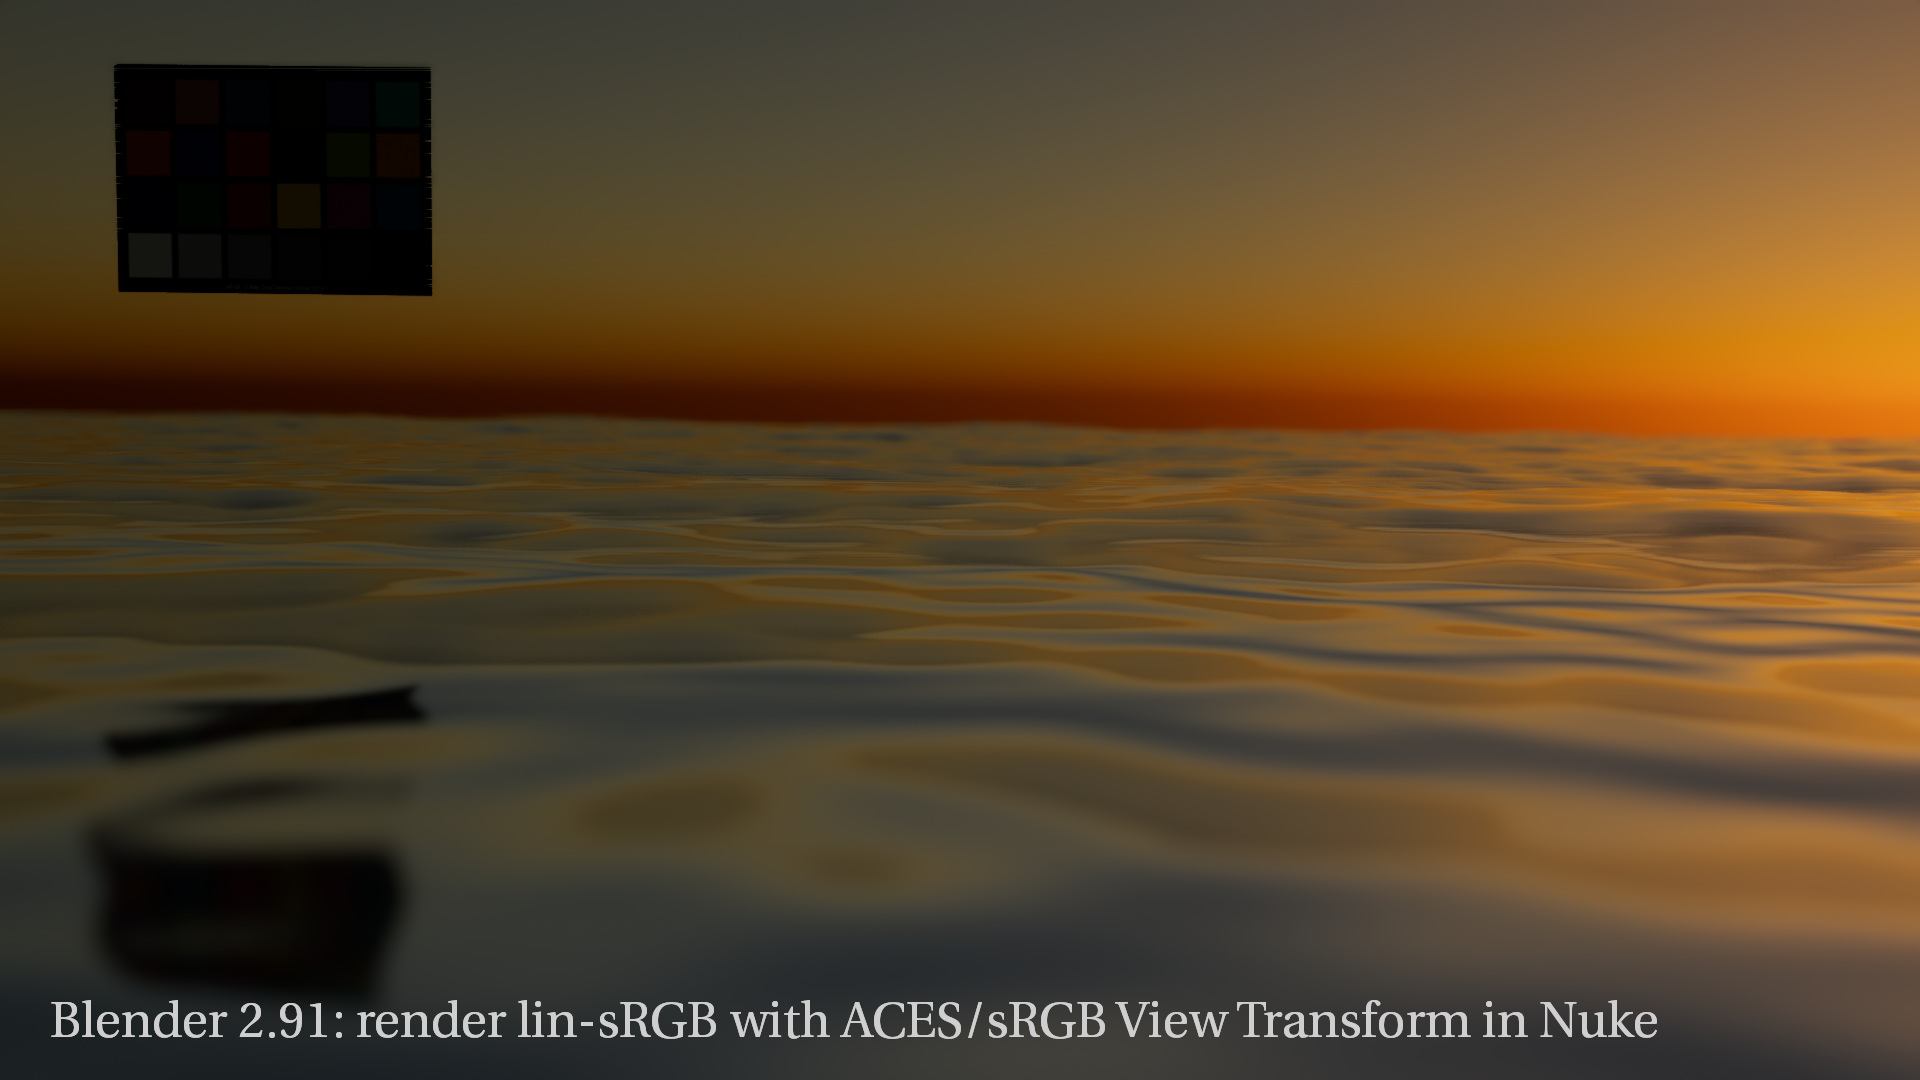
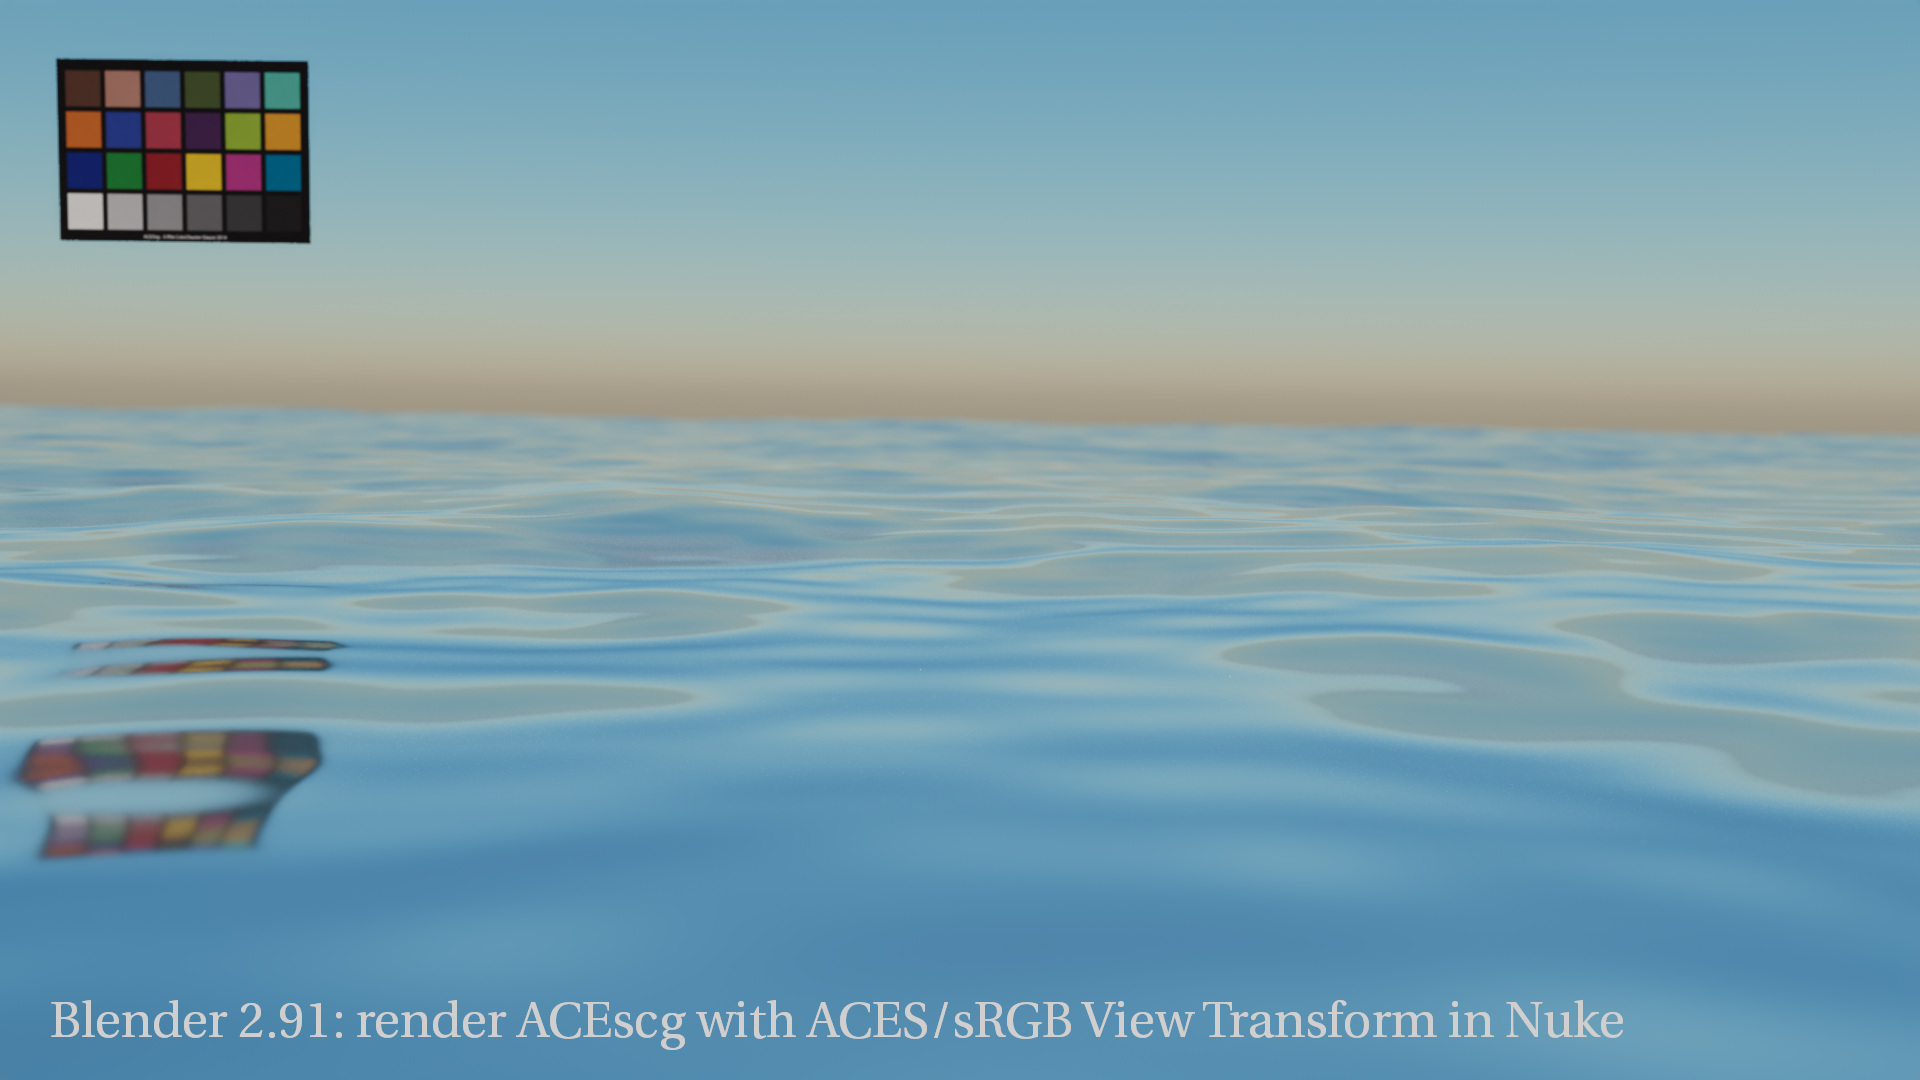
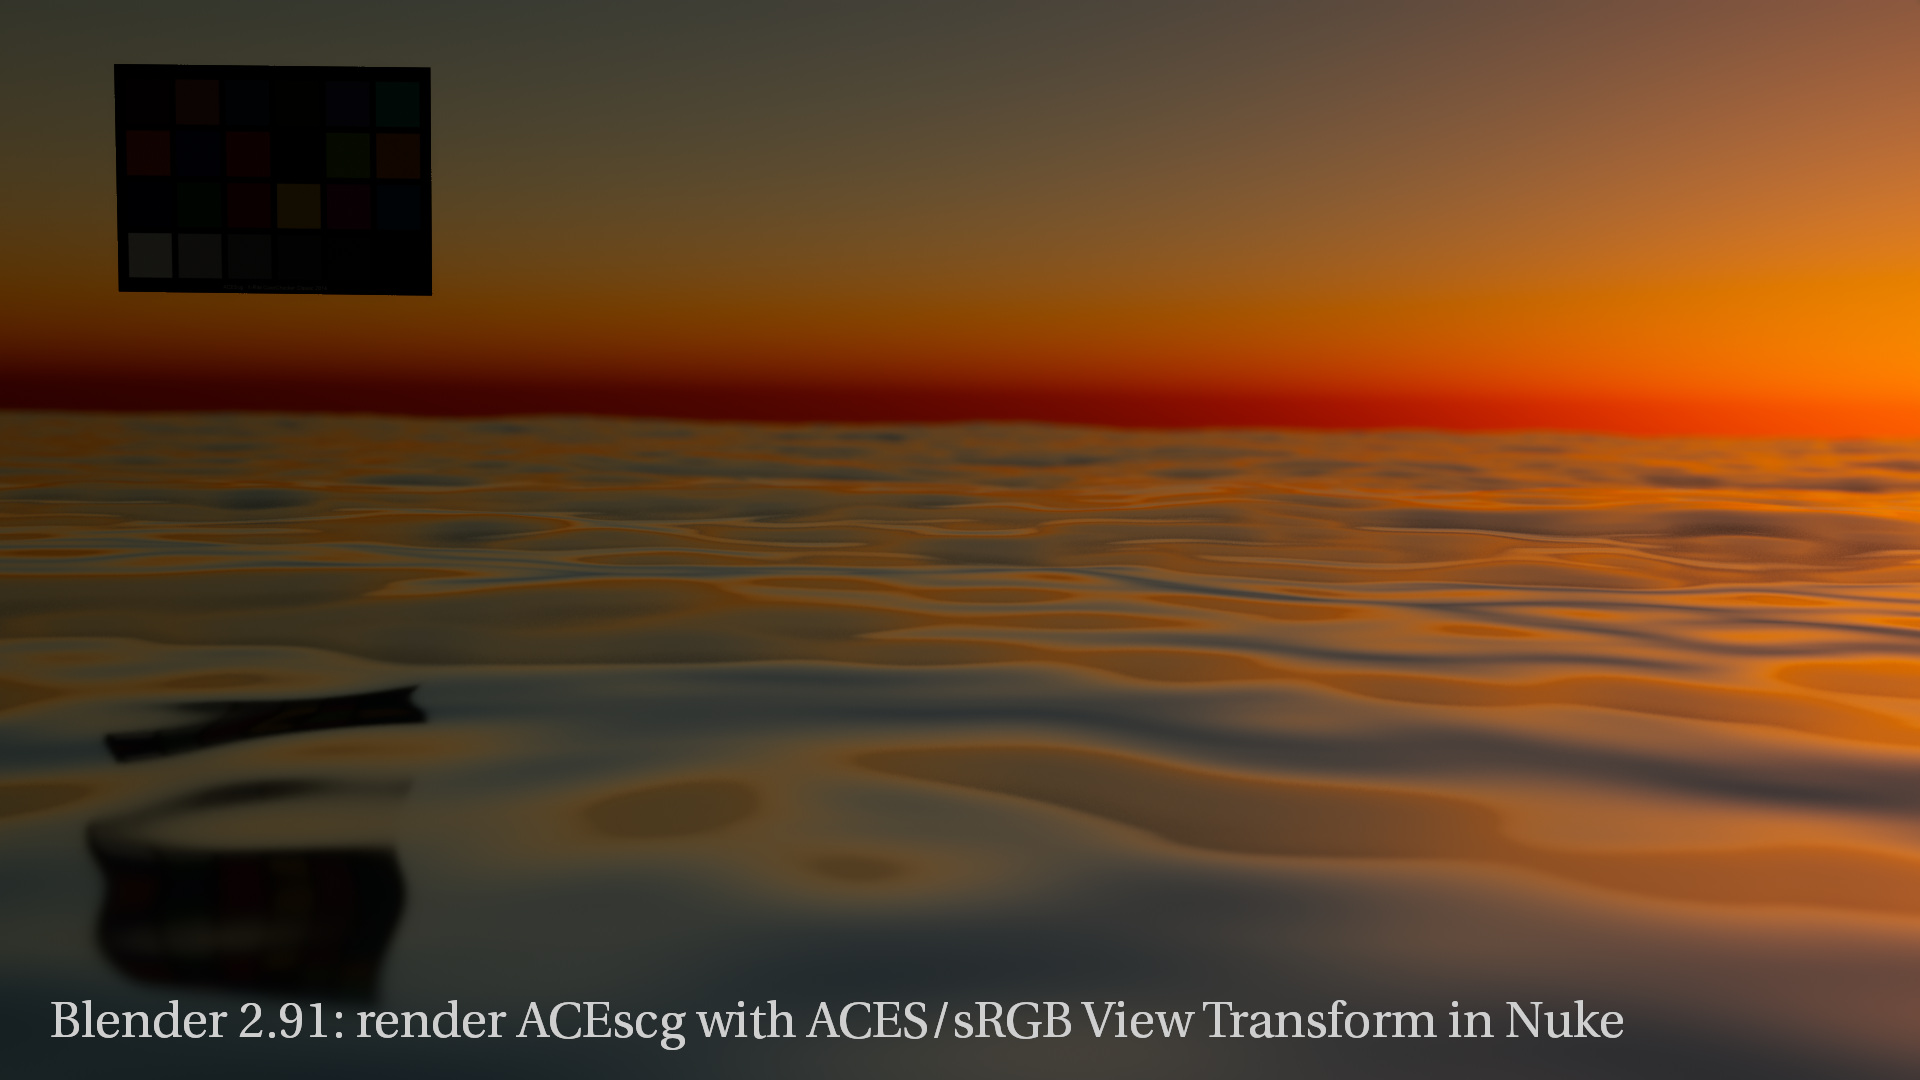
The shader seems not to be aware of the bigger gamut of ACEScg. Simply apply an OCIO/ColorSpace node and assume the ACEScg render is Utility-Linear-sRGB and convert it to ACEScg again. Then both renders looks identical.